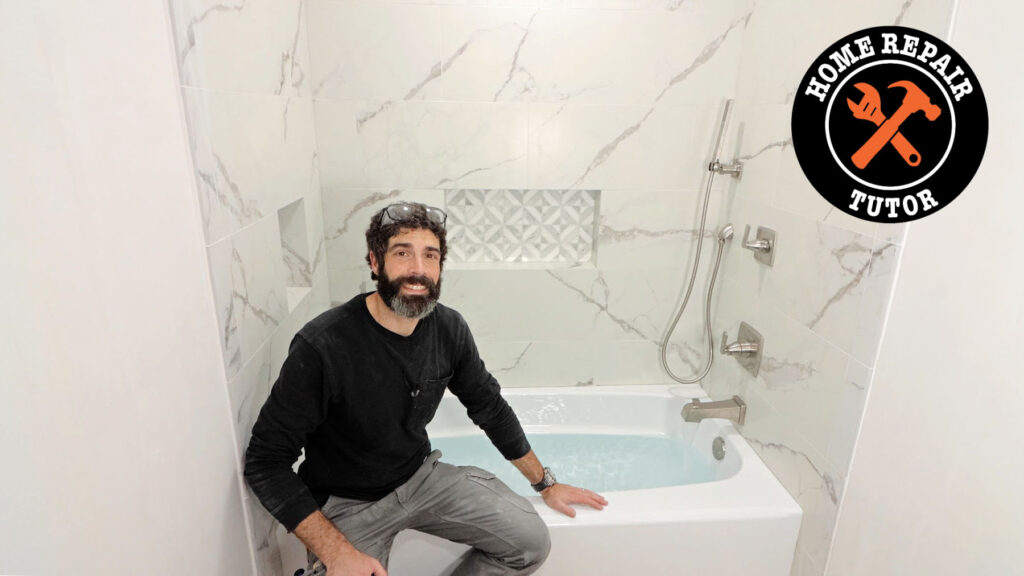
Bathroom renovations can be confusing, and that’s why I created the Ultimate Beginner’s Guide to Bathroom Renovations.
You’ll see tips for how to plan your dream bathroom, demo and frame it,
as well as how to waterproof the shower, install tile, and much more.
We’ll also discuss different materials that I recommend and Pro Tips
that will help you avoid mistakes.
Let’s dive in!
Your Bathroom Renovation Guide
I’ve organized this guide into nine parts:
- Planning Your Dream Bathroom
- Budget Planning
- How to Start Bathroom Renovations
- Framing and Plumbing Tips
- How Schluter Systems Work
- Shower Valve Tips
- Shower Waterproofing Tips
- Shower Tile Installation Tips
- Finishing Touches
You can tap the above links, and they’ll take you to the specific part.
Also, you might want to grab a pen and paper. That way, you can take some notes.
Planning Your Dream Bathroom

The first step in your bathroom renovation is assessing mechanicals
like plumbing, electrical, and HVAC.
If you keep the shower in the same location, that’ll save a lot of money.
The same is true for your toilet and vanity cabinet.
Now, here’s a pro tip,
Choose your shower drain, shower valve, and vanity cabinet before hiring a plumber
or starting a renovation.
For example, most shower drains are two inches in diameter and this might require changing the tub plumbing that is normally an inch and a half to two inches.
In addition, shower valves need to be installed to the correct depth.
It’s just not about installing the actual valve.
Thus, you should have the shower, backboard, and tile on hand when it’s installed.
Vanity cabinets often require P-Trap and water supply lines to be rerouted to fit around drawers.
So I always like having the cabinet to see the dimensions.
Electrical is another consideration. For instance, heated tile floors require 20 amp service, so do some heated bathroom exhaust fans.
So it’s always good to consult an electrician before you decide on either of those amenities.
Also, consider whether you want new lighting at the vanity cabinet in the ceiling or the shower and an electronic bidet seat.
Now, I’d like to talk about the budget and explain where I think you should spend your money and focus on quality.
Budget Planning

We all know that bathroom renovations can be expensive.
Here’s a list of items that require quality construction:
- Shower waterproofing materials
- Shower valve and shower trim
- Shower tile and bathroom floor tile
- Bathroom vanity cabinets
I recommend that you focus on quality when it comes to these materials.
So what is the cost of these four categories for shower waterproofing?
It has a wide range and this is highly controversial, but if I were you,
I would budget between $800 and $1500 for the waterproofing.
The reason for the range is it depends on your project.
You might be installing a small shower or you might be installing a huge master bathroom shower.
I would budget anywhere from $500 to $1000 for shower valves and the shower valve trim.
It could be even more depending on the finishes that you get. But in a prior tutorial
I shared why I like Delta and how it can help you stay on budget.
How about shower tile and bathroom floor tile? Again, this depends on the square footage of the walls and the floor.
But I would budget anywhere from $500 to a few thousand dollars and up.
And it really depends on the quality of the tile, whether it’s handmade
or it’s mass-produced and you can get it at home store.
Bathroom vanity cabinets have a wide range. You can spend anywhere from a few hundred dollars up to a few thousand dollars.
But I would budget between $500 to a few thousand for a quality cabinet.
And by that I mean it’s made out of plywood, not particleboard.
If you take a look at the side of the drawers, it should have a dovetail joint.
And then in terms of the top. I recommend getting those locally
and having them cut to the size that you need.
That can be another $400 to $800 depending on the material and the size of the vanity cabinet.
When you total up this cost, it’s anywhere from $2,000 up to $8,000.
It just really depends on the size of the bathroom. So you really want to refine this.
And that’s why I gave you the ranges of so that you have a rough idea.
The next question after you solve your budget problem is to figure out how to start your project.
How to Start Bathroom Renovations

What steps do you take to begin?
The first step is to turn the water off to the house, drain the system, and start your demo work.
If you don’t do this, there could be a catastrophe if you cut a water line.
Here’s how I approach my demo work. The first thing I do is remove the toilet
and the vanity cabinet to make room.
Then I remove the shower walls and the shower floor or tub.
From there I remove the main bathroom floor tile and do a substrate inspection.
If the plywood looks bad or the floor isn’t level, I’ll remove the plywood to inspect the floor joists.
Now, here’s a huge tip.
Bathrooms need solid framing to work properly.
For example, all the tile work for a bathroom floor begins with the framing.
I recommend picking your floor tile, then referring to the Schluter
DITRA Handbook, which provides framing advice.
As an example, I prefer using three-quarter-inch tongue and groove plywood over 16-inch on-center floor joists for ceramic or porcelain tile.
So once you know what tile to use, that helps you do the framing for the bathroom floor or figure out the substrate problem.
Framing and Plumbing Tips

After I’m done with the floor joists, I move on to the stud framing.
Keep this in mind,
All half-inch backer boards require studs to be at least 16 inches on-center.
It’s okay if they’re less than 16 inches on-center. You can sister studs to get this on-center spacing or add one to the top and bottom plate.
Also, studs should be even and square because they impart their imperfections
onto the shower backer boards.
Thus, if the studs are defective, tile work will suffer and it will be difficult for you
to make your tile shower look good.
It’s best to fix any plumbing or electrical while the floor joists and studs are exposed.
When it comes to drains, there’s one important point, and that is you never want to go from a larger pipe to a smaller pipe.
So for instance, if you have a two-inch shower drain, it should never reduce down to an inch and a half pipe.
But there’s one exception to this, and that’s with the closet bend.
You can use a four-by-three closet bend and reduce down from a four-inch to a three-inch pipe.
But a three-by-three closet bend is also fine.
Once all the drains are in place, that’s when I install my water supply lines.
Again, this is so much easier to do when the floor joists are open
and the studs are exposed.
At this point, you should also consider what electrical devices to use.
That way, if you need to run electrical in the walls or through the joist, you can do that.
For example, how many shower recessed lights are you going to use?
What kind of bathroom exhaust fan are you going to install?
Are you going to have vanity cabinet lights?
Where do you want to place your GFCI outlets?
Also, do you want a heated floor?
Because if you do, you might have to run an extra circuit for that.
So remember, it’s always good to do your plumbing and your electrical before you put your plywood down and close up the walls.
How Schluter Systems Work

I start to work on the shower once the mechanicals are completed.
If you’ve seen my other videos, you know I’m a big fan of Schluter
and that’s what I use exclusively.
Now, here’s the reason why,
They’ve been around for 50 years.
They offer quality products made in the US, Canada or Germany.
And they also promote the trade education component that I feel is missing
from other companies.
Schluter’s fleece and thin-set mortar system is commonly misunderstood.
So I’ll do my best to explain it from a molecular level.
The first step to waterproofing Schluter showers is to apply thin-set mortar to the fleece.
For example, on the KERDI-BOARD or KERDI tray.
I make the Schluter ALL-SET to the membrane consistency for this step. That’s really important.
Then I trowel the mortar on with a KERDI trowel. The trowel is critical because it provides the right dimensions for the mortar.
Now, here’s where the magic happens.
Once the thin-set is on the wall or the floor, I then apply another layer of fleece
over the mortar.
This is normally KERDI-BAND. The mortar is now bonding to two layers of fleece.
As the mortar cures, crystals grow and anchor into the fleece layers. Over time, more and more crystals form a very tight matrix, and this matrix becomes so tight
that water molecules are too big to pass between the fleece layers.
Now, before I get into the details of how I install a shower system, I want to back up a moment and share the shower valve tips.
Shower Valve Tips

I prefer using Delta and Hansgrohe shower valves.
Typically, I’m using Delta because it’s more cost-effective and you can get trim kits
that are reasonably priced.
The first thing I do when I’m installing a shower valve is run the water supply lines to that area.
Then I make sure the shower valve is at the right height as well as the right depth,
and then I properly anchor it.
The depth will depend on the backer board you’re using as well as the tile.
So I always recommend having both of those on hand when you’re installing the shower valve.
This is going to be critical because if it’s at the right depth and it’s plumb when you do your tile work, the trim will sit nice and flush up against the tile.
And that’ll be another form of waterproofing that will prevent water from getting into the stud bay.
So install the shower valve correctly before you move on with your waterproofing.
Shower Waterproofing Tips

Now, here’s the step-by-step procedure I use to install a shower system.
I add the shower wall backer board first, so I make sure that all my studs are plumb,
even 16 inches on center.
Then I waterproof the walls next and install the KERDI-DRAIN.
The reason why I install the drain – and you can definitely do this – is
it has to be level to work properly.
So I like installing the drain if I don’t have access from down below.
Then I’ll set the shower pan followed by the curb and then I waterproof
the pan and curb connections. Once I’m done waterproofing the shower,
I’ll install the waterproofing outside it.
Normally, I use DITRA, and right now I like DITRA Peel and Stick.
It’s one of my favorite options for waterproofing bathroom floors because it goes down right over the plywood or the concrete.
You don’t need to use thin-set mortar. You just stick it down, and you’re good to go.
I do recommend priming the floor first, though, because it makes that bond so much stronger. You don’t necessarily have to do that.
But it’s an extra step that I feel is important to understand, especially if you have contaminants on the floor like paint or residue from another floor installation.
Once I’m done installing the DITRA, I waterproof it up against the shower curb, and sometimes I waterproof up against the walls.
That’s especially important if you have a curbless shower.
Once the shower is waterproof and has sat for 24 to 48 hours,
I flood-test it. I put a plug in the drain, like an Oatey Gripper plug, and I fill up the entire shower pan with water.
It’s ideal to have the water go above the banding that’s connecting the pan to the wall if you can.
And you let that sit for 24 hours, and you come back. and make sure that the water
hasn’t gone down.
And if that’s the case, you pass the flood test, and you can move on with the tile work.
Shower Tile Installation Tips

The big question I get with the tile work is what sequence to use, i.e., where to start and finish.
Here’s how I build my tile shower.
The first step is to the tile shower floor. I put my mosaics, for example, on the floor, and I leave an eighth-inch expansion joint between those tiles and the wall.
Then I set my tile on the main shower wall and try to avoid the most common mistakes by having a good design. I complete that, and then I tile the side walls.
Then I tackle the curb, and then I put the solid curb, top, or bench top in place.
Once that tile has cured for 24 hours, I grout the main shower floor, and then I’ll do the wall tiles.
I seal any transitions between a change of plane using 100% silicone.
Now, you might be wondering – when do I tile the main bathroom floor?
Well, sometimes I do this before the shower, and sometimes I’ll do it after.
It doesn’t really matter when you do the tile work on the floor
if you’ve waterproofed everything, because water is not going to get back behind
the waterproofing and create any issues.
So in some instances, I’ll set all the shower wall tile, then I’ll do the floor tile, and I’ll seal those transitions again using 100% silicone.
Once that tile is set up, I grout it, and then we’re done with all the tile work.
Finishing Touches

The final steps of any bathroom installation, at least for me, are to install the vanity cabinet, toilet, and all of the electrical devices.
Now, one big tip that I wanted to give you is you always want the toilet closet flange to be at least even or a little bit higher than your finished floor.
If that’s not the case, you could have a water leak.
And there are ways to raise the toilet flange, which I’ve shared with you
in other videos.
Here’s a video tutorial with even more tips
Obviously, a bathroom renovation has a ton of different moving pieces to it that form one big puzzle.
If you want to unlock all my bathroom remodeling videos, courses, and personal coaching, join Home Repair Tutor today – it’s one of the best online resources for anyone renovating a bathroom. Tap the button below to learn more
Thanks for reading this guide. I hope it helps you out!
Jeff