In this tutorial, you’ll see how to build a curbless shower.
Everyone deserves a safe shower. Curbless or barrier-free showers are especially safe for older or handicapped people.
These showers are easy to access and help caregivers as well.
This tutorial shows you my four-step plan for building a curbless shower that will last decades.
Let’s dive in.
Curbless Shower Ideas and Principles
It’s important to understand how a curbless shower works.
The idea is simple; there’s no curb to step over.
And this allows people to walk into the shower…
Or roll into the shower with a wheelchair.
Furthermore, I recommend building the shower to fit the user.
For example, always make the opening big enough for a wheelchair or walker.
And in terms of length and depth, you can make a curbless shower relatively small.
For instance, I used a 32” x 60” pre-sloped shower pan in this bathroom.

Thus, you could replace a bathtub with a curbless shower.
But always consider the building codes in your area.
Framing and Plumbing
My first step for this curbless shower involved the framing and plumbing.
My prefab Schluter tray had to be 32” deep and 60” wide to fit the existing space.
And I ensured the edge of the shower was 15 inches from the toilet centerline.
This helped me maintain the local building codes.
The next step was to recess the shower floor.
And I did this without cutting the floor joists, which I don’t recommend.
Instead, I removed the subfloor where the shower pan would be installed.
I then inspected the floor joists to see if they were level.
Fortunately, the joists were level front to back and side to side.
I then sistered new 2x4s to the old floor joists using 3” construction screws.
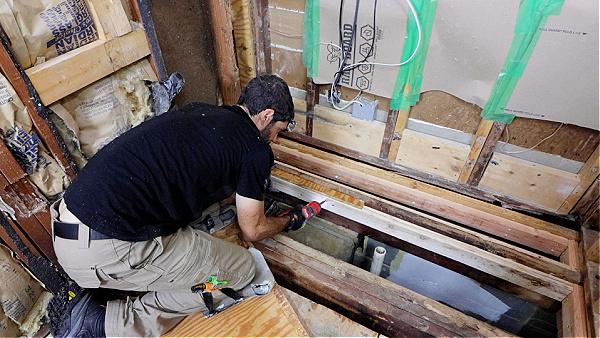
Screws were staggered every 6 to 8 inches along the 2×4 span.
I have new 2x4s along the entire perimeter of the shower area.
They are 3/4” below the floor joists.
I used a piece of 3/4” plywood to get the sistered 2x4s to the correct depth.
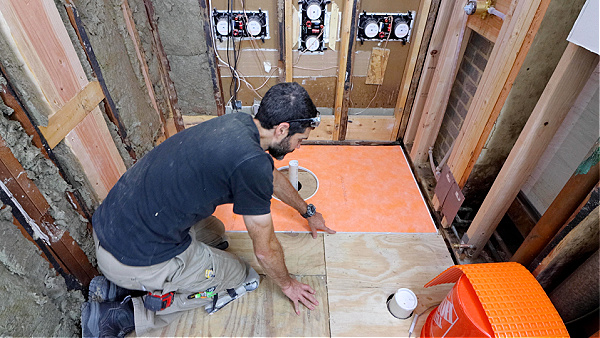
At this point, I ensured my new 2” shower drain was centered in the area.
I used a temporary riser pipe to help me get the drain centered.
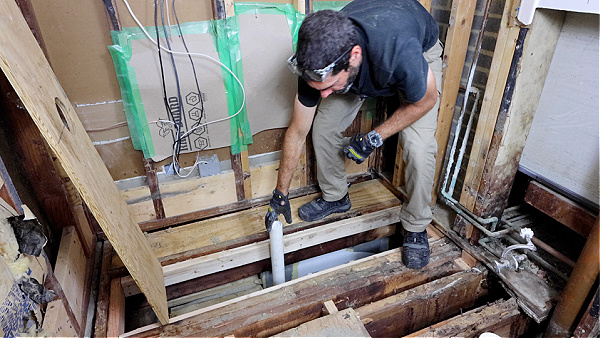
Once the drain was in place, I added new 3/4” plywood over the 2x4s.
This allowed me to recess the new 3/4” subfloor panels.
I used 2” screws with construction adhesive to secure the new subfloor panels.
Ideally, the screws should penetrate into the 2x4s by at least 1 inch.
In addition, I added screws every 4 to 6 inches along the perimeter.
And 6 to 12 inches in the field per the APA.
For the final subfloor panel, I cut out a 5″ hole for the drain.
The 5” hole is the maximum diameter allowed by Schluter for the shower drain.

Now my entire curbless shower area is recessed, yet even with the floor joists.
The goal here is to have a level substrate that doesn’t move.
That is critical for any pre-sloped shower pan.
Now here’s one step that some folks skip and that’s inspecting the studs.
I placed a level along the studs to see if they were plumb and even.
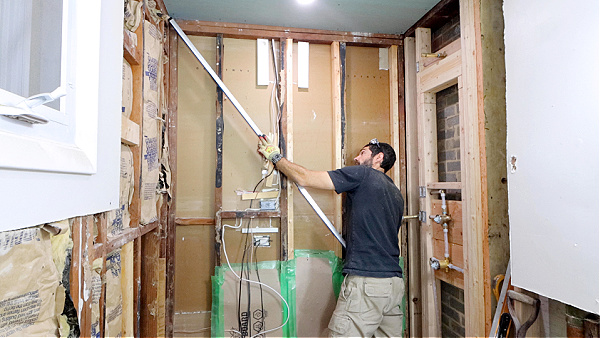
This is important for the shower wall backer board.
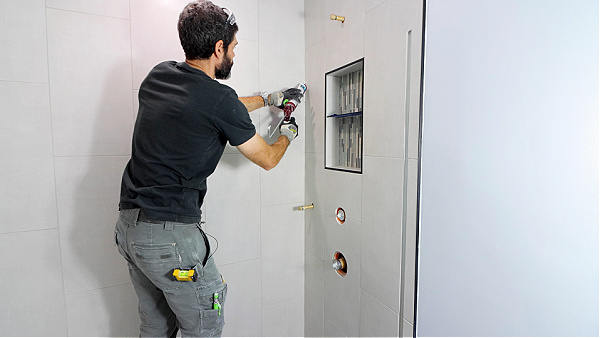
Once I inspected the studs and fixed any problems I installed the shower valve.
I highly recommend installing a valve that has a shower wand.
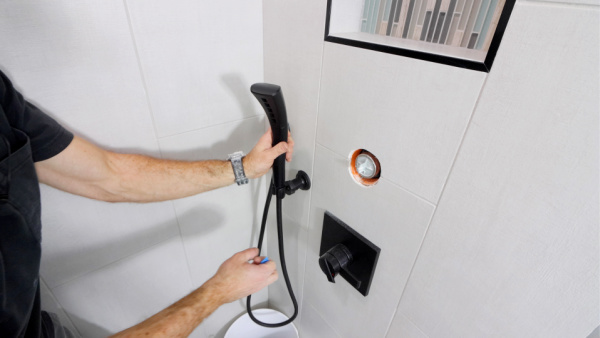
This is especially important for older or handicapped folks.
Using PEX A or PEX B and these Delta shower valves can make the process easy.
Schluter Curbless Shower
My next step was to waterproof the shower walls.
Normally, I use KERDI-BOARD, but in this shower, I used cement board.
Then I waterproofed it using KERDI membrane.
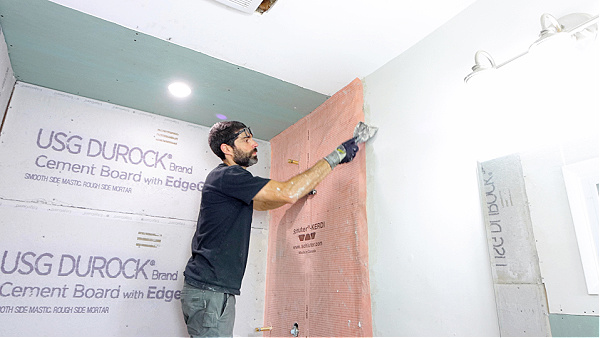
The only reason I did this was that KERDI-BOARD was out of stock.
I prefer waterproofing the walls first, then installing the drain.
The drain must be level.
And it’s easiest to make it level without the shower pan.
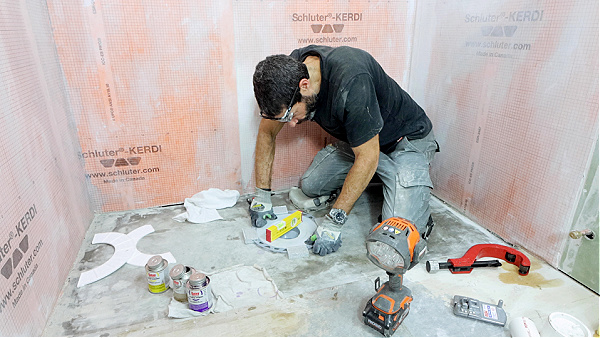
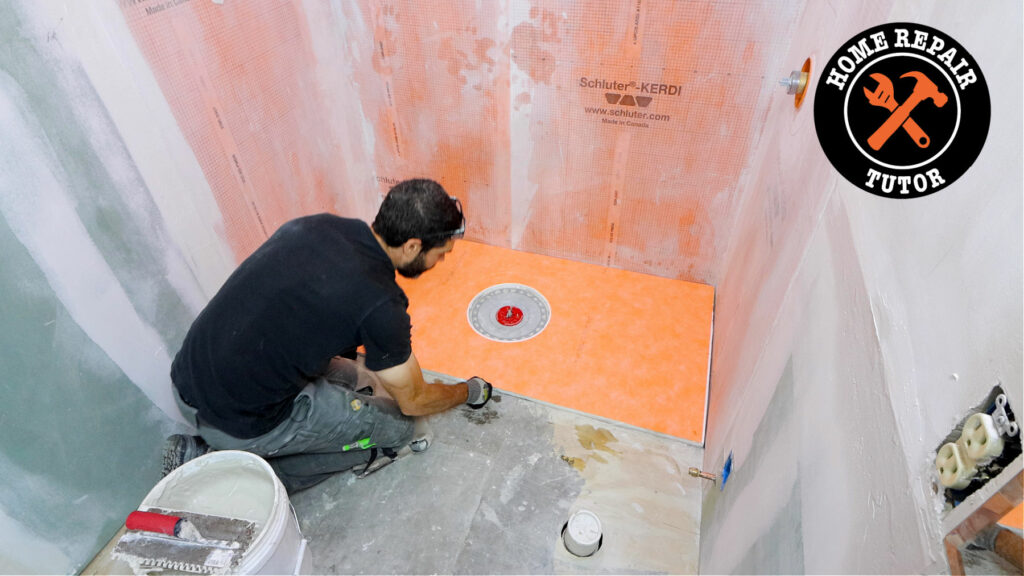
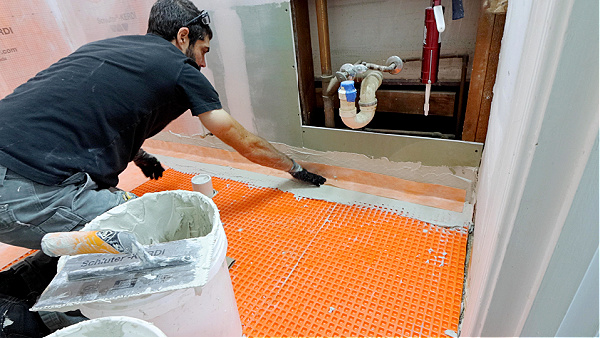
Once the drain is installed I then set the shower pan in thin-set mortar.
Sometimes the shower pan is slightly higher than the bathroom subfloor.
That’s okay,
Because I added DITRA-XL, which is 5/16 thick to the bathroom subfloor.
This raises the bathroom subfloor to be even or slightly higher than the shower pan.
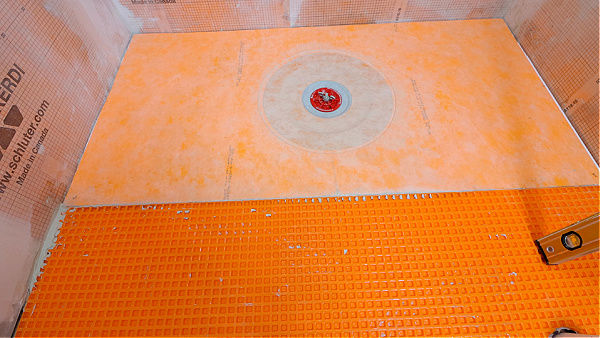
The important reason is that it keeps the water in the shower area.
Waterproofing is critically important for curbless showers.
And here’s how I do it.
First, I waterproof the pan against the drain.
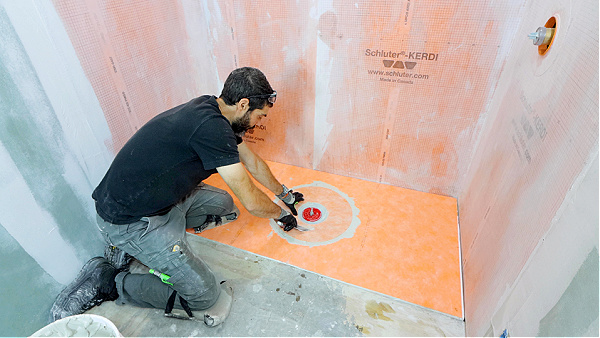
This circular piece of KERDI comes with the pan.
Then I waterproof the inside corners of the shower.
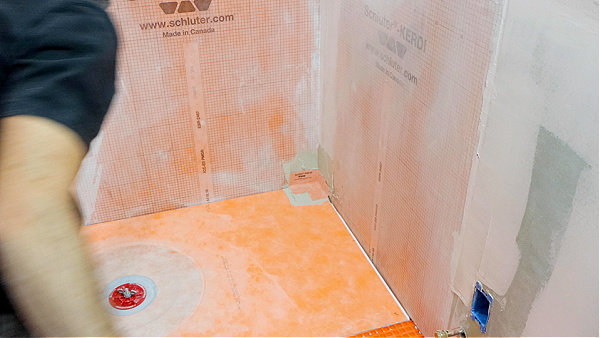
I follow that with KERDI-BAND.
I install the KERDI-BAND so that it overlaps the corners by 2 inches.
It also overlaps the shower tray and walls by 2 inches.
I also extended the KERDI-BAND outside the shower.
I used one long piece that extends from inside the shower to the doorway.
The last step is to add KERDI membrane to the pan and DITRA-XL.
It extends 6 inches into the shower and 36 inches outside the shower.
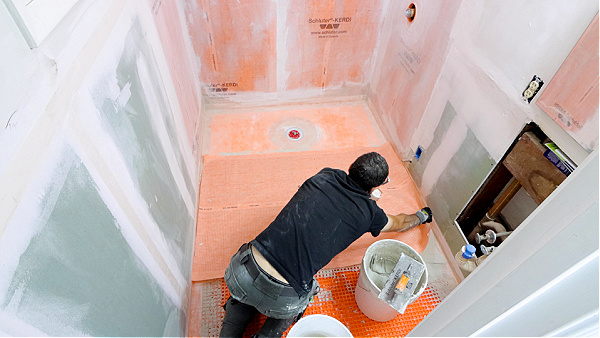
Schluter only requires the KERDI or KERDI-BAND to extend 2 inches into the shower.
But I like exceeding the requirements to ensure the pan is waterproof.
I recommend pulling back the KERDI and checking your coverage.
By the way, I’m using Schluter ALL-SET mortar and a KERDI trowel for all this.
And I waterproofed all the DITRA-XL with KERDI membrane.
Here’s a huge pro tip for your shower glass.
I use DECO-SG as a U-channel for the shower glass.
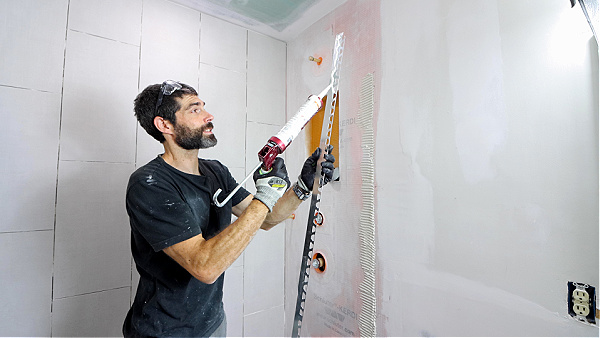
I bond it to the floor with ALL-SET and KERDI-FIX.
And ensure it’s equidistant off the main shower wall.
Then I install the vertical DECO-SG with the same method.
It’s important that the vertical piece is plumb.
This U-channel will accept the shower glass.
And the benefit is it doesn’t require screws which can pierce my waterproofing.
Just be sure to choose the DECO-SG based on your shower glass thickness and tile size.
How to Tile a Curbless Shower
After the shower waterproofing, I began the tile installation.
My preference is to tile the shower floor first.
I worked my way out of the shower toward the bathroom doorway.
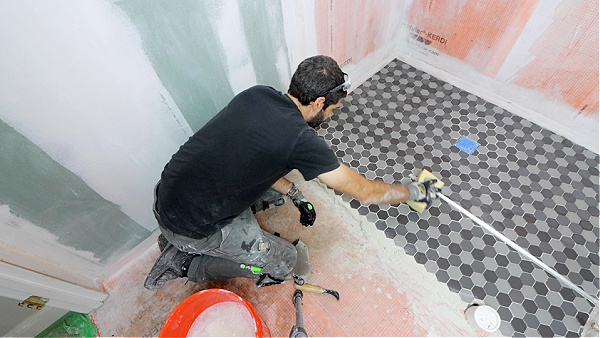
I leave a small expansion joint between the tile floor and walls.
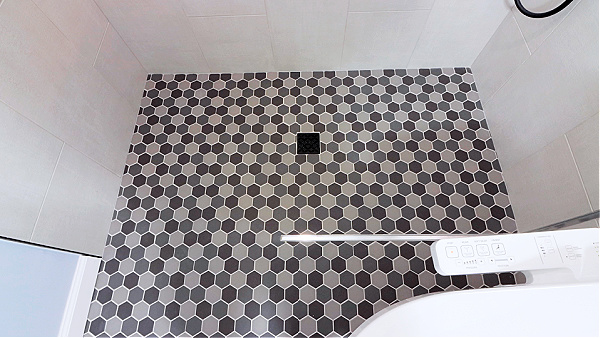
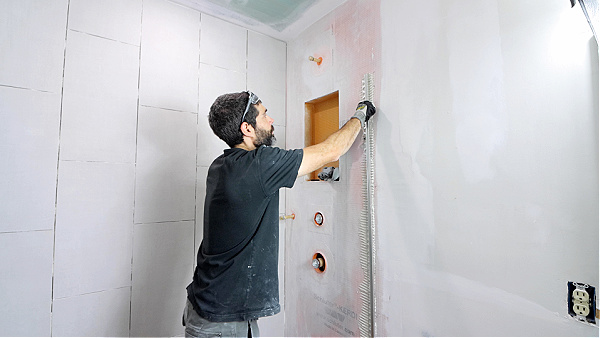
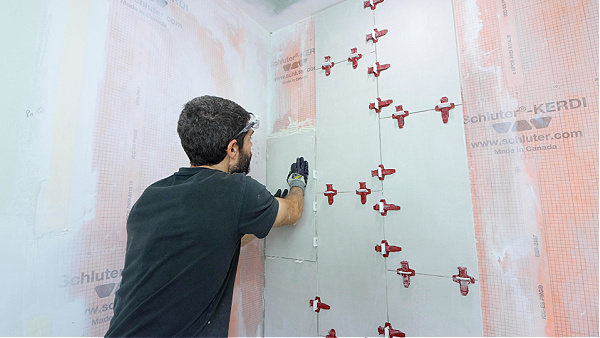
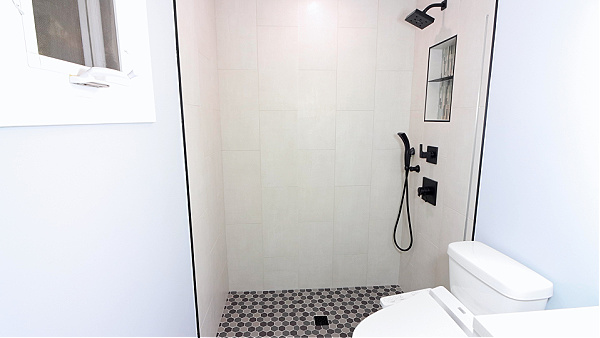
The next day I began the tile on the shower walls.
And used a vertical 12 x 24 porcelain tile.
I started the wall tile on the biggest wall.
And used a half-pattern offset per my client’s request.
I then installed the side wall to the left.
And finished the tile on the plumbing wall.
By the way, I capped the tiles using a black metal profile.
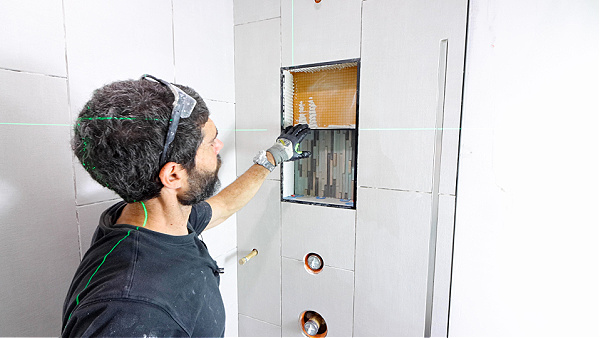
The final step was to tile the shower niche.
I used black metal profiles on the niche perimeter.
And a glass mosaic on the back – I really like how that turned out.
The black shower shelf matched the shower drain and metal profiles.
I pitched it slightly so that water would drain into the shower.
The final step was to grout the shower.
I used Laticrete Spectralock 1 which is premixed but has epoxy-like properties.
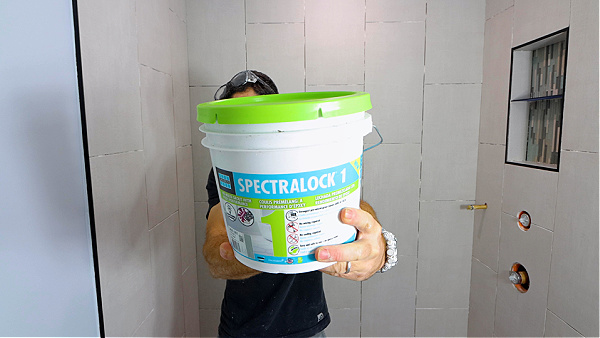
I like this grout because it makes any touchups or repairs super easy.
Plus it doesn’t have to ever be sealed.
I used the same grout color on the floor and walls.
Then I applied Latasil silicone between the tile shower floor and wall tiles.
I also used this in the corners because it’s a change of plane.
And any change of plane requires a flexible joint.
I’m pleased with this final look and my clients were as well.
Here’s a picture prior to the glass shower door installation.
And here’s a picture I got from my client after the glass shower door installation
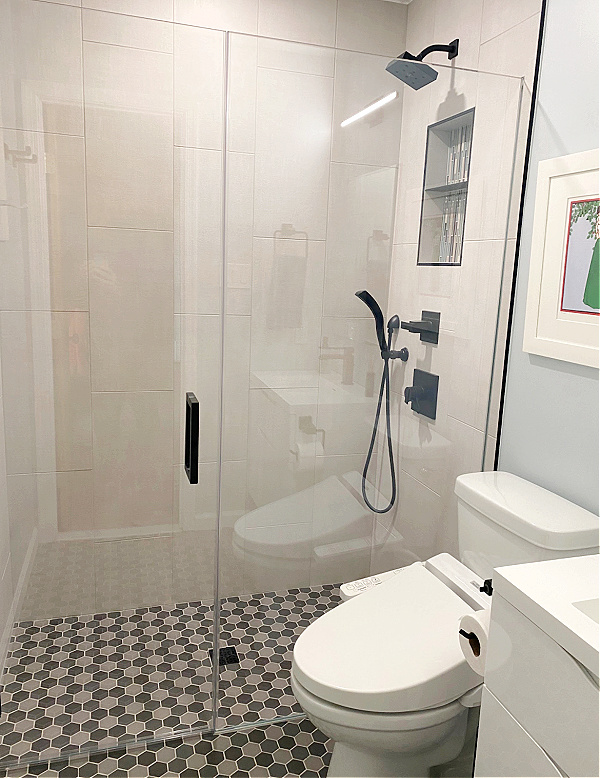
The curbless design, porcelain tiles, and grout selection made this shower clean, safe, and functional.
If you want to unlock all my bathroom remodeling videos, courses, and personal coaching, join Home Repair Tutor today – it’s one of the best online resources for anyone renovating a bathroom. Tap the button below to learn more
Cheers,
Jeff