One of the biggest reasons showers fail is the drain—and the signs are hard to ignore.
If your shower smells musty, damp, or like an old locker room, chances are the drain is the culprit.
Traditional clamping ring drains are a common source of these issues. They’re still widely used by plumbers and can be tricky to remove—but Schluter has engineered an excellent solution.
In this tutorial, I’ll show you how to upgrade to a Schluter bonding flange drain—a modern upgrade that eliminates those issues and offers long-term advantages.
By the end, you’ll see why making this change is one of the smartest improvements you can make to your shower.
I’ve organized this tutorial into the following sections:
Schluter KERDI-DRAIN-A Adaptor Kit Guide
- Why Shower Clamping Ring Drains Fail
- How to Install the Schluter KERDI-DRAIN-A Adaptor Kit
- How to Install the Schluter Compensation Board and Shower Tray
- How to Install the Schluter Bonding Flange Drain
- How to Waterproof the Schluter Bonding Flange Drain
- What the Schluter Naysayers Aren’t Saying (For Obvious Reasons)
- Schluter Shower Curb Installation Tips Plus a Video (OMG)
You can tap the above links, and they’ll take you to that section.
If you’re a Home Repair Tutor member, you can find more tips in the menu under Topics and Courses
Many thanks to Schluter for sponsoring this tutorial.
Schluter offers a comprehensive range of shower waterproofing products and backs installers with exceptional support, including detailed in-person workshops and high-quality online videos.
I love them because of their commitment to education and developing new products that help people build quality bathrooms.
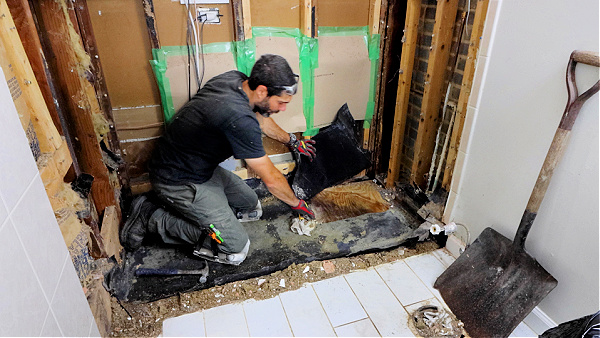
Why Shower Clamping Ring Drains Fail
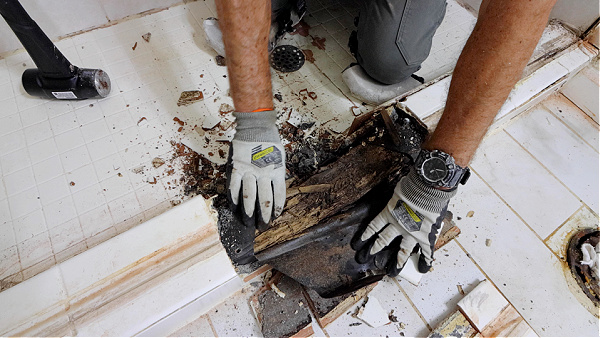
If you’ve ever demolished a shower and encountered a clamping ring drain, there’s a good chance you’ve seen it fail.
These types of showers require a liner. And that liner will likely fail at the drain connection, wall interface, or curb.
Often, installers skip creating a pre-slope on the wood subfloor or concrete slab. As a result, the shower is destined to fail because water will pool underneath the tile.
Over time, that pooling water accumulates organic matter from the users (yes, gross). That, combined with warm air, will cause the shower to smell musty.
Furthermore, many installers use wood curbs that rot when exposed to water over time.
There’s a reason many seasoned pros prefer Schluter Systems. They don’t contain organic material.
The shower trays are pre-sloped for reliable drainage, and the bonding flange means no weep holes or liners to worry about failing.
Yes, it’s a premium investment—but for a bathroom or shower that’s built to last, the supplies and techniques in this tutorial are worth every penny.
How to Install the Schluter KERDI-DRAIN-A Adaptor Kit
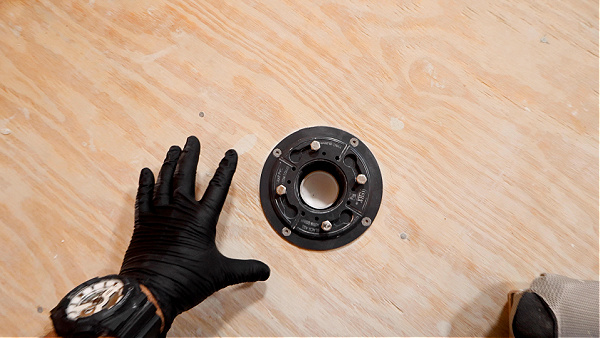
Fortunately, it’s easy to convert clamping ring drains to bonding flange drains.
Schluter has two different adaptors. One is for the standard bonding flange drain, and the other is for their linear drains.
While the process is easy, it’s still possible to make mistakes.
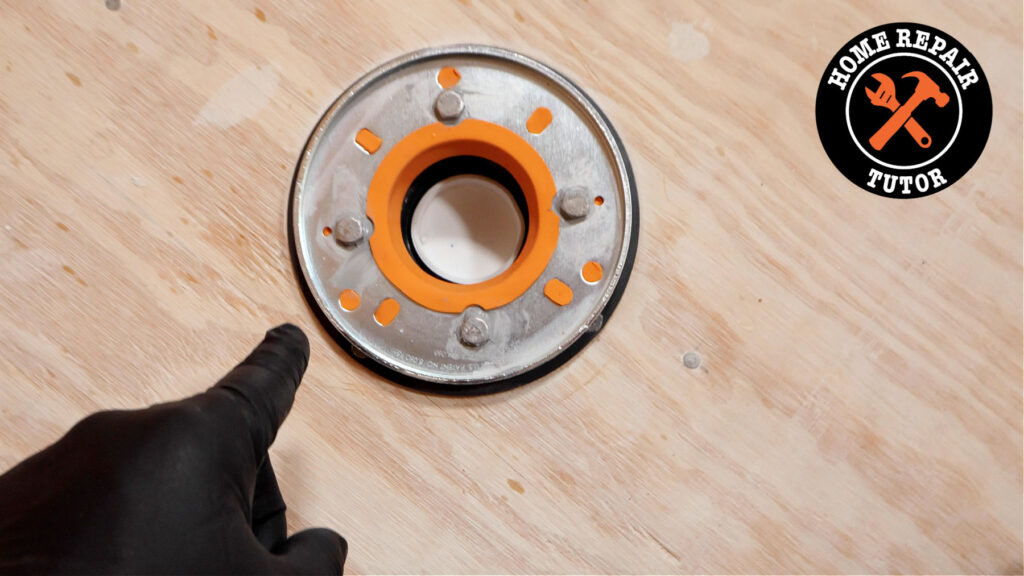
The first step is to remove the clamping ring and save the bolts.
I recommend cleaning the surface of the drain. Contaminants can cause the new bond with KERDI-FIX to fail.
I apply about a 1/4-inch bead of KERDI-FIX to the bottom of the adaptor ring.
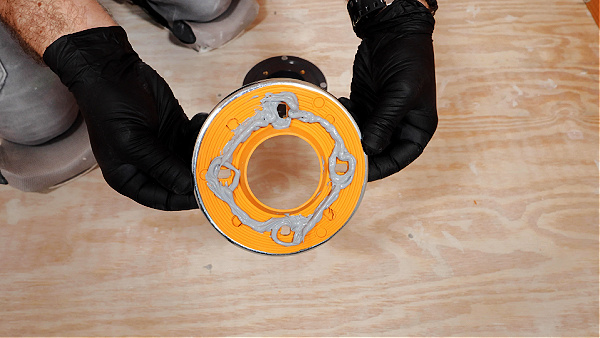
Conversely, it can also be applied to the drain.
Either way, I encircle the punchouts on the adaptor ring or the bolt holes with KERDI-FIX.
Then I immediately embed the adaptor ring on top of the drain. I hand-tighten the bolts and use a ratchet to tighten them another 1/4 turn.
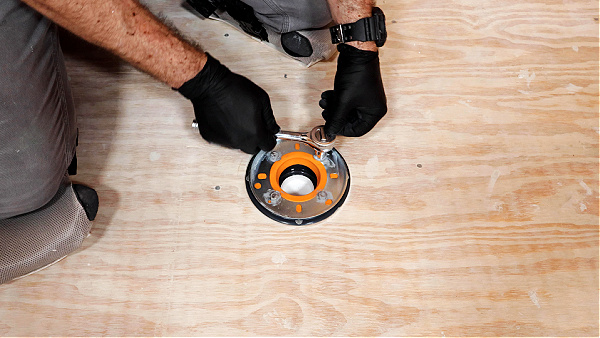
Here’s the error you can make: overtightening the bolts.
Avoid overtightening the bolts, as this can make the rubber gasket bulge and lead to leaks.
Pretty easy, right? It only takes a few minutes.
But I’m not done. There’s an important step when you combine the adaptor ring with the Schluter shower tray.
How to Install the Schluter Compensation Board and Shower Tray
The traditional KERDI-DRAIN is solvent-welded to PVC or ABS below the shower subfloor or concrete.

As you can see in the previous section, the adaptor sits above the subfloor or concrete.
Therefore, the Schluter shower tray must be raised to ensure the new bonding flange drain functions correctly.
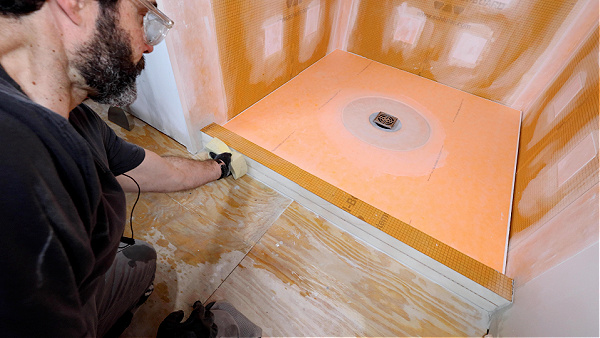
The easy way to do this is to use Schluter’s 1-inch height compensation board.
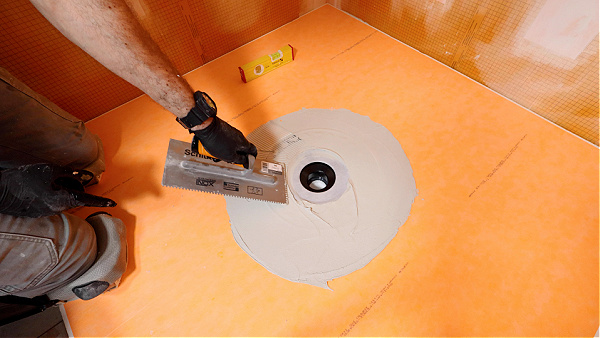
I dampen the plywood or concrete with a sponge and apply Schluter ALL-SET with the flat side of my trowel.
Then, I use the 1/4-inch by 3/8-inch square notched side to apply more thin-set mortar. All the trowel notches should be parallel with each other. Then I embed the compensation board into the mortar and walk on it.
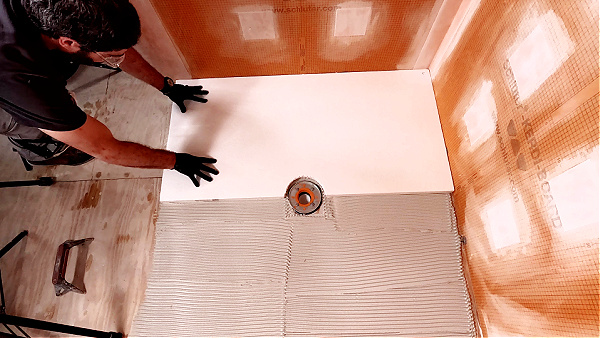
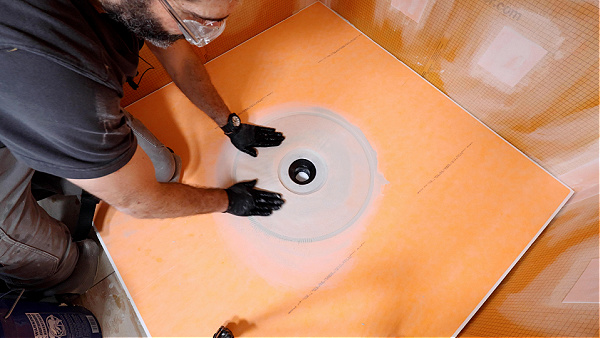
I do the exact same process with the Schluter shower tray. I embed it into the mortar that’s on top of the compensation board.
Now here’s the deal,
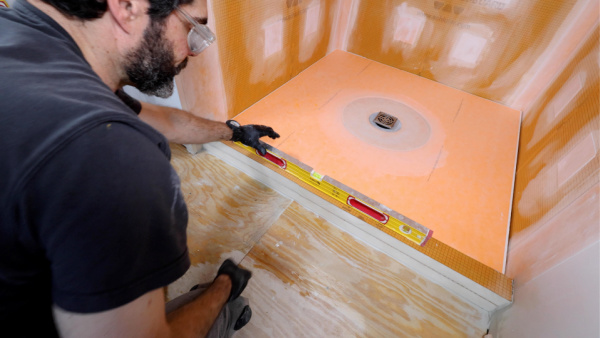
I walk on the tray (with a cardboard layer underfoot), and I ensure the perimeters are level.

This makes tiling the shower walls easier.
And it’s especially important for small subway tiles since any variation in the shower tray height will be noticeable.
That said, I will scribe the cut the bottom of the tile, even 12×24 tiles, if the shower tray isn’t totally level.
Once the shower tray is installed, I add the drain.
But this one is a little different…in a good way!
How to Install the Schluter Bonding Flange Drain
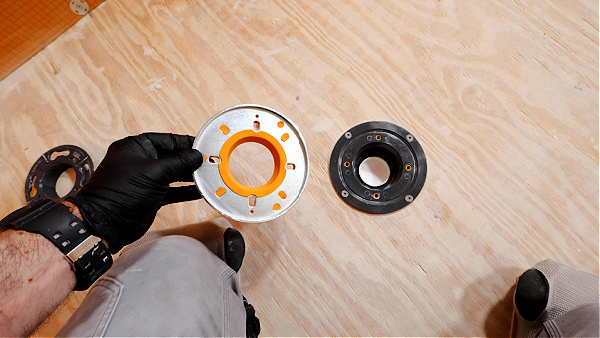
The Schluter KERDI-DRAIN-A Adaptor kit I used came with the bonding flange drain.
But this drain is different than the typical Schluter KERDI-DRAIN.
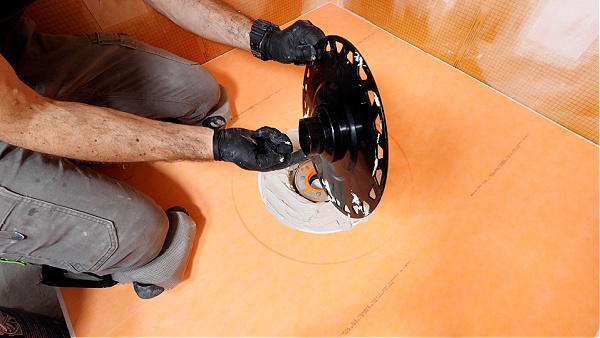
The drain hub slides down into the adaptor and makes a watertight seal.
It won’t be solvent-welded to ABS or PVC.
So, in many ways, it’s simpler to install.
But I want to impart some super important tips.
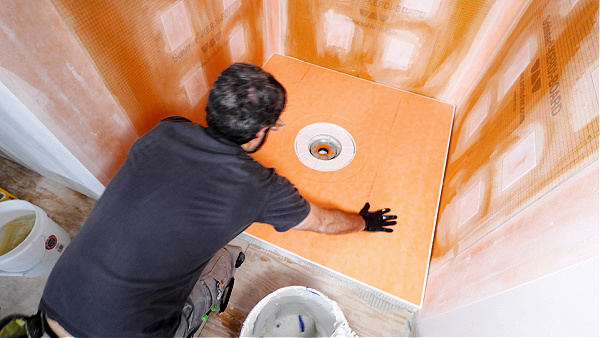
First, it should be level on all sides so that water will drain properly.
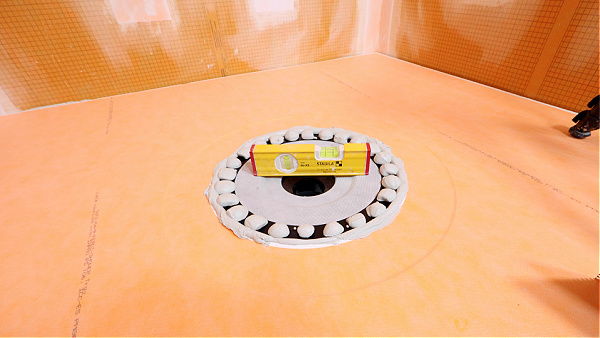
Second, it should be slightly lower than the Schluter shower tray, so that water won’t pool
Third, thin-set mortar should ooze up from the drain’s trapezoids. This provides surface area for the KERDI fleece to bond to during the waterproofing.
If your installation meets this criterion, you’re in excellent shape for the next step.
How to Waterproof the Schluter Bonding Flange Drain
You might see a lot of chatter on social media about Schluter drains. Some people love to bash companies and blame them for shower failures.
Sometimes, defects happen in manufacturing—it’s true for cars, baby strollers, and plenty of other products.
But more often than not, if a shower fails and causes water damage, it was the installer’s fault.
Either they didn’t install the drain properly, used the wrong thin-set mortar, mixed the mortar incorrectly, or used the wrong trowel.
Whatever the reason, they ignored the instructions and assumed something that wasn’t correct.
Once you understand how Schluter works, it becomes easy to use.
For instance, I mix Schluter ALL-SET with the membrane water consistency (per the directions) using cold water.
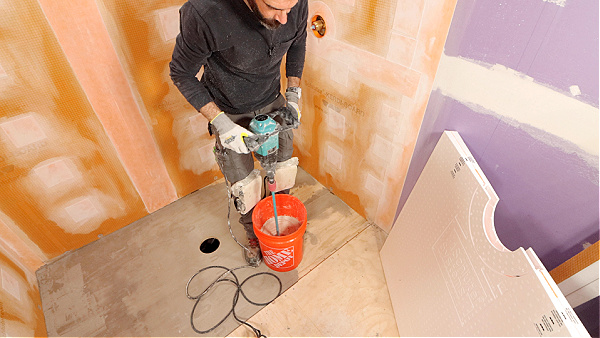
I also use a mortar mixer that can handle thin-set mortar, not a drill. This recipe works every time.
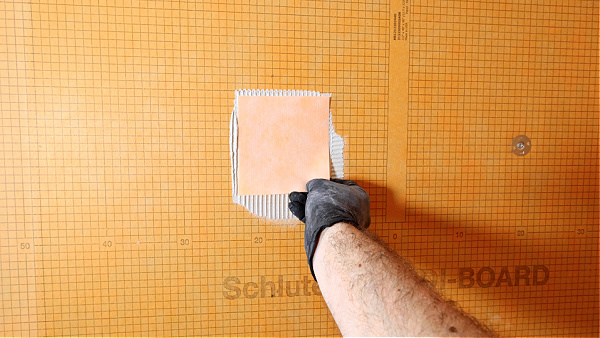
Then I apply the ALL-SET to the top of the bonding flange using a KERDI trowel. I hold the trowel at a 45-degree angle to maximize the notch.
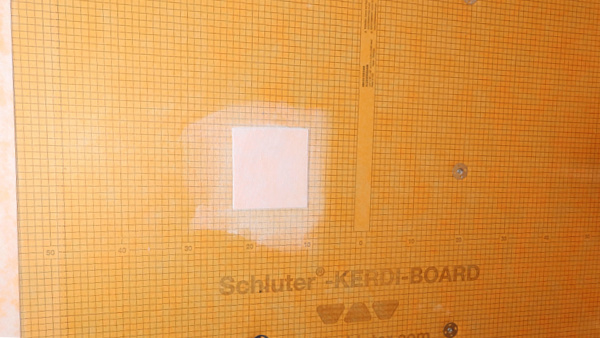
And I embed the provided KERDI membrane so that it’s centered on the bonding flange.
I compress it with a 6-inch joint compound knife using moderate pressure and remove any excess mortar with a sponge.
Boom!
That’s it. Pretty simple.
What the Schluter Naysayers Aren’t Saying (For Obvious Reasons)
I’ll be blunt, I love Schluter. And yes, I have a partnership with them.
I’ve seen many systems, and I respect what they can and cannot do.
But I’m not here to bash another product. It’s a waste of time because all products will work if they are installed correctly.
Also, if a social media influencer is criticizing a product, check to see who sponsors their content – you might find they have a competing brand behind them.
That usually explains why they’re so invested in tearing down a particular brand.
Anyhow, let’s get into the details…
Here’s how Schluter works:
Thin-set mortar is applied to a fleece layer on KERDI or KERDI-BOARD.

Thin-set mortar bonds to two layers of fleece on a waterproofed material like KERDI-BOARD or KERDI-BAND.
The fleece part is important because it acts as an anchor for the thin-set mortar.
If the thin-set mortar is mixed properly and the correct trowel is used, the thin-set mortar will develop a crystal matrix between two layers of fleece, e.g., KERDI-BOARD and KERDI-BAND.
The matrix will continue to grow until it physically blocks water molecules from passing through.
The KERDI-FIX option is similar. You need the KERDI-FIX to bond (or affix, hence KERDI-FIX) to something and be sealed with a KERDI layer, e.g., KERDI-BAND.
KERDI-FIX will waterproof and seal at the same time if KERDI-BAND is used. Thus, it’s a great option against windows, tubs, or acrylic/fiberglass shower trays.
So why aren’t you seeing the naysayers explain all this?
Let’s be honest – it’s pretty dull.
Twisting the truth or leaving out facts is the easy route on social media—especially when the goal is more clicks, comments, and ad dollars.
But if you’re reading this, I hope you can see through all that nonsense.
Schluter Shower Curb Installation Tips Plus a Video
Another controversial topic, apart from shower drains, is shower curbs.
I like building custom shower curbs with 2-inch KERDI-BOARD.
I can make them any dimension, and they’ll support the heaviest shower door you can afford.
Plus, any extra material can be used for shower benches, or you guessed it, other curbs.
Remember this about shower curbs,
They should be level across the length of the shower but slope a little toward the drain.
That way, the shower door can be easily installed, yet water will hit the glass and drain into the functional shower area.
Easy concept to grasp.
In the video below, you’ll see how to install the Schluter KERDI-DRAIN-A Adaptor Kit as well as the shower tray and custom curbs.
There are many tips. I highly recommend grabbing a pencil and a pad!!
Shower drains and waterproofing are just one aspect of bathroom renovations.
If you want to unlock all my bathroom remodeling videos, courses, and personal coaching, join Home Repair Tutor today – it’s one of the best online resources for anyone renovating a bathroom. Tap the button below to learn more
Jeff