Today, you’ll learn how to install a bathtub and make it as solid as a rock.
We’ll discuss subfloor prep, self-leveling, plumbing, and much more.
So if you need a good bathtub installation overview, you’re in the right place.
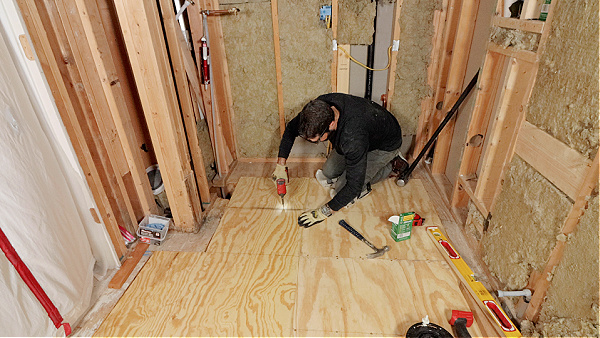
Bathtub Installation Subfloor Prep
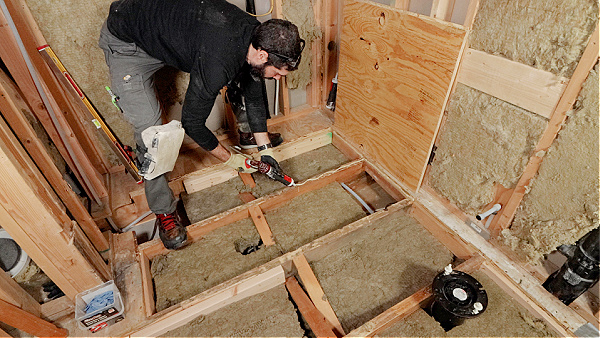
Bathtubs need level subfloors to drain properly and to have terrific tile work.
If the subfloor has water damage, replace it.
Just be careful not to cut any water lines!
I recommend applying either Great Stuff Construction Adhesive or PL400 over the floor joists prior to the subfloor.
This provides extra bond strength to the subfloor. It also prevents squeaks.
Subfloor thickness is very important. Choosing the correct thickness depends on the floor joist span and also on what type of flooring will be installed.
For example, the floor joist span was 16 inches on-center in this scenario.
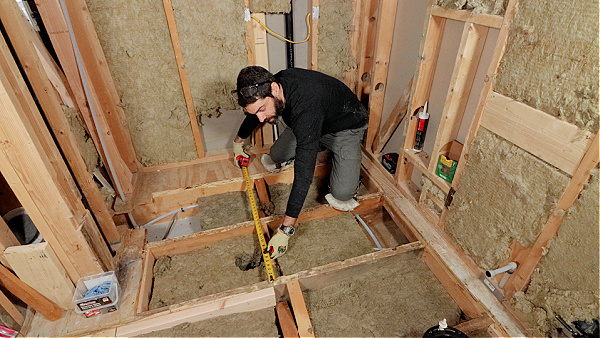
In addition, porcelain tiles will be installed.
Therefore, I chose 3/4 inch tongue and groove plywood and secured that to the joists per the APA nail/screw schedule.
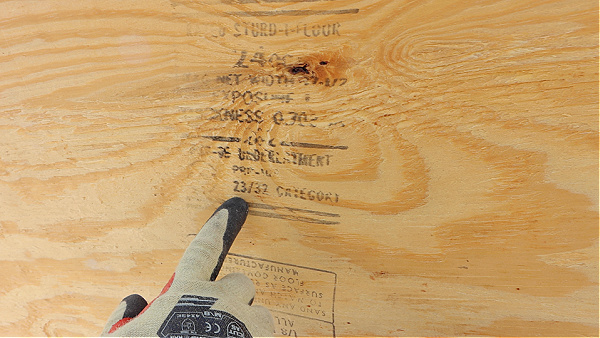
That means the plywood was secured every 6 inches on the perimeter and 12 inches in the field using 2-inch screws.
This screw schedule, along with adhesive, makes the subfloor solid. But what can you do if the subfloor isn’t level?
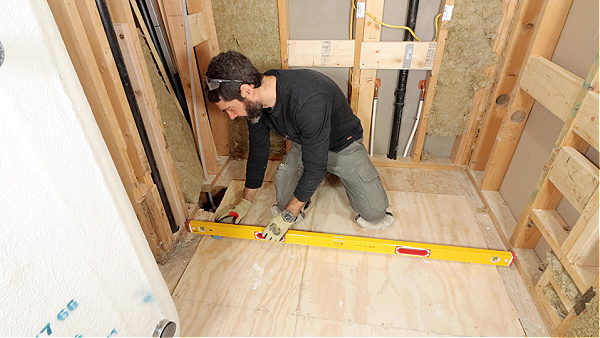
How to Self-Level Subfloors
Self-leveling is always a great option for bathtubs and bathroom floors.
However, there are several things to consider. For example, how much can the self-leveler be built up?
I like using Ardex Liquid Backerboard because it doesn’t require metal lath. And it’s easy to pour.
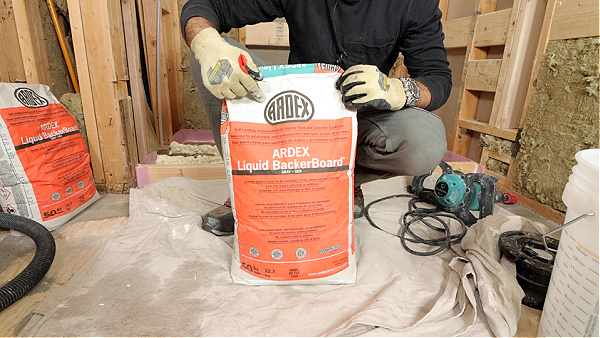
However, the total Liquid Backerboard thickness cannot exceed 1-1/4 inch. Keep that in mind.
Most self-levelers require the use of primer on subfloors. For instance, I primed the subfloor with Ardex P51 primer.
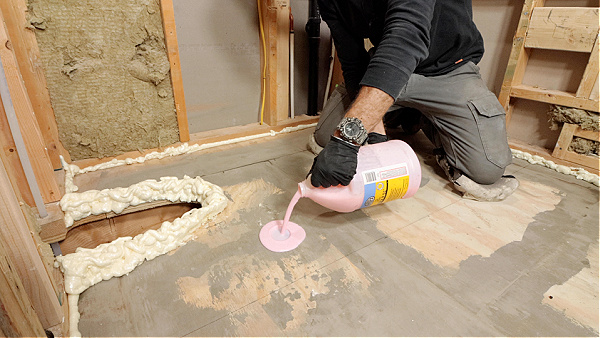
It’s very important to follow the manufacturer’s directions when priming. I also sealed the wall-to-floor transition and the hole in the floor with Great Stuff.

And added a 2×4 across the area to be leveled.

I mixed the Liquid Backerboard per the instructions, did the sign of the cross, and poured the leveler.
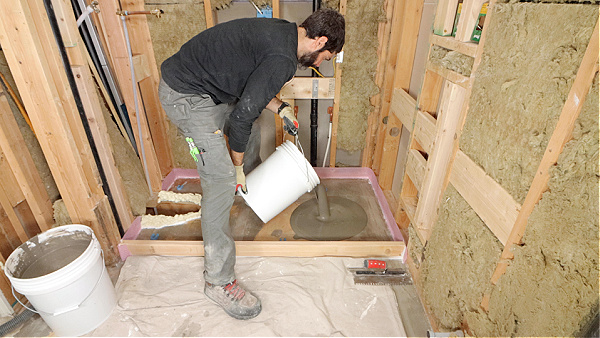
After a few hours, the bathtub floor area was level, and I could set the tub. But, before I could do that, the drain needed to be installed.
Bathtub Plumbing
Bathtubs require a waste kit.
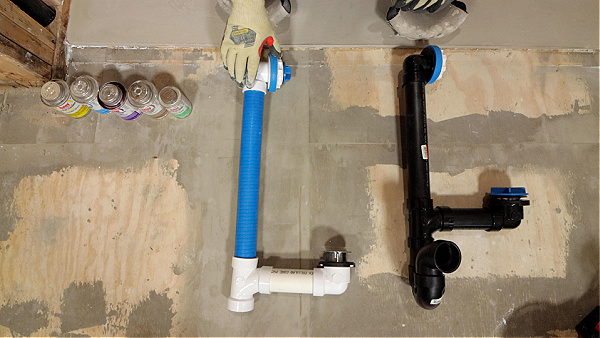
This connects the tub’s drain to the home’s DWV. I like Oatey’s True Blue Bathwaste kit.
This kit comes with all the parts needed to fully plumb the tub. I love the gaskets and test plugs that come with this kit.
My first step is to connect the drain to the bottom of the tub with 100% clear silicone.

Some installers prefer plumber’s putty. But silicone makes a better seal.
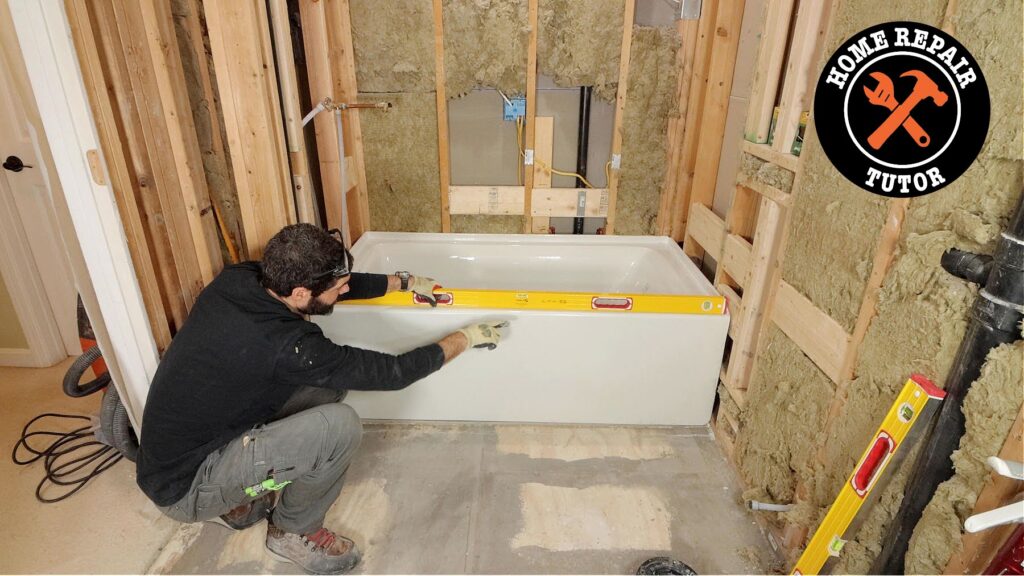
Once the drain is in place, I set the tub and ensure it’s level, very similar to a prefab shower tray installation.
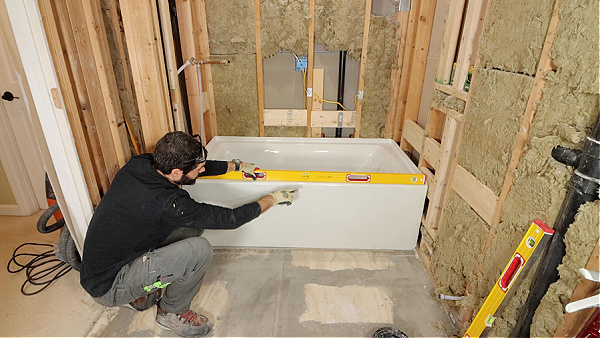
Every tub is secured to the studs in a different way.
This Duravit tub came with clamps that make securing the tub flange to the studs super easy.
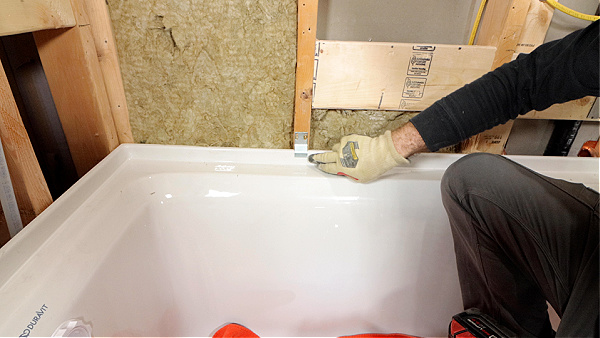
I always check to see if the tub is level back to front and side to side.
Because once the tub is solvent-welded to the home’s DWV, it’s going to be hard to fix any leveling issues.
Next Steps
Installing a bathtub is just one phase of a bathroom renovation.
If you want to unlock all my bathroom remodeling videos, courses, and personal coaching, join Home Repair Tutor today – it’s one of the best online resources for anyone renovating a bathroom. Tap the button below to learn more
Jeff