Nrdly
Get Nrdly Free Trial Built with Nrdly

How to Install PEX Pipe in 10 Minutes or Less

Are you afraid to solder copper pipes?

If you’ve never soldered before it can be intimidating. Plus you can easily catch your house on fire – never a good thing.

Today you’ll learn how to install PEX pipe. This is a general overview that’ll share quick tips and get you familiar with PEX.

Which by the way comes in pretty handy when your wife tells you the kitchen ceiling is leaking water.

We promise that you’ll be able to fix any leaky pipe in your house after you read and watch today’s tutorial.

So let’s dive in and save you money!


PEX Supplies

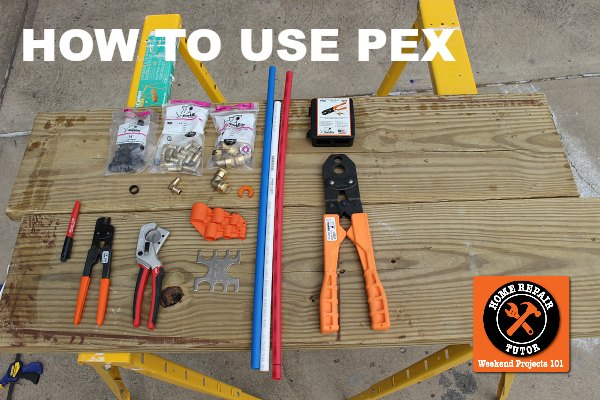
Here are all the supplies we discuss

SharkBites aren’t cheap but if you buy the PEX fittings in bulk they’re actually competitively priced.

And once you have the PEX crimping tool you’re all set to begin your plumbing setup.

One warning: make sure your local plumbing code allows PEX.

Some places don’t. And you’ll have to use copper. So call the local building inspector and ask…use someone else’s voice if you’re afraid of their response, haha…just kidding.

How Easy is PEX to Use?

Easier than you think.

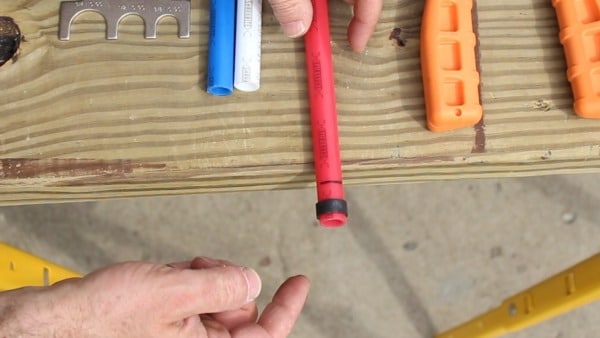
You’ve probably seen it in the home store. PEX comes in red, white and blue colors. Red is for hot water lines, blue is for cold water lines and white is neutral, meaning you can use it for either hot or cold.

The colors are more for forgetful folks like me who can’t remember what they were doing 3 seconds ago.
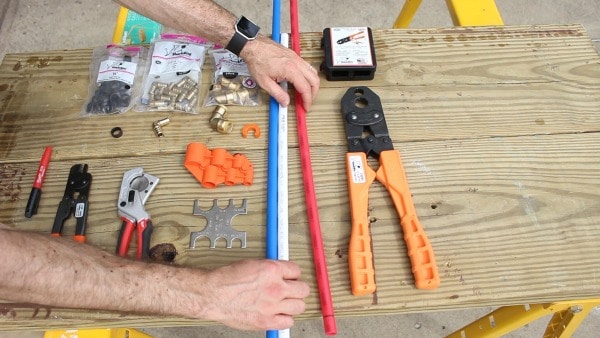
Color of PEX

Slide a crimp ring onto the PEX.

PEX Crimp Ring

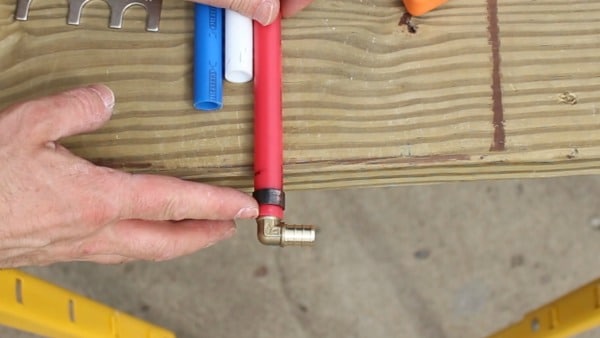
Slide your fitting, in this case a 90 degree elbow, into the PEX.
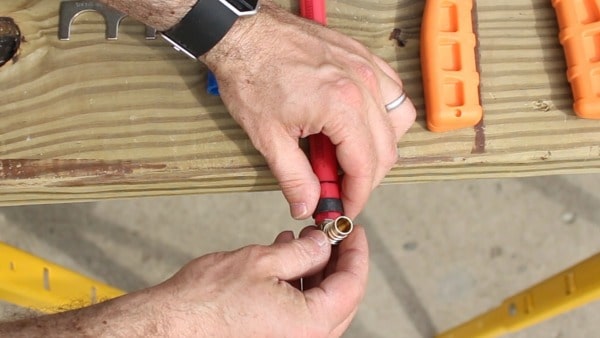
PEX Fitting

Crimp rings should be 1/8 to 1/4 of an inch from the end of the PEX. This recommendation is per SharkBite who makes these crimp rings.

It might be different for your PEX system so follow the manufacturer directions.

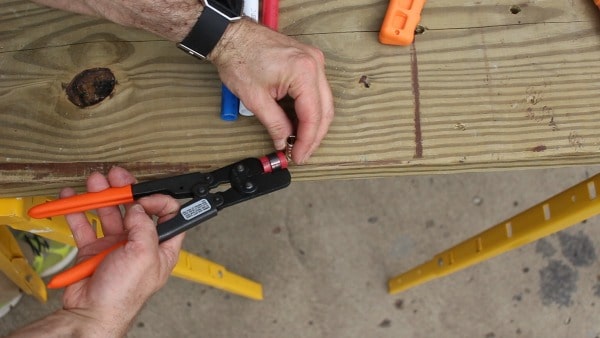
Position the PEX crimping tool at 90 degrees over the crimp ring. Then slowly squeeze the crimping tool until you hear it pop and compress the ring.

Our only complaint about the PEX crimper is that it has short handles. We wish you could extend the handles to create more leverage…hmm, maybe we should develop some invention.
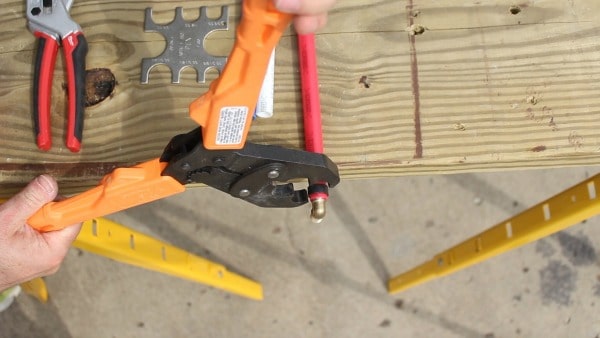
Squeeze Crimp Ring

It’s that simple.

Squeeze Crimp Ring

But how do you know if your crimp ring is tight enough?

The nice thing about the SharkBite system is that it has a gage. If the ‘GO’ slot fits over your crimp ring you know it’s on the PEX correctly. You also want to slide the ‘NO-GO’ slot over the crimp ring, if it doesn’t fit you’re totally good to go.
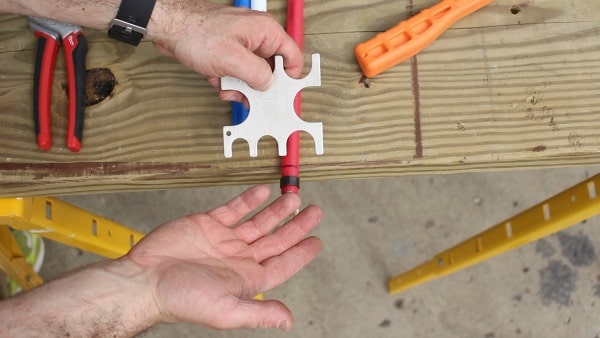
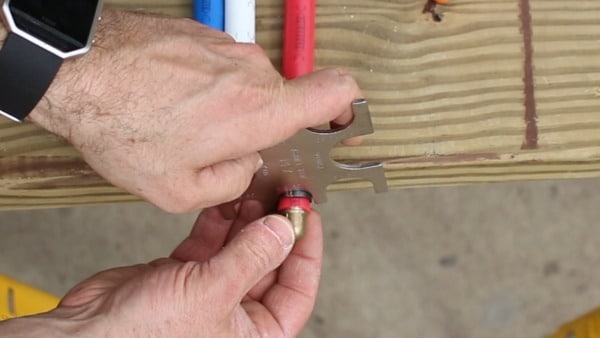
SharkBite Crimp Gage
GO Gage

What if you mess up the position of the crimp ring?

Not a problem.

How to Fix PEX Crimp Rings

If your crimp ring is more than 1/4″ away from the end of the PEX it’s super easy to repair.

Cut the PEX  just shy of the PEX fitting.
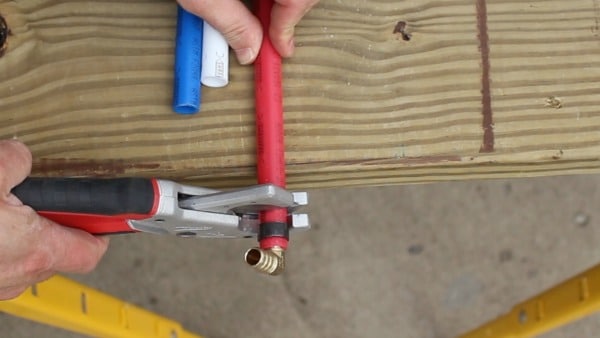
Cut PEX

Slide the removal tool into the PEX.

Remove PEX Crimp Ring

Squeeze the handle and snap the crimp ring. Place the removal tool 180 degrees on the other side of the crimp ring and snap it again. Although, we find that this mostly opens the crimp ring just enough to allow it to slide off the PEX.
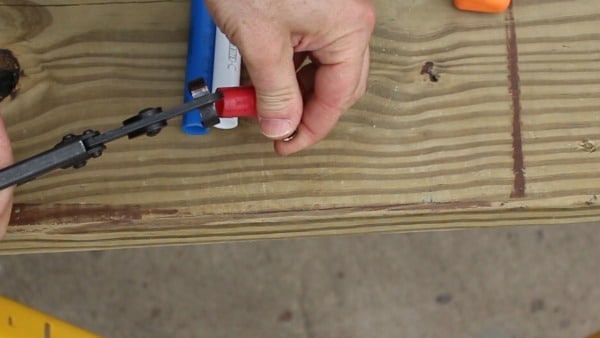
Snap PEX Crimp Ring

Inspect the PEX fitting and make sure it’s okay to use again.
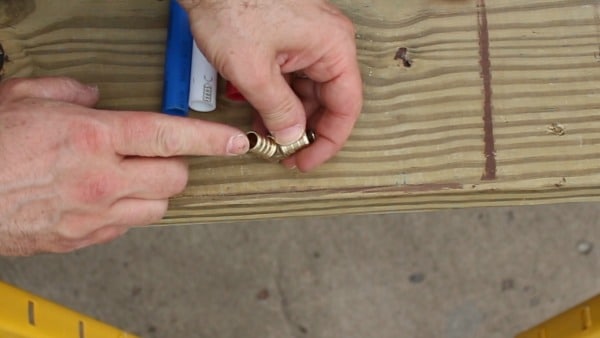
Inspect PEX Fitting

What if you don’t want to use PEX fittings with PEX?

Use SharkBites instead!!


Using SharkBites with PEX

We love PEX but it’s even easier if you use SharkBite fittings.

The one downside is the fact that SharkBites are expensive as all heck. We’re talking movie ticket prices.

But we LOVE them and SharkBites come in handy for super tight spaces.

Place the SharkBite depth tool on the PEX and make a mark with your marker.
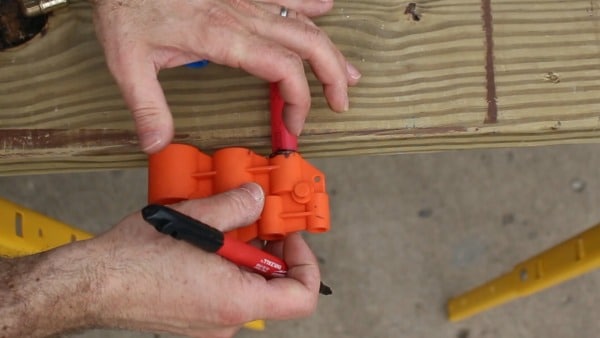
SharkBite Depth Tool

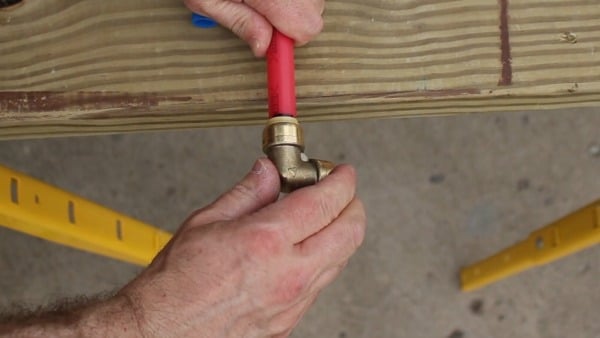
Slide the SharkBite over the PEX until it meets up with the mark.
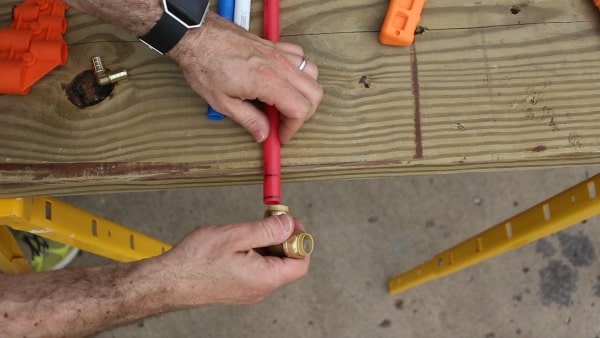
Slide on SharkBite
Slide on SharkBite

Each SharkBite fitting has a plastic insert and this makes the PEX connection solid. Little side note, you can leave the plastic insert in the SharkBite fitting even if you use it with copper. We called SharkBite and asked them about this.

SharkBites will spin 360 degrees around PEX or copper pipes. This is completely normal. So don’t be freaked out.

Watch our quick video to see extra tips and a funny outtake at the end…my daughters crack me up

What’s Next

This was meant to be a high level overview and teach you the basics of PEX.

We truly think you’d love working with it more than copper in some instances.

That said, if you want to learn how to solder copper pipes we have a great tutorial.

If you’re doing a bathroom remodel and need help, join one of our online courses – they’ll make your bathroom renovation much easier!

Let me know if you have any questions and I’ll do my best to help.

Cheers,

Jeff

PEX Plumbing Tips

  1. Jeff says:

    I just moved in a new home and had to move some water pipes. I was surprised when I saw pex under the house. The local hardware store loaned me the tools and the renovations were simple and went well. Time will be the real test but so far I like pex.

    1. Under the house can be tough. So PEX is a great place for it. Pretty nice that your local hardware store gave you the tools. That saved some money, awesome.

  2. Linda Louise Weeks says:

    Well, that was timely! Pex, eh? I’ll have to check and see if that’s a thing in our county, but it looks a lot easier than copper pipes! Thanks again!

    1. Glad you liked this one Linda. Yah, you’ll love PEX. Good idea to check you local codes before buying the supplies 🙂

  3. Celene says:

    In a pinch, I’d use pex (if I can, nice tip on researching local codes); however, overall I’d probably default with copper.

    1. Understand, copper isn’t bad it’s just the soldering part that holds up folks. You can still use SharkBites with copper.

  4. Squafdonoboles says:

    I made great decorative lighting by passing some LED strings through some PEX pipes. Looks real cool!

    1. Hah, never thought of that. Thanks for sharing, that’s a pretty cool idea

  5. Dan says:

    I bought pex cinch rings/tool not the crimp rings. What is the big difference? But there is a big difference in not having to solder.

    1. Totally agree. Any time I have to solder in the ceiling it makes me a bit nervous. The heat can linger and everyone knows what happens with wood when it gets hot. I’d rather use PEX and SharkBites when possible 🙂

  6. Dennis says:

    I did two projects with pex and shark bites.The first was changing the hot and cold washing machine valves in the box in the wall to quarter turn ball valves. Cut a small square in the sheet rock and cut the pipes and remove the nut which holds them in and removed the valves. After soldering a shortl half inch pipe into each one, I used a shark bite to join the pipes to the valves and close the hole in the sheet rock. The second project was adding another faucet through the crawl space wall on the other side of my house using a shark bite to join pex to copper and added a frost free valve. No leaks and works fantastic.

    1. Awesome job Dennis. I’ve done the second project in my home and it’s been leak free for years. Frost free valves are fantastic. Unfortunately I think a lot of folks thing they can’t install one because it’s too difficult. But they’re actually pretty easy.

  7. Tim says:

    I just replaced a failed hot water heater with my son. We were discussing the materials to use, but since teh copper existed already, we just used that. We did use the sharkbite fittings and I have to tell you – that worked out GREAT! The job took just over an hour for the two of us non-plumbers, but I love, love, love the sharkbite fittings! If (when, I guess really) I need to do additional plumbing work I’d definitely be considering replacing existing pipes with PEX.

    1. Awesome, great to hear you did the hot water tank project with your son. Great job. PEX is a lifesaver in older homes where you need to be up in the ceilings or in the walls. So much easier to get the pipes where you need them. My most recent project was way easier with a combination of PEX and SharkBites 😉

  8. Phil Hutchinson says:

    Thanks for the awesome tutorial!

    Due to failing CPVC water pipes, all 88 owners in my neighborhood have been told they need to replace their water lines or risk water damage (several homes have had leaks already). I paid a plumbing company a little over $7K to get this done. They used PEX. While there’s no way I could have done all of the work they did, I like having the knowledge needed to make further repairs/additions on my own. Thanks for the awesome video.

    PEX seems superior to me, especially price-wise. My local Home Depot has type M copper pipe for $0.98/foot while SharkBite PEX tubing is only $0.28/foot. Seems like a no-brainer to me. What am I missing regarding people who still prefer copper?

  9. How do you like the PEX press system over than the more popular copper ring press systems? I’ve been looking at the Viega pex press system and I’m quite interested but I’m not seeing much reviews on it. The only gripe i do have tho is the manual press tool, they look big and bulky compared to the Mil3 crimp tools, whats your take. Also could you do a review on the viega manual press tool would appreciate it. Thanks

  10. Sally says:

    Hi Jeff, just to be clear, you are demonstrating Pro Pex as apposed to plain old pex – they are a different beast.

    1. Thanks Sally, the PEX in this tutorial is from SharkBite and found at our local Home Depot. So we use the SharkBite PEX fittings with it and haven’t had any issues.

  11. Haddon Baillie says:

    Does pex tubing have a freezing point to where water will freeze in it and cause it to burst ? I was just wondering

    1. Good question Haddon, I’m assuming it does but don’t know that exact temperature.

  12. Larry Lange says:

    Pex is the real deal. It will withstand close to freezing temps and swell far beyond copper pipes before bursting. It’s so easy to work with and resists mineral building up. The only downside to pex that I can see is that if you have a building with a history of rodent issues, don’t do it. They chew through everything including Pex.
    I worked in an old building that had Pex and mice. I invested in a good wet-vac.

    Larry

Leave a Reply

Your email address will not be published. Required fields are marked *