
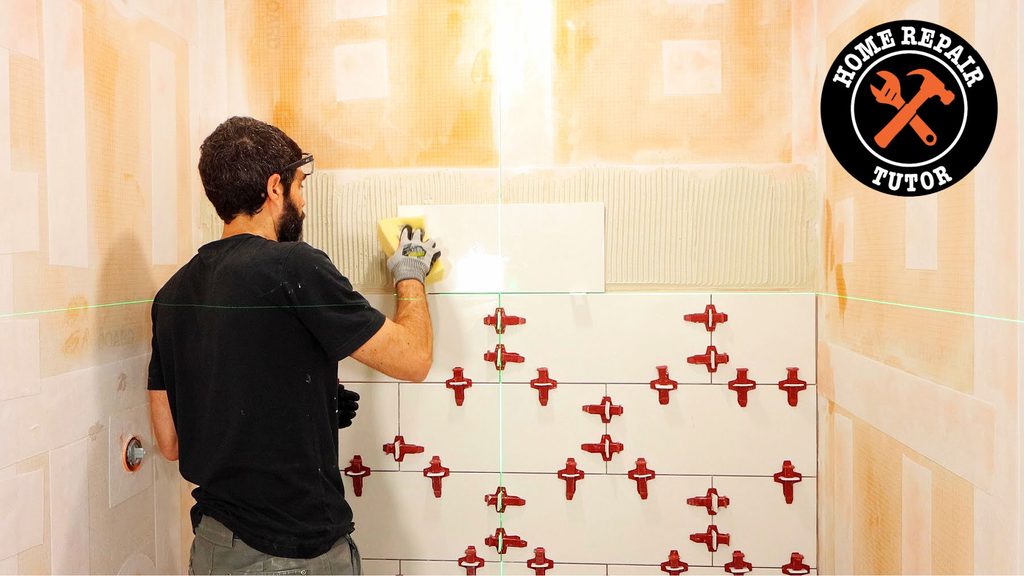
Learning how to tile a shower wall isn’t hard
But it does require preparation.
Today I’ll share 9 quick tips that’ll make your project easier and get you great results.
Ultimately, I promise you’ll feel more confident tiling a shower.
Let’s get started.
Tile Shower Wall Guide
I’ve organized this tutorial into the following sections:
- Check Shower Stud Walls
- Use Waterproofing Materials
- Plan Tile Layout
- Purchase Quality Porcelain Tile
- Tile Leveling System for Large Format Tiles
- Stagger Large Format Tiles
- Use Small Grout Joints
- Quality Thin-Set Mortar
- Quality Grout
Tap the above links, and they’ll take you to the specific part.
Also, grab a pen and paper to take some notes.
Check Shower Stud Walls
Before you do anything, it’s best to check that the stud walls are plumb and level.
Take a 4-foot level and place it across all the studs.
Do this vertically, horizontally, and diagonally.
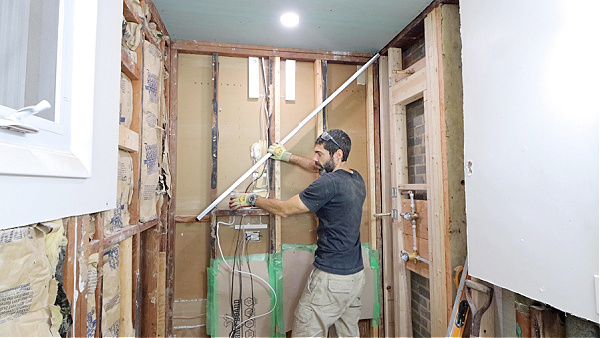
If the studs aren’t plumb and level, the waterproofing won’t be either. This in turn, will lead to tiles looking wonky, particularly at the corners.
How do you fix studs?
The easiest method is to sister a second stud to the one that’s off-kilter or crooked.
Attach the new stud to the old one with 3-inch deck screws or nails. Then check that it’s plumb and level.
Use Waterproofing Materials
It’s critical to use some type of waterproofing material behind tile. There are many ways to waterproof a shower.
But one of my favorite methods is KERDI-BOARD on the stud walls.
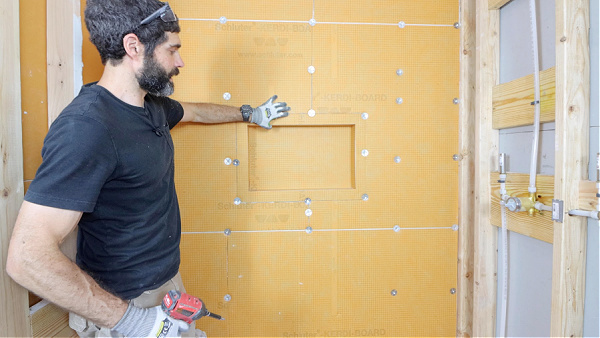
Remember one thing about alternatives:
Cement board and HardieBacker are NOT waterproof. They’re water resistant.
As such, they require a waterproofing membrane over them, such as RedGard.
Here are some waterproofing options:
- RedGard with Cement Board
- ARDEX 8+9 with Cement Board
- Hydroban with Cement Board
- KERDI Membrane with Cement Board
- KERDI-BOARD Panels
- Hydro Ban Board Panels
- Wedi Building Panels
- GoBoard Panels
These are all great options…just don’t throw cement board or HardieBacker on the studs and think you’re done. It takes a bit more preparation than that to prevent mold in your bathroom.
Plan Tile Layout
Once the waterproofing is up, plan the layout of the tile.
A fancy computer program isn’t required for this – a pencil and paper are fine.

The reason for the layout is two-fold:
- To prevent slivers of tile from the ceiling or corners
- And it will give you a plan to follow
Not having a good design is one of the biggest tile shower mistakes you can make.
There’s nothing worse than a sliver of tile at the ceiling. Tiles that are two inches or more will look good at the ceiling transition.

All you need for a good tile layout is an understanding of basic tile requirements and a measuring tape along with your pencil & paper.
Purchase Quality Porcelain Tile
Don’t get a clay-based tile…whatever you do, stay clear of this type of tile.
Why?
If you chip the tile the clay will show.

Solid porcelain tile is a better choice.
It’s the same color throughout, so if you have a small chip it will be hard to spot.
Plus, porcelain tiles are constructed a bit better than ceramic tiles.
But you should still inspect any tile for imperfections.
Tile Leveling Systems for Large Format Tiles
Before I even type anything else…tile leveling systems are optional.
This is a highly debated topic in the tile industry. Some folks like these systems and others say they’re for unskilled tile setters.
Here’s my opinion, which is worth as much as the gum on the bottom of your shoe:
Tiles are getting larger and not always perfect.
Thus, tile leveling systems help with tile imperfection.
I say give them a shot and see how you like the performance.
Tuscan leveling system makes great products like the SeamClips. Just be sure to get the correct size SeamClip for your tile.

And T-Lock is a wonderful option that has the spacer integrated into the Clip.

If you’re using a large tile, e.g. 12×24 inches, we recommend trying a tile leveling system and using 1/16″ Clips.
But again, the choice is yours to make.
Stagger Large Format Tiles
One way to limit tile lippage is to stagger large-format tiles into thirds.

Large tiles tend to cup or bow upward in the middle of the tile.
This in turn creates a slight lip between two adjacent tiles.
The staggering of tiles in thirds helps limit this effect.

Well, that and a tile leveling system 😉
Plus, the Tile Council of North America has specific recommendations on how to set different sizes of tile.
I recommend you get their Handbook and read it.
Use Small Grout Joints
Grout joints between 1/8″ and 1/16″ are good because they keep the maintenance low for tile showers.

Furthermore, even if you use a 1/16″ grout joint, it will likely expand a little. The same thing goes for a 1/8″ joint.
Smaller grout joints just look better than larger ones.
But it does mean you’ll have to watch the tile for lippage.
In the end, you’ll prefer shower tile with smaller grout joints.
It looks better and again, means less cleaning over time.
Quality Thin-set Mortar
I love ARDEX X77 – it’s my go-to for large-format tiles and glass mosaics.

It’s a superior polymer-modified thin-set mortar.
What does that mean?
If you mix X77 per the directions, use the correct trowel size, back butter your tiles, and use directional troweling so your tiles won’t slide down the wall.
Also, if you’re tiling a ceiling in the shower X77 is a fantastic option.
Nobody wants a tile to fall off the ceiling and hurt someone or crack a shower pan tile.
There are a ton of great thin-sets on the market, but X77 is still our go-to in the shower.
Quality Grout
There are so many grouts.
Which one should you choose?
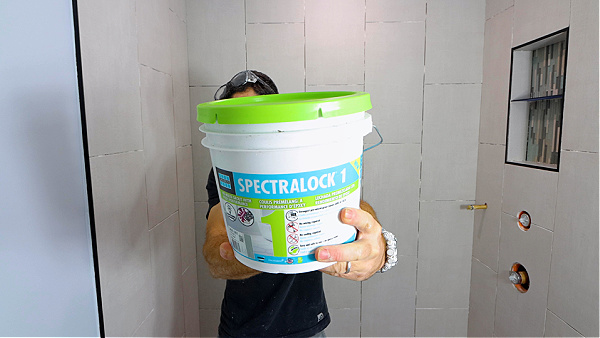
I like Spectralock 1 because it’s pre-mixed, stain-resistant, has color consistency, and is easy to apply. It’s not cheap but a great option for tile walls.
Mapei’s Keracolor U is an unsanded grout. I used it for the shower in the video because the tiles are glazed porcelain and I didn’t want them to be scratched.

Plus I found a color from Mapei that worked well with the tile.
Mapei also makes Flexcolor CQ, which stands for colored quartz.

This is a pre-mixed, stain-resistant grout that’s very simple to apply…if you follow the directions.
Always test the grout on the tile to ensure it won’t scratch the surface.
Epoxy grouts are fantastic for maintenance-free bathrooms.
Watch this video to see all the tips and a few extras that will help you with your shower tile project
Next Steps
Tiling a bathroom can be a challenge, but the right tools make a huge difference.
Having a step-by-step plan makes your bathroom renovation much easier.
If you want to unlock all my bathroom remodeling videos, courses, and personal coaching, join Home Repair Tutor today – it’s one of the best online resources for anyone renovating a bathroom. Tap the button below to learn more
Jeff