How awesome would it be to never have to seal your shower tile grout or worry about it staining?
This is what I was thinking after repetitively trying to clean our shower floor tile grout with no luck. So I decided to remove all of it and start over.
So which grout is the best option for a shower tile floor?
I’ve had a lot of luck using grout by Custom Building Products. And their technical support line has always been really informative (think Yoda or Obi-Wan Kenobi, seriously, these people are awesome).
I researched their website, spoke to a technical representative, and decided to use epoxy grout.
Epoxy sounds a bit scary and I was nervous about using it. However, since it offers stain & chemical resistance that regular grout can’t match I decided it was the best choice.
Plus, the shower epoxy grout joints will be super durable and this means they also won’t crack or shrink over time.
You should consider using epoxy grout for your shower grout for these reasons and because it isn’t hard to install. I’ll share the tips I got from Custom Building Products and you’ll discover that using epoxy grout is easier than cleaning your kitchen after Thanksgiving.
Here are the supplies you’ll need for this project
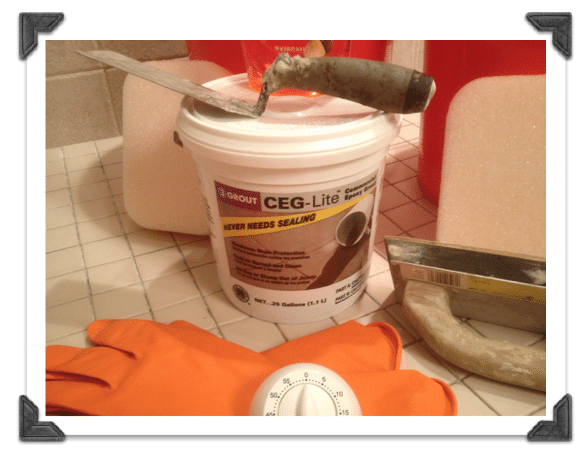
- CEG Lite Commercial Epoxy Grout
- Five-gallon buckets (3 total)
- Grouting sponges with buff pad (3 total)
- Microfiber cloths (3 total)
- Dawn soap
- Margin trowel
- Grout float (made of hard rubber)
- Rubber gloves
- Safety glasses
- Spiral grout mixer (optional)
- Drill (optional)
- Timer
- Old Towels
If you’re ready for shower grout that will look awesome and resist the test of time then epoxy grout is the way to go.
Let’s get started!!
Getting Started with Epoxy Shower Grout
Any time I use a new product it’s my habit to call the technical support line of the manufacturer. So the directions I’m providing today are from the notes I took while on the phone with Custom Building Products.
Custom Building Products makes grout and I’ve had success with their products in the past.
The first step is to add about 3 drops of Dawn dishwashing soap to the three buckets (5 gallon). Fill the buckets to within 5 inches from the top with warm water.
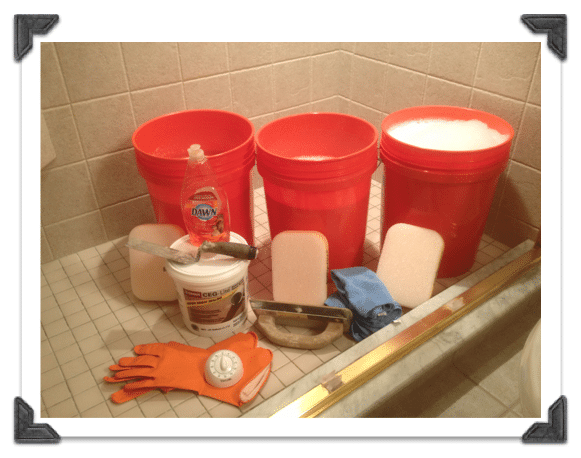
You’ll want to get this water along with your sponges & microfiber cloths ready before mixing the epoxy shower grout because once the grout is mixed you only have 40 minutes to work with it. Here’s a picture of all the supplies I used.
If you just installed your tile make sure all of them are fully embedded in the mortar. This ensures the tiles won’t sag, which can consequently create pinholes in your new grout (which absolutely sucks, I’ve had it happen).
Vacuum the tile and grout joints one final time. Then dampen your shower tile surface with the sponge and water from one of the buckets. Make sure water doesn’t puddle in the grout lines.
Add a rag to the drain, the last thing you want is epoxy grout clogging it (can you say nightmare),
Set your timer for 30 minutes. You’ll have 40 minutes to work the grout into the grout joints and clean up. But the timer will give you a 10-minute warning. You’ll find that having a timer is really helpful because it allows you to pace yourself (after all, this is kinda like running a race).
How to Mix Epoxy Shower Grout
Since you have a limited time frame to use epoxy grout in your shower get all your tools ready. Place your margin trowel, grout float, gloves, safety glasses, drill, and spiral mixer next to you.
You should also position an old towel (or two depending on your level of messiness) next to your working area. This gives you a space for the used bucket of epoxy grout when you’re done.
Applying epoxy shower grout is easiest when the temperature is between 70F and 85F (21C and 29C). The directions say that lower temperatures will make the epoxy grout stiffer and extend the setting time. Higher temperatures, on the other hand, will make the epoxy grout more fluid and shorten the setting time (which means you need to work FAST!!).
FYI, the temperature in our house was around 69F when I did this project.
CEG Lite epoxy shower grout can be found at Home Depot and one bucket cost about $24.
Our tile shower floor was roughly 32 inches by 58 inches and one bucket was more than enough.
CEG Lite consists of a Part A (which is the colored hardener) and a Part B.
Put on your gloves and get ready to have some fun.
Mix Part B, which is already in the bucket, with your margin trowel. The mixed consistency should be a thick peanut butter that looks and feels like it has sand in it (don’t spread this on toast).
If for some reason Part B is difficult to stir you can put the top back on the bucket and soak it in warm tap water (120F) for 10-20 minutes. Go watch a Seinfeld rerun, I like the one where Jerry visits the boy in the bubble, haha.
After letting the Part B bucket return to room temperature mix it with your margin trowel (humming the Seinfeld theme song isn’t mandatory but makes epoxy grout stirring fun).
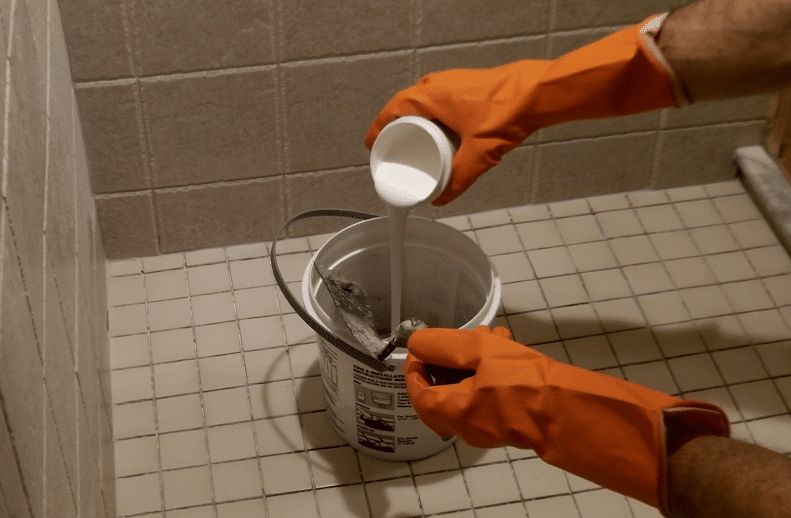
Open the Part A container and add all of it to Part B. Use your margin trowel to scoop out as much of Part A as possible since it contains your colorant.
Mix Part A and Part B together, scraping the bottom and sides of the container. I had to really turn over the mixture (like whipping up a cake batter) to get a homogenous consistency. This will take you a good 5 minutes. Make sure there are no color streaks so that your new grout color will look consistent.
You could use your drill and spiral grout mixer for a few minutes at a low speed to help with this process. I didn’t do this because you can easily cause the epoxy grout to “flash” set (envision your bucket of epoxy grout turning into a rock) if you mix it too quickly. Since I’m not Superman but regularly workout I decided to mix via margin trowel only.
The directions tell you that epoxies generate heat chemically. It makes sense that if you leave your mixed concoction in the bucket all the heat will cause it to prematurely set up. So it’s a good idea to scoop most of the epoxy grout onto your shower tile to extend the working time.
How to Apply Epoxy Shower Grout
Pick the corner of your shower that’s the hardest to reach. Scoop your epoxy shower grout into this corner.
Use the rubber grout float at a 45-degree angle to smear and pack the epoxy grout into the grout lines.
Hold your grout float at a 90-degree angle and move it diagonally across the tiles to remove excess grout. You’ll have to do this a few times because epoxy grout is very sticky. Make sure the grout joints are fully packed.
If you did remove some grout simply add more and pack it in place with the float. This takes patience and a sharp eye but you’ll be happier with the end result by being anal-retentive.
Try removing as much of the epoxy shower grout as possible with the grout float. This will make the clean-up process a lot easier (can you tell I’m talking from experience, haha).
Here’s a short video that shows you what to expect.
How to Clean Up Epoxy Shower Grout
Cleaning up is the final step in applying epoxy shower grout and it could arguably be the most important thing you do.
Your goal is to clean off the excess grout, tool the grout lines smooth, and make sure there won’t be a hazy film left behind.
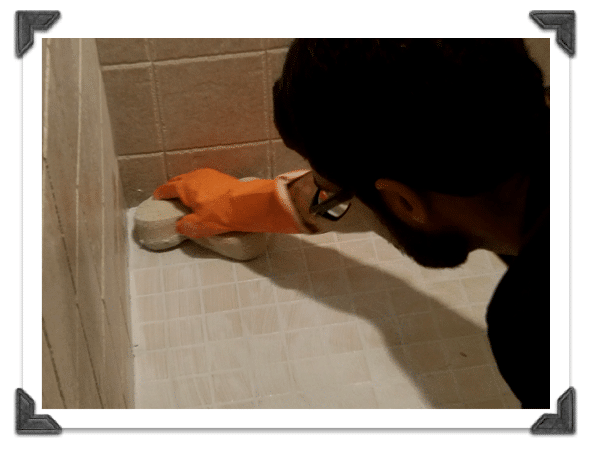
Move your first bucket of warm water into position. Dunk the sponge into the bucket then squeeze out the excess water.
Use the soft side of the sponge in a circular motion 1 or 2 times then turn it over and do the same thing with the nylon scrub pad.
Clean off your sponge in the bucket of water and repeat this process until the sponge becomes too gunky.
Switch to your second bucket of water and use a new sponge once the grout becomes hard to remove. Continue this cleaning process until all of the epoxy shower grout is transferred from the surface of the tiles.
You may get away with using only 2 out of the 3 buckets of water. But I had to use the third bucket in order to completely clean the tiles.
Now for the finishing touch.
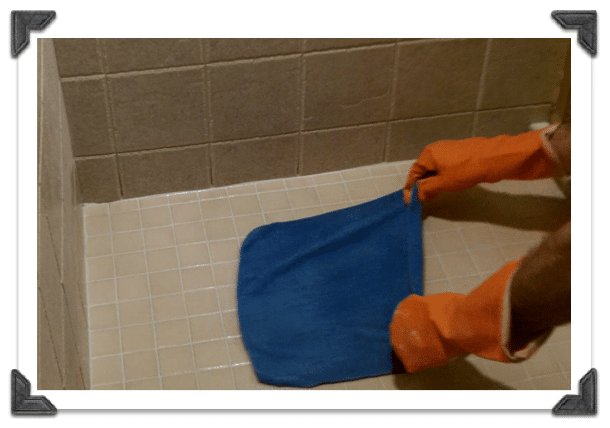
Grab your microfiber cloth. Submerge it into your last bucket of water (which should be relatively clean) and squeeze most of the water out of it.
Place the cloth on the surface of the tiles then drag it diagonally across to remove any leftover grout haze.
Do this for the entire shower tile surface area and double-check that the grout lines still look good (I had to retool a few but it wasn’t a big deal).
You’ll love epoxy grout because it won’t stain or crack like the normal sanded or un-sanded varieties.
After speaking with LJ, the technical service rep for CEG Lite, I learned that epoxy grout is pretty much impermeable to water. This means that it makes your shower floor virtually waterproof and also eliminates the possibility of mold growing in the grout joints.
Mold and mildew will grow on the surface of anything, even epoxy shower grout. This is especially true in showers where soap, hot water, and skin oils create a buffet for growth.
But there’s no chance of the mold penetrating inside epoxy grout, there’s simply no space within the epoxy matrix for this to happen. This isn’t the case with sanded or un-sanded grout due to their structure having small pockets for mold to penetrate.
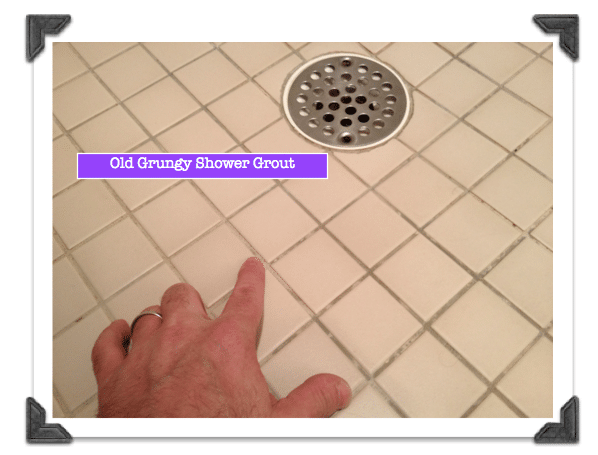
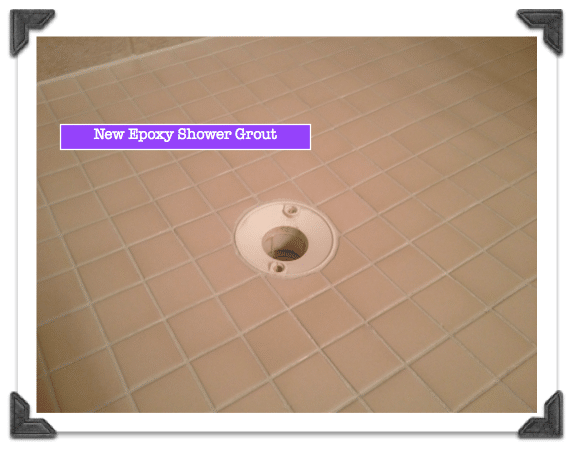
Here are some before and after pictures of my shower grout so you can see what I was dealing with (In case you need help removing old grout here’s a link to my tutorial)
What’s Next
Epoxy grout is a great option when tiling shower walls. Especially if you want low-maintenance bathrooms!
If you’re doing a bathroom remodel and need help, join one of our online courses – they’ll make your bathroom renovation much easier!
Let me know if you have any questions and I’ll do my best to help.
Thanks as always for reading, watching, and being part of our awesome community.
Cheers,
Jeff


