Tiling showers can be difficult.
Plus, it can quickly turn into a big mess.
This tutorial shares five mistakes DIYers make during their project.
I promise you won’t make these same errors after reading this.
Let’s dive in!
Your Tile Shower Wall Installation
I’ve organized this tutorial into the following sections:
- Tile Design and Layout
- Mortar Selection and Mixing
- First Row of Tile
- Mortar Application
- Tile Installation
- Bonus Tips
You can tap the above links, which’ll take you to the specific part.
Also, you might want to grab a pen and paper. That way, you can take some notes.
Tile Design and Layout
The first mistake is not having a plan.
I draw the tile design on graph paper for every shower I install.
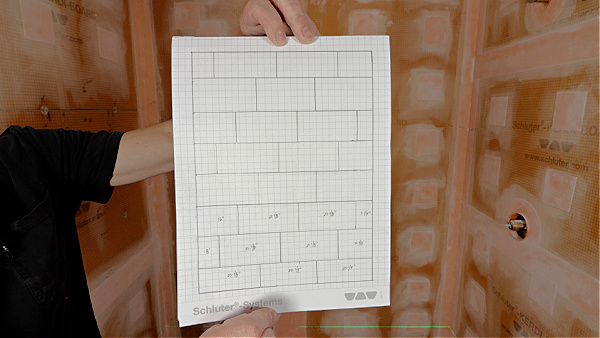
And this helps me plan the tile shower so there aren’t slivers or weird cuts.
For example, I normally cut down my first row.
This helps me scribe cut the bottom of the tile against the shower floor tile.
In addition, I plan the tile layout so there aren’t any slivers in the doorway or at the ceiling.
I also plan the layout so there aren’t slivers at shower niches or benches.
Furthermore, I typically plan the shower niche framing at the same time as the tile design.
But again, the biggest mistake is not having a plan to follow based on good design.
Mortar Selection and Mixing
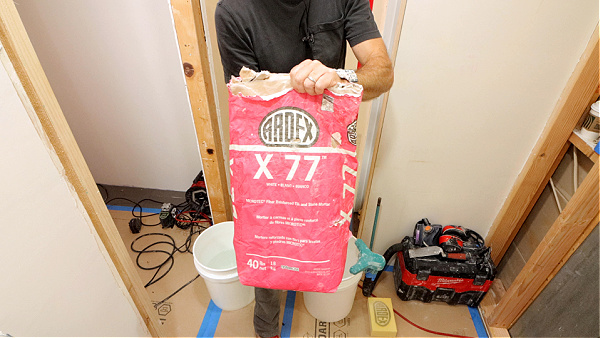
The second mistake is not selecting the right mortar and mixing it properly.
I like using a polymer-modified mortar like Ardex X77 for large format tiles, e.g. horizontal or vertical 12×24 porcelain.
Other great mortars include Schluter ALL-SET and Custom ProLite.
Choosing the wrong mortar can make shower wall tile truly frustrating.
Also, it’s critical to read the directions and follow them.
Using a measuring container for the water and mortar is very helpful.
Cold clean water should be added to the bucket, followed by the powder.
Then I use a dedicated mortar mixer with a paddle specifically for mortar.
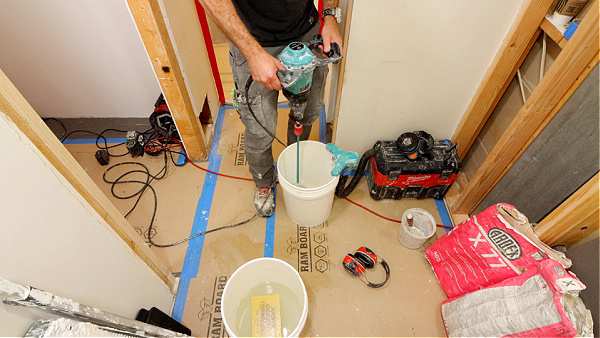
Frequently, folks use a drill and that is not powerful enough. The motor will burn out.
Plus, drills will not make the mortar a super creamy texture, which promotes a good tile bond.
I use the Collomix Xo-1 with a bird cage paddle, but Ridigd also makes a good mixer.
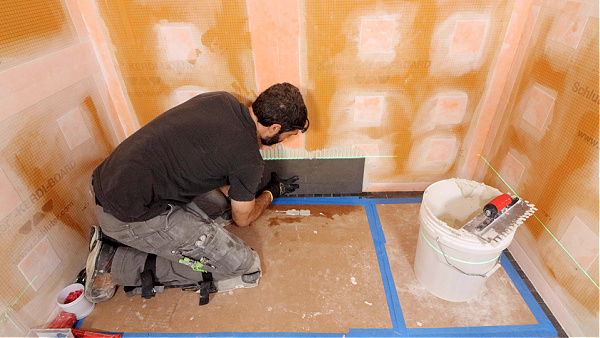
First Row of Tile
The third mistake is not setting the first row correctly.
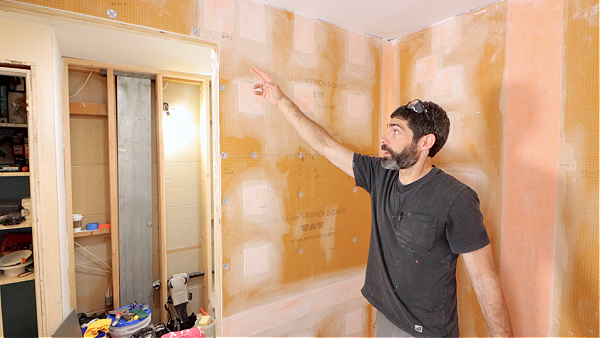
I always mark the centerline of the wall on the floor.
Then I align my tile with that location and add 1/16 inch horseshoe shims under the tile.
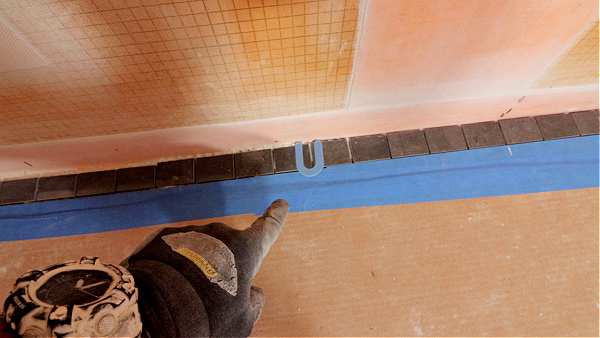
The first row of tile should have an expansion joint at the bottom between the tile shower floor (which I always install first).
Spacers should be under the tile when marking the cut location.
I dry-fit the cut tile and check that its top edge is even with the horizontal laser level.
This procedure will set you up for success with the entire shower wall.
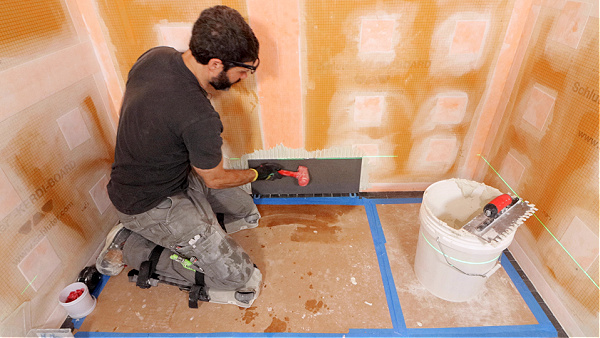
Mortar Application
Mortar application mistakes start with the wrong trowel.
The goal with shower wall tile is to have 95% mortar coverage between the tile and backer board.
So it’s imperative to choose the right trowel that provides that coverage.
For example, I use a 1/2 inch by 1/2 inch U-Notch trowel by Perfect Level Master for 12x24s.
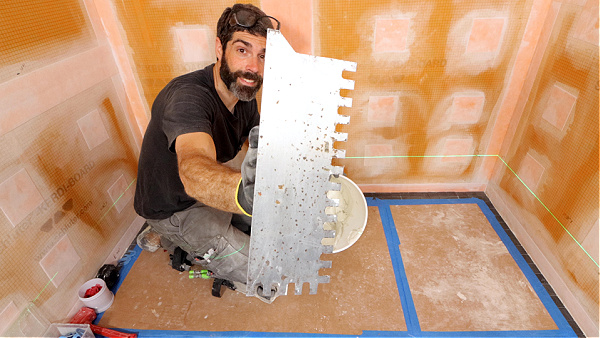
Also, I apply the mortar by holding the trowel at a 45-degree angle to the wall.
This maximizes the trowel notch/bond between the tile and backer board.
Additionally, all the trowel notches should be parallel with the short side of the tile.
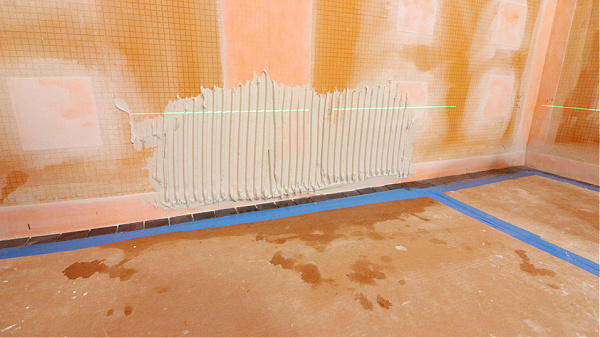
I’ll explain why this is important in the next section.
Another error is not keeping the work area clean.
Mortar that gets on the floor, tools, tile, and clothing will magically appear elsewhere.
Thus, I recommend sponging mortar off these surfaces.
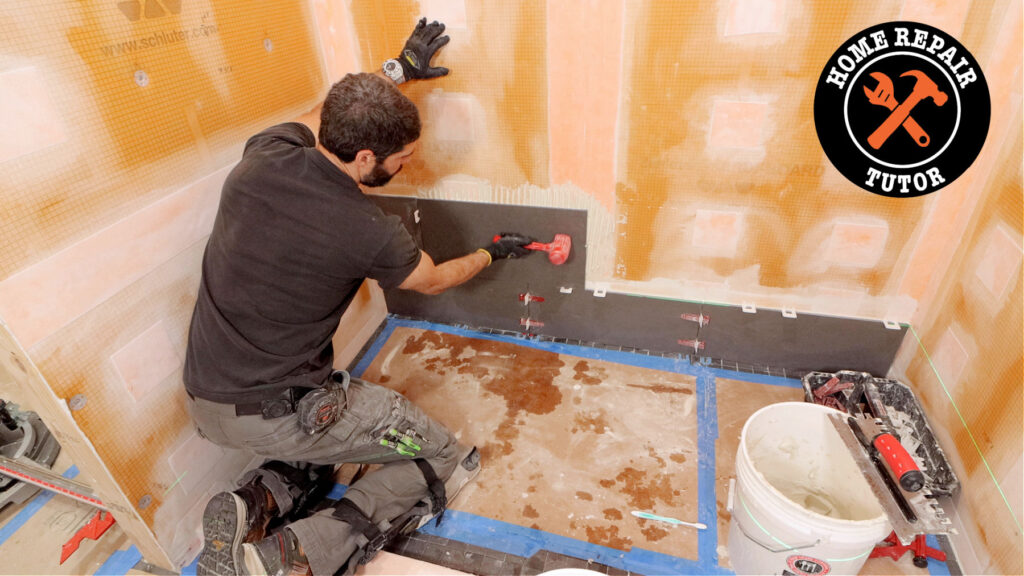
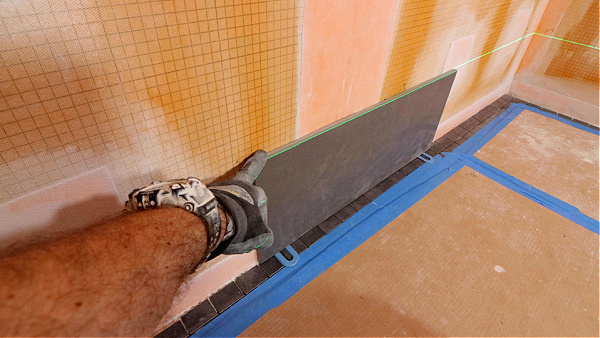
Tile Installation
The fifth mistake is setting the tile incorrectly.
When the tile is pressed into the wall, it should be moved laterally to compress the trowel notches.
Remember how I mentioned the trowel notch direction?
If the trowel notches are parallel with the short side, that is the shortest distance for air to escape.
As a result, this helps reduce air being trapped between the tile and the wall.
Thus, the mortar will collapse and create a good bond.
I also lightly tap the tile with a rubber mallet to help collapse the mortar.
All this combined will give you that 95% mortar coverage.
But I have more tips that will make your shower wall even better!
Bonus Shower Wall Tips
Tile lippage can be a problem with tiles.
This is when tiles are not flat against each other and one tile is higher than the other.
Tile leveling systems are a great way to solve this problem.
I use T-Lock, which has a Clip and Wedge design.

The Clips have integrated grout spacers, and normally I use 1/16 inch.
Another important tip is to have expansion joints at adjacent walls and the ceiling.
Typically, I like 1/8 inch joints between the tile and walls.
But at the ceiling, I prefer a 1/16 inch gap.
My video has even more tips and is well worth the 6 minutes!
Tile showers can be a fun challenge when you have the right plan.
If you want to unlock all my bathroom remodeling videos, courses, and personal coaching, join Home Repair Tutor today – it’s one of the best online resources for anyone renovating a bathroom. Tap the button below to learn more
Thanks for reading this guide. I hope it helps you out!
Jeff