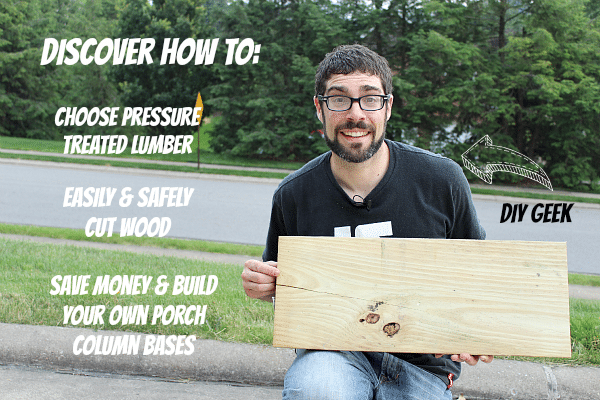
I decided to give it a shot and build our own porch column bases out of pressure-treated lumber.
It’s amazing how cheap you can construct stuff with a little know-how and some tools.
Plus, the big upside is affordability. Wood is super cheap, durable, and can look awesome.
Let’s dive in!
Porch Column Inspection
This post is important to you because:
- You’ll learn how to pick out pressure-treated lumber
- You’ll see how to use a rafter square and circular saw to cut wood quickly & easily
- And finally, if you have porch column bases like mine you’ll save at least $200 doing this project yourself
To refresh your memory, here’s the rotted wood that was “supporting” our porch column.
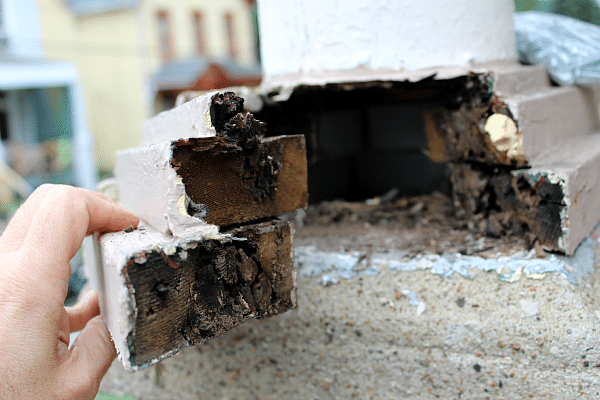
This is 10 out of 10 for rottenness.
These buggers didn’t exactly let us know they were going to the dark side until it was almost too late.
We noticed this dangerous issue while doing an annual inspection of the house.
Picking Pressure-Treated Lumber
Before getting started on this project we wanted to know which material was better: pressure-treated lumber or PVC boards. A trip to the local lumber yard would prove to be invaluable.
Eric was the manager who helped clear up a lot of questions for us.
He was super patient, listened to our story, and even looked at several photos of the porch. We told him our idea of making a tiered platform and he agreed that the design would hold up the porch roof’s weight.
So we got a Green Light on design (this part of the project wasn’t hard since all we did was copy the old design for the most part).
Eric ultimately convinced us to go with pressure treated wood because PVC expands & contracts at a faster rate than wood. Not good if you’re looking to hold up a roof that weighs hundreds if not thousands of pounds.
Yes, PVC will never rot or be ruined by harsh rainstorms. But the expansion and contraction over time could cause the column to move out of plumb. This is helpful info to learn because I’d prefer our porch not crush someone into a pancake!!
Planning Porch Columns
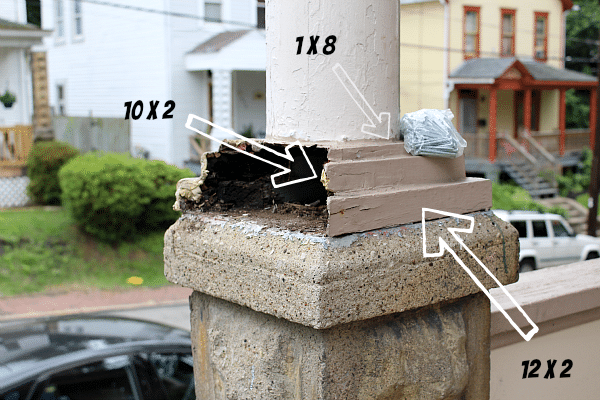
Before going to the lumber yard, I measured the old bases and came up with these dimensions
- 12 x 2 (very bottom base)
- 10 x 2 (middle base)
- 1 x 8 (top base right under porch column)
Perhaps Eric could see our angst or had a great cup of coffee or is just a great guy. Whatever the case, he was fantastic to work with because we got our wood for 50% off and he threw in some scraps for free.
He was able to give us a good deal due to some of the wood being splintered at the ends. How should you choose your wood if you don’t have an Eric?
Make sure there isn’t any major splintering through the entire piece you’re working with and try to avoid major knot holes more than 1 inch in diameter.
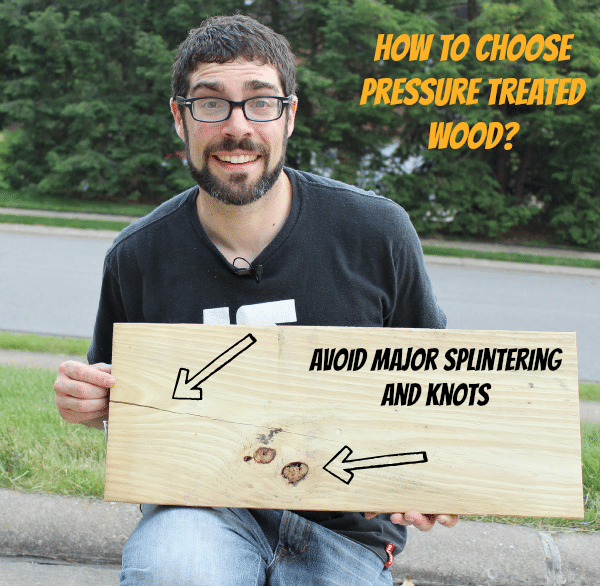
My wife took this picture and said, “You look goofy”. Thanks, thanks a whole bunch. But who cares, the point is to show you what a bad piece of wood looks like. Who cares if there’s a goofy-looking dude in the photo, right?
Once we sorted the good wood from the bad it was time to make the individual pieces of the tiered column base design.
Making Custom Porch Column Bases
A long time ago we made the mistake of thinking that a huge setup with sawhorses and clamps was necessary to cut wood. In reality, all you need are two 2 x 6s, one circular saw, a measuring tape, pencil, and rafter or combination square.
And this is much sturdier and safer in my opinion than working on a table. The 2 x 6s can be placed on a level sidewalk, patio, or driveway. Fortunately, our driveway has a level pad!!
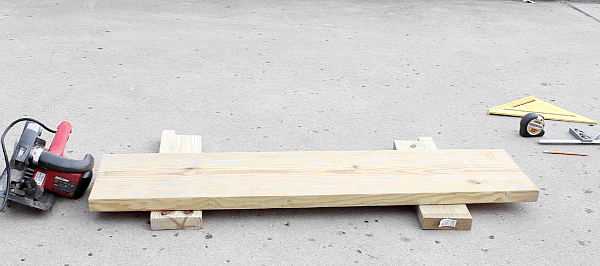
The bottom portion of the column base is a 12 x 2 piece of wood. After inspecting the wood we noticed there was some splintering on the end.
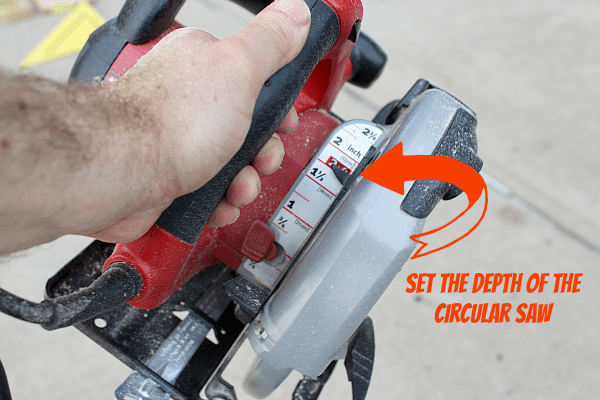
So this needed to be trimmed off. If you’re cutting wood you’ll need to set the depth of your circular saw to be a bit deeper than the wood’s depth. In this case, we used the 2 x 4 setting since the 12 x 2 is really 1.5 inches deep.
Cutting our base pieces was super easy. The width of the 12 x 2 was 11.5 inches. So we measured 11.5 inches over from the end, made a mark with the pencil, and positioned the rafter square on the board.
Rafter squares are very handy when cutting wood because the circular saw can use it as a guide to making straight cuts. You can center the saw’s blade on your pencil mark then slide the rafter square onto the wood until it’s flush with the saw’s guide.
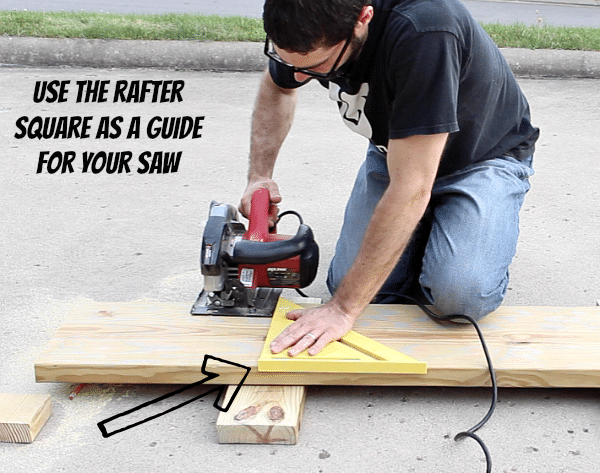
In less than 10 seconds we had a perfectly square piece of pressure-treated lumber. Yeah, it’s that simple. In fact, it’s easier than loading the dishwasher in my humble opinion.
We did this for the 10 x 2 and 1 x 8 sections of wood as well. Now, here’s the cool part. All our measuring for the day was done because we used the newly cut bases as templates for each successive cut.
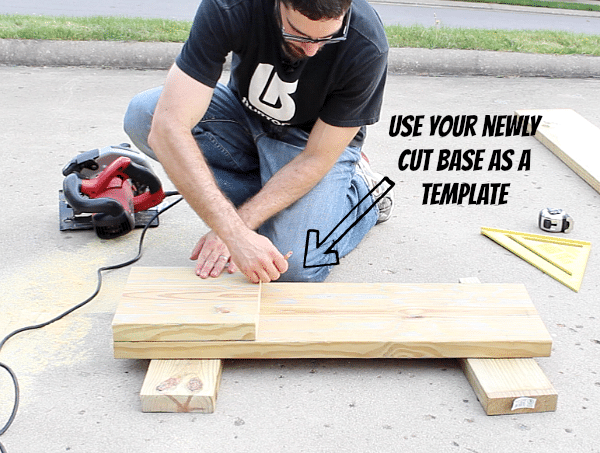
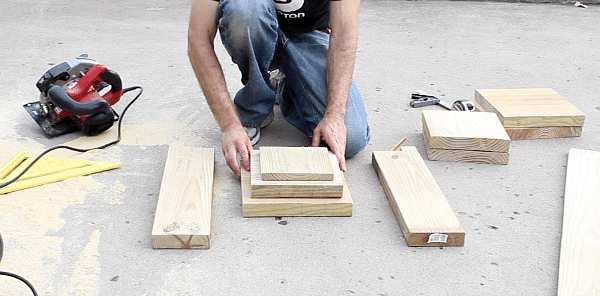
Literally, all the base pieces were cut and ready for assembly in less than 15 minutes. Making This Old House Proud, baby!! Oh, yah.
The initial 3 tier look wasn’t bad but a little blah and boring.
Customizing Porch Bases
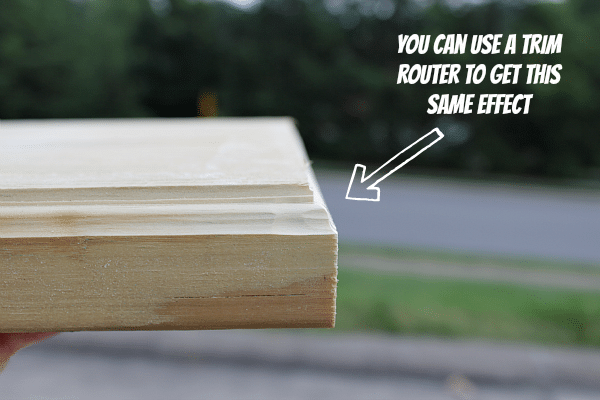
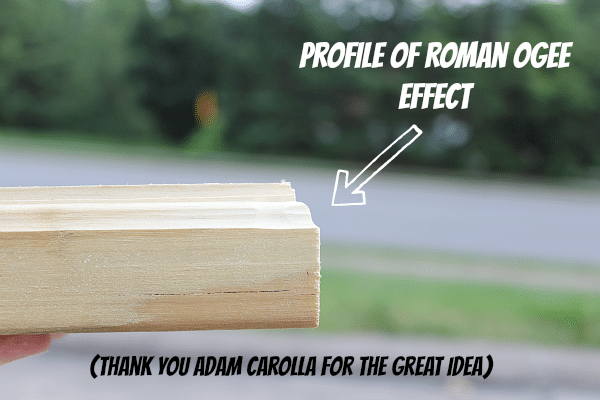
It’s at this point, a little voice crept into my head. It was Adam Carolla and he was telling me to add a Roman Ogee effect with the trim router that was collecting dust in the tool cabinet.
So I routed the bottom and middle tiers to make them look more interesting and custom. The top piece of wood couldn’t get this same treatment because the router would take off too much wood and the column would hang over the edge.
Take a look at what a difference the router made.
The next step in building the bases was to stack them so that the porch column’s weight would be evenly distributed in the center. We placed the 10 x 2 on top of the 12 x 2.
Stacking Porch Bases
Then I made the two sides of the 10 x 2 flush with the 12 x 2 edges like in the picture below and measured the distance between each respective edge of the 10 x 2 and the 12 x 2. Our distance was 1 inch based on my measuring tape in the picture.
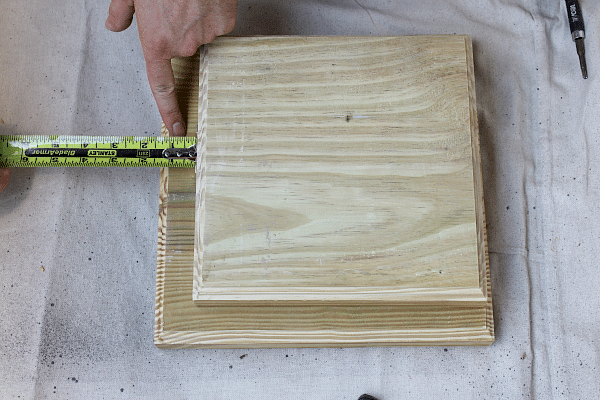
We halved this distance, made marks 1/2 inch from each of the four corners and used the rafter square to draw straight lines across the 12 x 2.
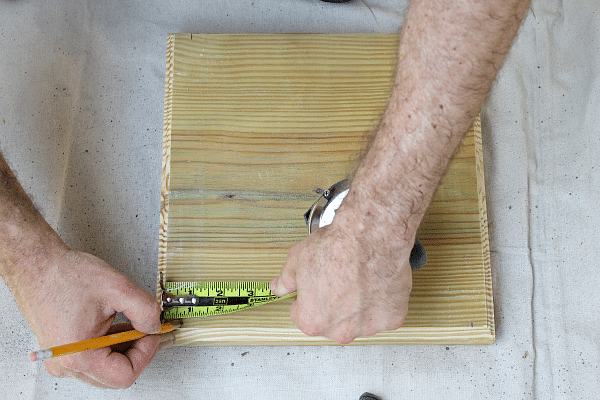
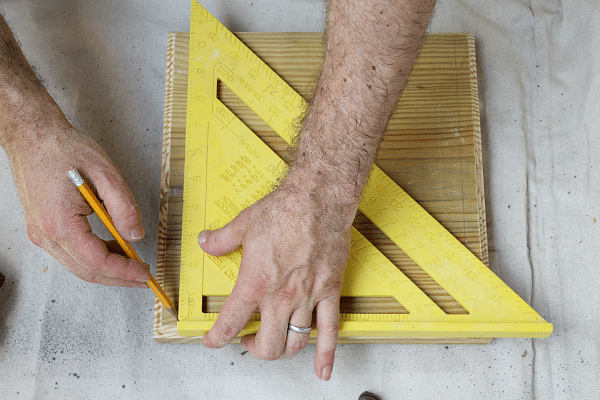
We were left with a penciled template on the 12 x 2.
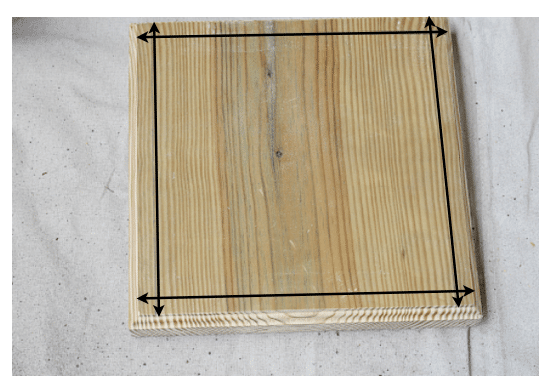
We then placed the 10 x 2 inside this template and secured it to the 12 x 2 with 2.5-inch deck screws. This is the easiest way to center the 10 x 2 on top of the 12 x 2.
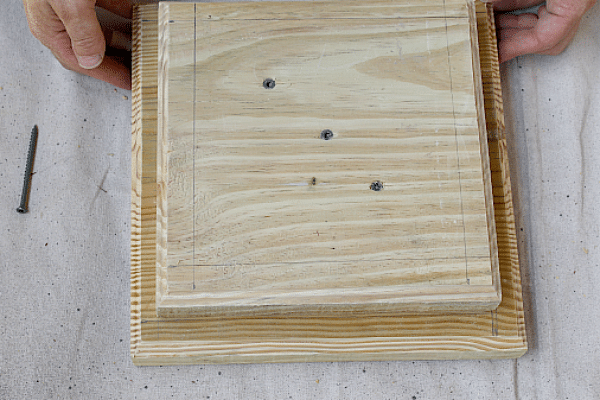
Since I’m not a complete nimrod I did the exact same template strategy on the 10 x 2 for the 1 x 8. And we placed “X” marks in the corners of the 10 x 2 to show the screw orientation because the 1 x 8 would obviously hide the screw heads.
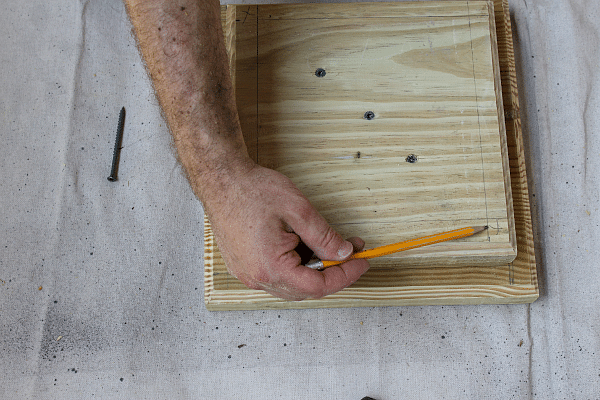
The final step in making the tiered column bases was to add the 1 x 8 on top of the 10 x 2 and screw it in place. We made sure the screws would be hidden by the column by spacing them within 3 inches of the center of the 1 x 8 since the diameter of the column is 6 inches.
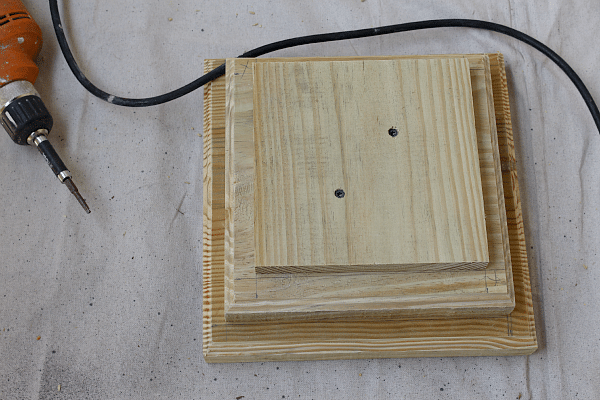
Good thing I paid attention in high school geometry just enough to remember the basics of radius and diameter. Although lingering nightmares about isosceles triangles and proofs still invade my brain at night. Weird stuff!
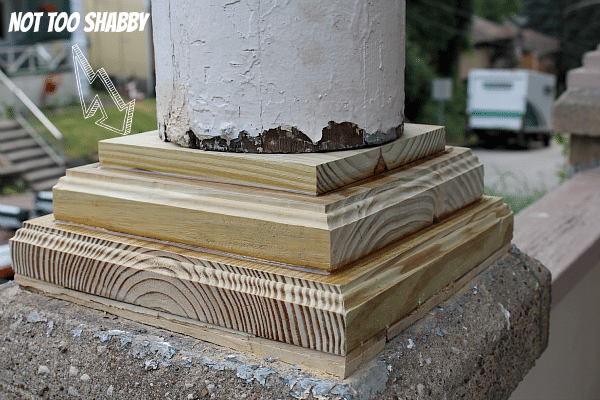
Anyhow, the column base construction was a HUGE success. Here’s the final look. Of course, I’ll prime and paint the base as well as the column (just as soon as it stops raining here in Pittsburgh, which could be never).
What’s Next
This project began when I decided to inspect the front porch columns – good thing I did!
If you’re doing a bathroom remodel and need help, join one of our online courses – they’ll make your bathroom renovation much easier!
Let me know if you have any questions and I’ll do my best to help.
Thanks as always for reading, watching, and being part of our awesome community.
Cheers,
Jeff


