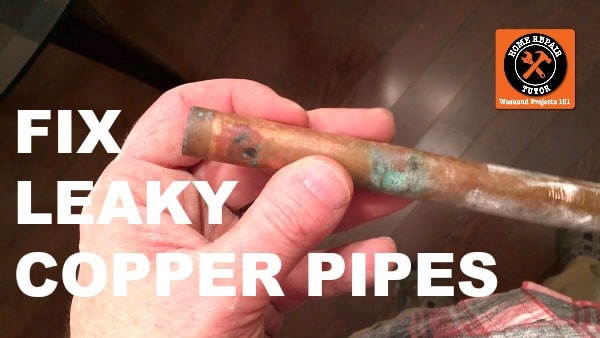
Today you’ll learn how to fix a copper pipe.
Here’s the Story:
Last Sunday I got a frantic text from my wife…
…water was leaking from the kitchen ceiling!!!!!!!
What would you do in this situation?
If you don’t have an immediate answer you’re in luck.
Seriously, EVERY homeowner should know how to fix leaky copper pies.
Let’s dive in.
Why Learn to Fix Leaky Copper Pipes
How much does a plumber cost on Sunday?
You don’t want to find out…trust me.
So it’s good to know how to repair copper pipe leaks.
After today you’ll have the confidence to do this yourself.
Here are the supplies you need
- SharkBite Couplings
- SharkBite Depth Tool
- AutoCut Copper Pipe Cutter
- Ridgid No. 10 or 15 Tubing Cutter
- Milwaukee PEX Tubing Cutter
- Emery Cloth
- Drywall Saw
- Utility Knife
- PEX (optional)
- Copper Pipe (Type L)
- Sharpie Marker
- These Amazon Links help support Home Repair Tutor, many thanks for using them
You don’t need all these tools.
But they’re nice to know about.
What’s the first step when assessing a water leak?
How to Start a Copper Pipe Repair
Unless there’s water gushing from the ceiling, leave the water on.
That way you can identify the location of the leaking pipe.
I know this sounds NUTS, but it helps spot the leak.
Feel the ceiling or wall for sponginess.
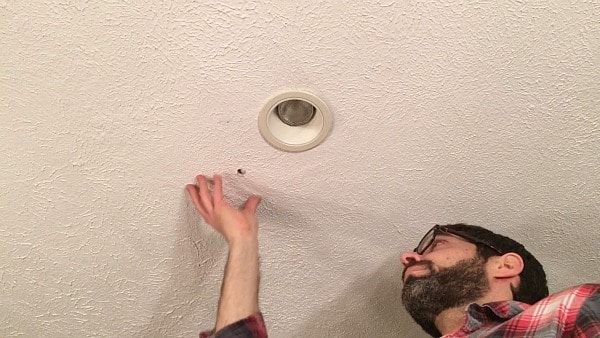
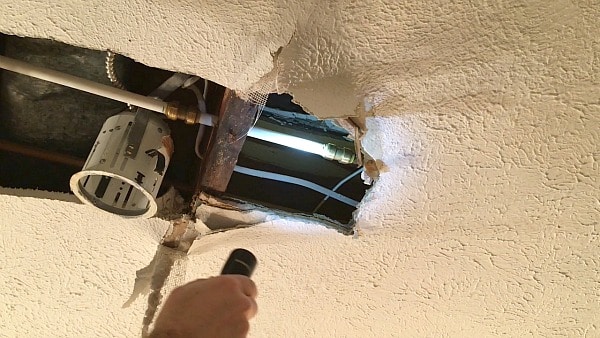
Saw a small square or rectangle in your drywall ceiling.
Yah, this is scary but you have to do it — PLUS your drywall is ruined, so who cares, lol.
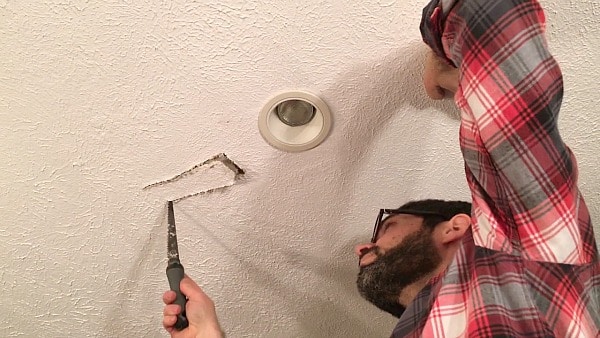
Do your best Magnum PI impression and inspect for the leaking pipe.
Mustache is NOT optional.
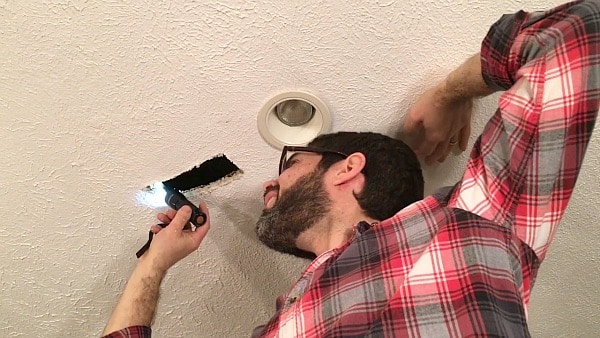
Here’s what I found:
…a copper pipe pinhole leak, FUN TIMES
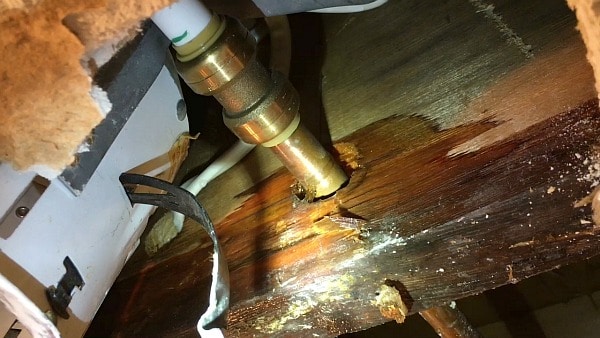
Once you locate the pipe leak, shut the water off to the house.
Drain the water lines, I did this at our laundry tub.
Please excuse it’s grime. I wasn’t expecting to do this tutorial on a Sunday night!!
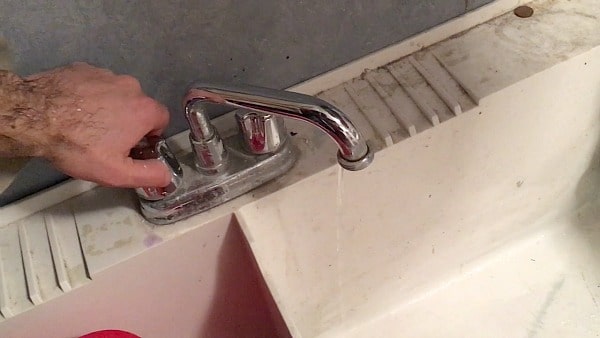
Whew, dealing with a water leak can be stressful.
What’s the easiest way to repair a pipe leak?
Can You Fix a Copper Pipe Leak Without Soldering?
Yes
One word:
SharkBites
Fortunately I had some spare 1/2 inch SharkBite couplings in my tool box
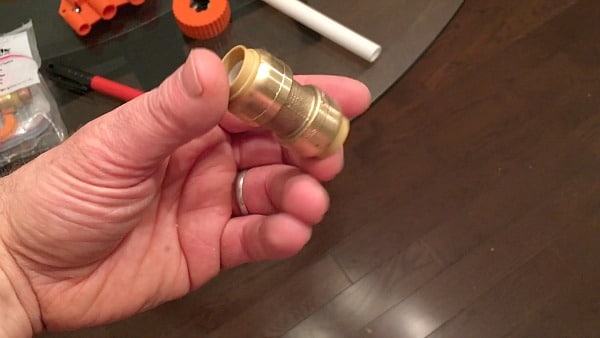
These slide onto copper, PVC, or PEX pipes.
AND anyone can use them.
Start the repair by cutting out the leaky piece of pipe.
This is surprisingly cathartic (in the video I show you my favorite tool for doing this)
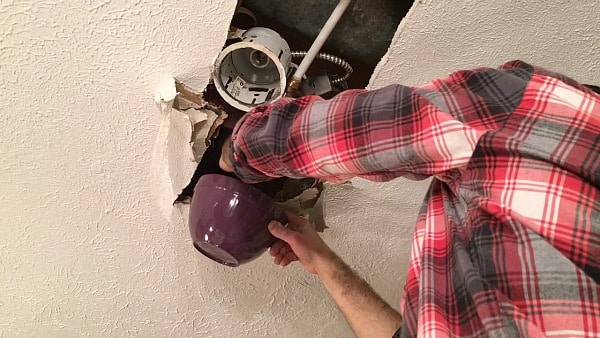
It’s not a bad idea to hold a container under the pipe.
When you cut it, any extra water will drain – prior experience and harsh words from my wife have trained me to do this!
If you use copper choose Type L because it’s thicker than Type M and will last longer.
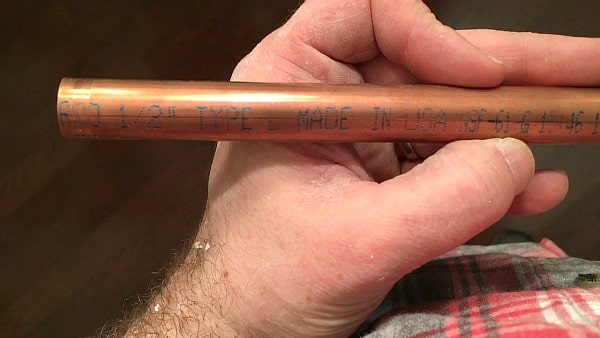
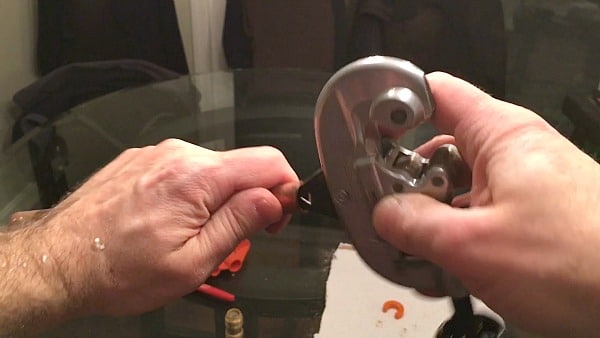
Debur your copper pipe with a pipe cutting tool or utility knife.
This is ULTRA important for SharkBites (or soldering if you choose to go that route).
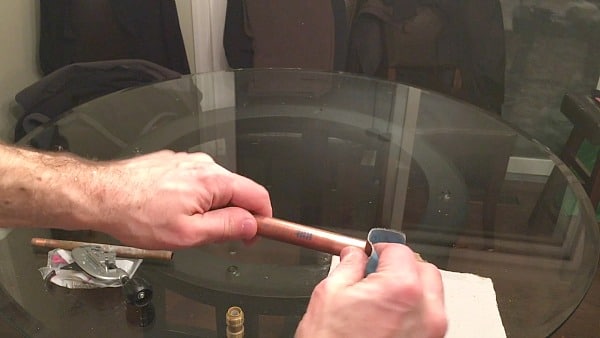
Then smooth down the first 1 inch of copper pipe with emery cloth.
Why I Love SharkBites
SharkBite fittings are great because you simply push them onto pipes.
Seriously, I’m pretty sure my 11 year old daughter can use them.
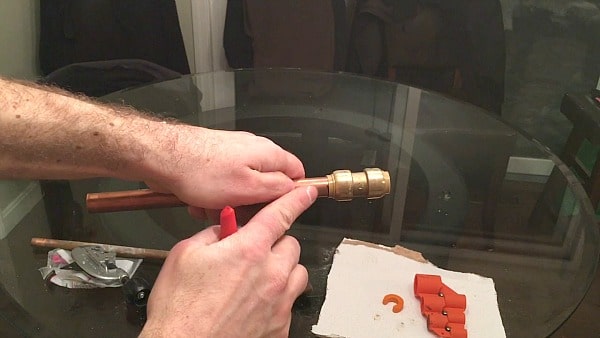
You need to make sure they fit on the end of the pipe by 1 inch.
Use the SharkBite depth tool or a measuring tape to make your mark.
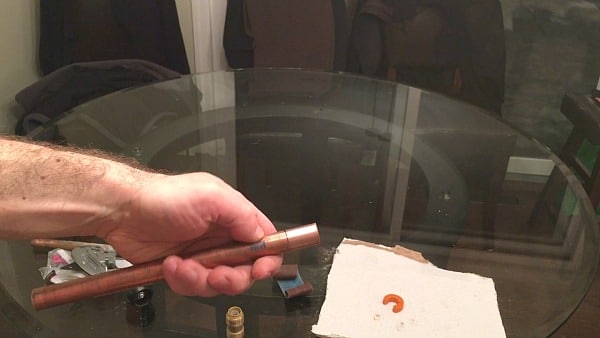
Push the SharkBite onto the pipe and make sure it’s flush with the mark.
Super easy.
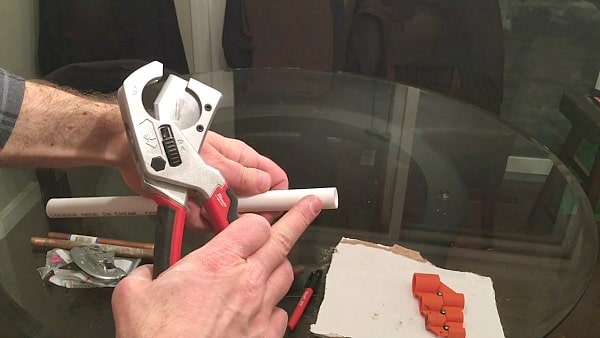
Since we’ve had issues with copper I chose to use PEX as my replacement pipe.
Cut the end of the PEX square with a PEX tubing cutter, Milwaukee makes a good one.
(NOTE: PEX tube cutters make great cigar cutters, too)
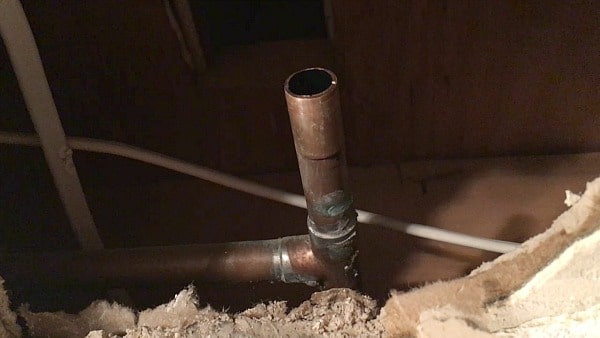
In the ceiling, I cut the copper 2 inches shy of the T fitting.
I had to debur and emery cloth this pipe as well.
Then I made my 1 inch mark for the SharkBite fitting.
How to Install SharkBites on Copper Pipes
There was slack in my copper line, so I decided to use two 1/2″ SharkBite couplings.
If you don’t have slack in your copper line you can use a SharkBite Slip Fitting.
The Slip Fitting can slide on the pipe and allow you to attach your replacement pipe without trouble.
Measure the distance between your two SharkBite couplings and add 2 inches onto your dimension.
I’m not good with measurements but this is easy.
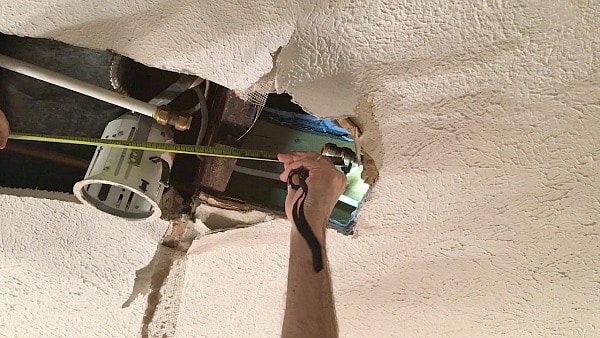
This is the dimension for your new piece of pipe.
Once it’s cut square, debured, and emery clothed you simply push it into the two SharkBite couplings.
The video tutorial has a few extra tips…
…PLUS a cool SURPRISE giveaway.
I explain the giveaway in the video
What’s Next
SharkBites and PEX fittings are great options if you want to avoid soldering.
Our PEX Pipe tutorial is a great if you’ve never used it.
If you’re doing a bathroom remodel and need help, join one of our online courses – they’ll make your bathroom renovation much easier!
Let me know if you have any questions and I’ll do my best to help.
Cheers,
Jeff

Hi I’m Juan
Yes definitely I will use sharkbites they are very good for a quick nice and neat repair job , my house is more than 100 years old and so far I’ve been here for 10 years and I didn’t have any pipe leaking thank God; but that kit will come handy in case of a emergency Repair
Thank you
That’s good news Jaun, you likely have a super solid house. Those 100 year old structures are surprisingly resilient!!
Thanks so much for the repair using a “sharkbite” coupler. since I am alone, and usually am a DIY person, (it’s too expensive for some things to hire someone) these should work out great for me. After our FREEZE my washer copper pipe, the cold side came loose it appears from a coupler, and then I noticed a pin hole or tiny split in the hot water pipe also. I went to my local hardware store, and of course they were out of the “straight sharkbites” and had the angled ones. I went ahead and got those hoping they will work for now. I “think” I have enough room to use those. I could not find my pipe cutter, and had to buy another one, so then I realized I could have gotten all of this and correctly online, and saved money. So, I went ahead and ordered online the other connectors, 4 of them so I have a couple of extra and a different pipe cutter. I’ve been without water now for going on 3 days, and I am trying to decide whether to wait till Tomorrow or Monday to make the repairs, when the others come in or go and try to use what I have. Anyway, THANK YOU! I will NOW “even if I don’t get the one from your giveaway) will keep a “kit” handy at home for this type of circumstance. I am again alone, have “multiple health problems” and really no close family that can help. So, if these can help me to make those repairs myself, and save money doing so, that will be wonderful!
Thanks Pam for your kind words. You’ll be able to use the SharkBites and they’ll last a long time if you follow all of the directions. If you have any questions feel free to ask, I’m more than happy to help.
Shark bites only work on copper pex or cpvc 100 year old house probably galvanized pipe, don’t get your hopes up for quick fix easy to repair with threaded adapter though
I live in a 36-year-old house and haven’t had any pipe leaks yet. But you never know! When replacing my hot water tank a few years ago, we discovered a copper elbow that just pulled apart by hand because it had never been soldered properly in the first place, but by some miracle it had never leaked. So an emergency kit would be a great idea. Appreciate your podcast. I noticed your ceiling where the repair was done is textured or spackled. Have you ever done a video or podcast on repairing textured ceilings?
Whew, you sure were lucky Phil. That’s crazy you never had a leak.
Thanks for listening to the podcast, really appreciate your support. Hope it’s helpful.
So, the textured ceiling thing…I made a video about that over on YouTube.
Here’s the link to the video and the written tutorial
http://hrtllc.wpengine.com/how-to-patch-drywall
It’s more art than anything else.
What kind of texture do you have?
Would 100% love to try ShareBite, I have to old valves in the basement that are going to go at any moment. I’d like to replace them proactively and don’t want to mess with soldering!
I’d recommend the SharkBite route Matt, especially if you can see the valves. They’re super easy to install.
Are your looking to replace shutoff valves?
I would love to have the emergency repair kit as my plumbing is getting older and we have had a few leaks.
What kind of leaks have you had Toni?
when ever i turn the water on, i will come off the full open by about 1/8 turn so there is some play.. i want to have some play in the handle. i don’t want it to freeze in the open position. thanks for your programs.
I am the retired guy in a neighborhood of widows and in addition to my home repairs
I get calls from frantic neighbors about leaks on the weekends. The kit would be a huge help to me. Helping others is something I enjoy and never charge.
I own a house that is around 70 years old and I am seriously considering replacing as much if not all of my copper pipe. I have had the pinhole problem as well as leaks caused by putting stress on the pipes to replace valves etc. I think an emergency repair kit is a great idea. I am going to look into it on my next store run.
Bob, I’m in the same situation. My copper pipes are 60 years old and they keep springing leaks. At some point, it will be more cost effective to re-pipe the whole house, which is a small one-story rental. I read that if copper pipes have green tarnish on them, they are on their way out. I don’t know if that’s true, but mine have lots of green. Fixing the leaks myself is fairly cheap, but the water damage is quite costly. On one occasion, I had to tear out all the carpeting.
Ooof, carpeting is expensive to replace…hardwood is even worse.
If the pipes haven’t created too many problems you might want to hold off on replacing all of them.
Good to know we’re not the only ones suffering from repetitive pinhole leaks Bob.
I also need to assemble a kit, funny enough. Those fittings were the last ones in my tool box!!
Yes I will certainly use Shark Bites and anything else you see fit to put into your Emergency Pipe Repair Kit because my building was built in 1945 and pipe leaks are a common occurrence here, and I am on the condo BD so I help deal with such problems. I built an under-sink water purifier using push-fit connectors so I know it’s a great concept. I hope you won’t count it against me that I don’t smoke cigars.
Lol, don’t worry Steve, I don’t smoke.
The cigar cutting thing came to mind while writing the tutorial at 5 am, who knows why,lol.
Great job assembling a water purifier with the SharkBites!!!
I followed one of Jeff’s earlier tutorials about Sharkbites and gave it a try. A copper pipe in a 60 y/o house sprung a leak inside the wall, behind the top of the furnace and water heater. I had no prior experience with plumbing, but following the tutorial, cut out the drywall and the pipe. The biggest difficulty was the area is so cramped it was really hard to access the pipe. I had to take down a wall cabinet to reach the right hand side. I ended up soldering it, which was not hard at all after a few practice runs on spare fittings. The left hand side, behind the furnace was very, very difficult to access. I didn’t want to solder, out of fear of starting a fire in such a constricted area. So I used a Sharkbite on that end. It was still difficult, because I was trying to shove it onto the pipe, with no way of reaching the pipe and holding it steady. It finally worked, but I had to buy a Sharkbite accessory that helps hold it open. A total bloody nightmare! But I have continuous problems with the pipes in that house, so I expect more repairs in the future. It would be fantastic to have a Sharkbite kit on hand! Thanks, Jeff. Your tutorials have saved me a fortune in repair costs!!
Your story is awesome Laura, thanks for sharing and being a source of inspiration for us. It goes to show that persistence is key, that not giving up on yourself can be the best thing. Thanks so much for watching the videos and being so kind with your comments Laura, you’re the best.
I have used shark bites before really easy to use makes the repair easy if you don’t know how to solder I would love to have the repair kit to keep me from running to the store yet again when they may be closed
That was my fear as well Alan, not having the supplies and the store being closed.
Of course you can turn off the water, but why do that when you can put up a solid repair in 20 minutes.
as a 70 yr old retiree I am impressed that you make it so simple Thank you god bless you and your family.
Thank you Harry, you should have seen the first time I did this repair, it wasn’t so pretty, lol.
But time and practice help a lot 😀
Live in a older house, I’m 70yrs. young, and anything to make life easier is a blessing. Thanks for the chance to win.
My pleasure Jim, having a kit like this has saved my skin a few times!!
Being a woman and the wife of a man who doesn’t know or even want to know how to repair a household problem, I take every opportunity to stock my arsenal with facts that will help if anything happens in our home. Thank you for making this available, Jeff! Keep on keepin’ on…
You’re the nest Meri, thanks for the kind words.
Any time you have a question or want to post your own tips please do so.
The more the merrier.
Jeff – Shark bites are a wonderful invention. As I hire a few different plumbers to repair such things on commercial properties, one thing you didn’t mention in your (excellent) presentation is that soddering requires dryness. If you attempting to drain down a difficult area and there is trapped water with air pockets, it’s a waiting game and you’re on the plumbers clock! Who cares about dryness with a shark-bite?? Cut away the bad pipe, slam on the shark bites and declare victory! Think shark bites are expensive??….try the plumbers hourly wage waiting for the dry end of a pipe!!….pays for itself 10 times over! This particular repair tutorial…..so valuable & worthwhile, Jeff. Much thanks!
Howard
Thanks Howard, you bring up a great point. The copper does need to be dry when soldering.
These days my plumbers are using more PEX and special copper fittings that don’t even require soldering.
The problem is these fittings require a $1800 compression tool that no ordinary person would buy.
The technology is there to eliminate soldering but it can be expensive…that said, SharkBites are very affordable for the DIYing homeowner.
OMG… could I use the leak kit. I live in a 170 year old house with copper pipes. They constantly spring leaks in various places. I have always fixed them the old fashioned way by sweating a new pipe on…. this is great!! I never knew about “sharkbites”. I am going down to the hardware store to purchase a few, just to have on hand. I would love to have your pipe repair kit and even if I don’t win it, I am going to make up my own because it is a great idea!!! Thank you for all your helpful videos!
Thanks Jan, can’t believe your house is 170 years old…that takes the win in terms of the oldest house mentioned on HRT, lol.
You’d like SharkBites. They’re great when you’re in a pinch, especially when you have leaks.
Glad you like the videos, let me know if you have one you need for this year 😀
Love your site and thank you for all the great helpful information! When we moved in to our older house a few years ago I noticed spots throughout the house in the copper plumbing that had been repaired with pvc the same way. I figured it is only a matter of time before I need to repair a portion myself. This would be very handy to have already prepared kit. More importantly I would surprise my wife and appear like a prepared handyman… I am neither prepared or a handy man.
Something tells me you’ll be a great handyman Dan…and that rhymes, so you’re automatically cool. Having a kit in place totally makes unexpected leaks easy to handle. I was dreading a trip to the Depot but fortunately had the SharkBites in my tool box.
Between myself and my (2) son-in-laws that live nearby, I’m sure there will be a need for this DIY plumbing emergency kit at some point. Love your daily podcasts !!!!
You guys should get multiple kits, and hey, aren’t son-in-laws suppose to take of you, haha.
Thanks Marty for being a podcast fan, too. Hope you got some great tips 😀
I love the SharkBites for repairing leaks. However, I had an occasion to cut the main water line to install a whole house water filter. I needed to put two SharkBite ells to come out of the wall and then run the lines down the wall. The SharkBites can stand very little tension on them or they will leak….which they did in my case. Ended up having to solder the copper in place. Just a heads up for your readers.
Good to know Henry, thanks for the heads up.
Henry W., you might want to check that your Sharkbites are pushed on firmly. I also had a small leak on my Sharkbite, until I pushed it onto the pipe as far as it would go. That stopped the leak. In any event, they are still invaluable to have on hand for emergency repairs, or to use in places (like I did) where the use of a soldering torch is out of reach or presents a fire hazard.
Good point about the fire hazard issue Laura, many home fires are started with soldering.
And I had an issue with the SharkBite leaking…I cursed a bit until see the SharkBite was leaking due to a second pinhole leak!!!
I am a complete klutz in DIY home repair. Any help is truly appreciated and I am loving your video and podcast. I think the shark bites would be a big help for leaks.
Awe, you’re being too hard on yourself Ralph. We’re all clumsy, and nobody is perfect.
Thanks buddy for watching the videos and listening to the podcast!!
Good info. I like the idea of the sharkbite.
Please enter me in to the contest for your emergency repair kit.
Best regards,
Verne
They are a great idea when you’re in a plumbing pinch.
I would LOVE this kit, especially the tools! It would absolutely help, as we are remodeling our 1970’s master bath and moving the sink 4 ft. We’re hoping this updated bath will help sell our house so we can move closer to work and church. (I have my eye on a 1940 fixer upper. Everyone thinks I’m nuts, but I love a challenge!) It would be great to have this kit for the repairs.
You’re not nuts Sharon, updating older houses can be challenging and fun at the same time. Good for you.
Let me know if you want any help with the bathroom remodel. We have a ton of great videos on the topic and many more to come.
I’ve been old fashion and always soldered my copper pipes until I had a place in the ceiling that was hard to get to. Went to Home Depot and reluctantly bought a 1/2″ Shrakbite coupling. Didn’t have much confidence because of the ease it was installed. Turned the water back on slowly until I didn’t hear any water running. I was surprised when it held. Since then I have used them a lot with success. One thing I would like to know is a jumper wire with clamps required to be used around the Sharkbite to continue the electrical grounding in copper piping.
That’s a great question Joe. I called SharkBite a few months back and yes, you have to add a jumper to make sure the grounding works for the remaining copper pipes. It’s pretty easy to do.
In this case, I didn’t have those supplies to show how to do it in the tutorial.
Regarding the copper pipe grounding, that was common in older homes, and some CATV/Satellite installers will still use any nearby pipe for a ground/earth connection. Most newer homes rely on a dedicated ground circuit, and are not dependent on the plumbing. You bring up a good point though. In order to ensure any equipment ground continuity, you must bond (clamp on each copper pipe and a wire connected to each clamp) the copper pipe pieces together over the PEX and shark-bite fittings. Now this goes on into NEC issues, and regional electrical code issues, but knowing that they need to be bonded gives you a leg up.
Thanks David for bringing this up, it is a super important issue to be away of when dealing with PEX and SharkBites in a home that has existing copper.
I so enjoyed your video, i’ve always done things around the house being a single Mom when my son was growing up I alwys had to find a way to cut coner’s. I had a pipe the size like the one in your video in my basement, I went to a plumbing supply store showed them the problem and was ready to do a little sodering when the salesman showed me this technique, it took me a little longer, because i didn’t have the proper cutting tools like you.I hope this is the correct place to enter your give away. Winning would make my next repair so much easier. Thanks in advance
Great job Shirley tackling your repair. The first time doing something like this is a bit tough.
But after you do it you think “hey, I can this!!”
And that’s the best thing in the world…to get more confidence and basically just trying new stuff.
My house was built in 1972 and I have lived here for 20 years. Unfortunately I have had the displeasure of fixing leaks a few times and an emergency kit like you mentioned would be great on a Sunday nite when it seems like these leaks are always discovered. Great tip Jeff.
Sunday, for whatever reason, is always the day for catastrophe!!! Murphy’s Law, lol.
This would be a great kit to have around for an emergency. We don’t live in town and a sudden water leak might go unfixed for quite awhile till the stores opened and we could get to town and back.
Stores are never open when you need them Linda, it’s such a bummer. Yep, having a kit like this is the way to go.
Jeff, Thanks for another great video and for the chance to win an emergency repair kit. Being a senior citizen on a fixed income puts me in sort of a bind . I cannot afford to spend the extra money for something that may not happen so it would be great to win this. That way I would only have to buy one or the other of the cutting tools to make my kit complete. Thank you so much for this chance ,great job as always. Your videos are a lifesaver !
Totally understand the budget thing Hank, having to choose between one thing or the other is no fun. Hang in there buddy. Hope you’re having a good winter. At least we’re two months away from spring!!
Sometime I do these kind of repairs in a similar method and sometime I do it using a simpler method. When I want to do this type of repair I use a competing product that is made by Watts. It comes either in brass or in plastic which is cheaper. For the small extra cost I go with copper to be sure. The reason I use Watts over Sharkbite is that my home store Menards carries only Watts and I don’t see much difference so I save myself a longer trip to get the parts. The simpler repair that I use for pin-hole leaks is that I wrap the pipe and the leak with gasket rubber which is about 3/32 thick and I cut it about an inch wide. I secure the gasket material with a pipe clamp – the kind that has slots along most of its length and has a screw type mechanism to tighten and compress the rubber. I have patches of that kind installed without any problem for a few years. It is a lot easier not to have to measure and cut a pipe.
However, I did enjoy watching your video and I would like to go on record saying that your wife is surely a lot calmer than mine in this type of situation..
Lol, my wife is pretty steady for sure. It takes a lot to get her upset…which is a good think when you live with a DIYer.
Great tip on how to fix a leaky pipe Don.
Watts is a great brand, I didn’t know they made a similar product. Will have to check that out.
Yes, SharkBite fittings are great. I’ve used them to reconnect a copper pressure relief line that had to be cut when I replaced our water heater. Next time, I can just slip the fittings off and then reuse them to reconnect the line. Great video, Jeff!
Thanks Len, you’re the man for replacing a hot water heater. That’s no small feat. SharkBite makes fittings for those as well but I’ve never used them.
Comment No. 2
I forgot to say that a complete fix-it would require Sharkbite fittings in both 1/2 inch AND 3/4 inch. I have needed both (at different times.)
Thanks again, Jeff.
Good point Don, we have 1/2 inch and 3/4 inch in out house, too.
Hmmm, maybe I’ll throw the 3/4″ couplings and PEX into the kit.
Have an older house with LOTS of copper piping in the basement ceiling. Have had several leaks already and had to pay big bucks for the fixing sometimes had to have the same leaks redone because the first plumber didn’t do he job right. Very scary to see water filling up your basement and you can’t even think what to do first. Would love to get the kit. Thanks so much for all your advise.
Ouch, sorry to hear your story Nan.
If water is flowing that fast certainly turn off the water main in your house then tackle the leak.
Thanks for the great tutorial Jeff. I have seen the SharkBites at the store, will definitely pick up one or two.
Thanks for offering up the 2 kits, whoever is lucky enough to win them will surely put them to good use, seeing as they’re at your site to begin with.
Cheers
Thanks PS, it’s always nice to do giveaways. Only wish I could do more of them.
Thanks for the video Jeff. I use the SharkBite fittings quite a bit in my house when I changed it over to copper from Pvc. (I wish I knew about pex at the time!) I love the idea of an emergency repair kit. I’ll be putting one together soon.
Keep up the good work!
Dan
Thanks Dan, yah, PEX is amazing.
If I had to redo all our copper pipes I’d go with PEX. Easy to use and not pinhole leaks…at least I’ve never heard of PEX having pinhole leaks.
We’ve got a new-to-us house, and these would be great for having around for any plumbing emergencies. We already had one major one after a toilet shut-off valve replacement went awry (as in the compression valve kept leaking water, despite multiple installations and removing the old copper pipe) and the main (an old gate valve) started to leak after the few times we had to turn it on and off. Needless to say, we spent a LOT to get things replaced on short notice and get water restored (though, we did end up with a gorgeous quarter-turn ball valve for the main… which I’d wanted for some time). Having an emergency repair kit around the house will offer some peace of mind for those times when a pipe springs a leak and I don’t feel like scrambling to find a plumber in the middle of the night.
No fun scrambling late at night to fix a leak…been there.
Good job opting for the quarter turn ball valve. They’re the best option for shutoff valves and the only type I use.
Sorry to hear about your plumbing issues, at least you know how to tackle that problem moving forward 😀
I got a recirculationg pump and temperature valve. But instead of using the valve, I think I will run a pex return to the drain off valve of water heater. What do you think? The SharkBites would be great and I can change my mind and remove them if I want to do something different.
Boy that’s a good question Dan, I’d follow the directions that came with the pump. Especially if it has a warranty. I’d hate to see your warranty be voided by not performing the installation to a T. But it wouldn’t hurt to call the pump manufacturer and ask them
I want the kit because I believe I can do this. My uncle taught me to use a piece of rubber and a hose clamp to stop leaks in copper pipes (as a temporary fix). Thankfully I haven’t needed to try that yet. This sounds better. As a woman who ended up on her own with a house, I am having to learn a lot of things. Like using a zero turn mower, cleaning spouting, etc. I want to believe I can do this. The force is with me, Jeff!
The force is strong with you young Jedi…seriously, you can totally fix a pipe with these Kelly. Good for you to learn DIY
We live in a newer house (5 years) and already see so many problems. I am fixing something almost every month.They dont build houses like before anymore. Sharkbites would be handy to have incase I run into some problem in the future.
Agree Liz, it’s sad really. For all the technology we have there are shortcuts made when building homes.
I look forward to the new videos each week and this week you hit one of my biggest fears – plumbing!!! After watching the tutorial, I feel much more comfortable facing a leak some day in the future. I will be putting together an emergency kit of my own “just in case”. However, it would be wonderful to win one!!????
I would like this repair kit because my wife and I just bought our first house(January 2nd), and I found your channel by trying to learn how to take care of my own house. It’s a 1931 house that needs a lot of love, but my wife and I can see through the grime and want to restore this house to it’s previous glory with the help of your website!
Congrats Charles…hooray on your first house!!! Any question you have please feel free to reach out.
You’ll be able to restore your house to its full glory, can’t way to see your progress.
The tips just keep on coming. Jeff is the DJ of home repair! Keep it up. Would love a repair kit. I do not have any kind of plumbing back ups.
You’re the man John, thanks buddy.
SharkBites are a homeowner’s best friend when it comes to leaky pipes.
You have already introduced me to sharkbite fittings a year or two ago. But I did not realize there was a way to remove the fittings after installed. That is a nice feature if you installed a shutoff valve with a sharkbite connection to copper and then need to remove it for any reason. I could see how it would be highly intelligent to have a kit like that on hand. You have a huge snow storm of 3 feet and can’t even get out to repair the plumbing if it did break possibly due to a frozen pipe from lack of electricity. If I don’t win a kit, I will buy the stuff to have on hand. I also am interested in PEX but haven’t messed with it at all. The biggest issue out of all that would be repairing the drywall on the ceiling. We have the beloved popcorn ceilings and they are a bit of a pain to match without re-coating the ceiling with the spray on popcorn texture. Then repainting the entire ceiling. The best part is that you fixed the leak for sure with your kit!
You’re so right Mike…the ceiling fix is the pain if you have texture.
Frankly, I made a mess of it last time. BUT this next repair will be a lot better.
There will be a tutorial on how to patch the drywall ceiling.
Can’t say much now, BUT there will be a pretty sweet giveaway.
GiveawY…entry…where…do I enter??? Thank you for your time..
Well you kinda just entered by leaving a comment, lol
Thanks for making my upcoming DIY project doable….😬. Just noticed a small drip right above my dryer., I had a ACL reconstruction and Meniscus repair done on my right knee and have been keeping a close eye on the leak until I can drive to get parts and tools needed, and also to be able to be stable enough to climb a ladder. I posted your video to my Facebook page and looking forward to the challenge.
BTW… do the shark bites come not only for a straight line, but an elbow fitting too?? I am not sure exactly where the leak is coming from, and my luck if I poke at it…a finger size hole will appear … (past experience with kitchen sink drain pipe).
I didn’t see it in the video, but is there a certain type of primer to use before making the connection?
Great job – especially for a Sunday night. We’ve all gotten frantic texts from the wife in the past and you did a great job at handling her issue.
Thanks Dave, my wife was pretty calm when I got home.
She’s pretty cool like that.
I NEED this tool to fix all my dumb moves! Couple years ago I had dug out an old bush that had been planted by the previous homeowners, it was right next to the front door and was so close that you would rub by it just going into the house, so I dug it out. It was one of those that if you left the roots it would just grow back so it entailed pruning a lot of underground roots in order to get it all out. W..E…L…L…. I swear I thought I was cutting a root but cut the main waterline to the house! If I would have had this tool, would maybe have been able to save myself the price of a plumber. Oh well, live and learn as my Daddy always said. One thing is for sure, I triple check before cutting roots now.
Oh my, that’s a tough one Rebecca. Not sure if a SharkBite would help in that situation but you taught us all a valuable lesson.
Here in Pittsburgh you can call the local 811 number and the utilities will come out and mark the location of pipes, lines, etc.
Always a good idea before digging…but as you said, lesson learned.
Can I enter to win kit
Yep 😀
With a 100 year old house, it’s an eventuality that plumbing repairs will be needed. Would be great to have some sharkbites on hand for when it does.
Hear ya Shawn, those old homes are great but the plumbing can be a bear!!!
Comment No. 3
When replacing a section of (bad) copper with PEX, the flow will somewhat be reduced because since the walls of PEX are thicker than copper, the useable ID of PEX is smaller than copper. Is this a potential problem (especially for a long run) or is the effect negligible?
A link to Watts version of “no-solder” connectors can be found at:
http://www.watts.com/pages/literature_cats.asp?catId=71
and this page has a link for downloading detailed info on the fittings.which is:
http://media.wattswater.com/PL-Quickconnect.pdf
Thanks, Jeff and, good luck
Great DIY tutorial. Hope I never need to use the kit, but better to be prepared.
Thanks again.
Murphy’s Law…always be prepared for it
Thanks Scott, after making this video I had to run to the store to stock up on more SharkBites!
Jeff:
I love to watch tutorials on how to fix things yourself and this one was great. You see these products in stores but most of us (me) never know how to use them. Having an emergency repair kit would really come in handy considering these emergencies always seem to occur when you can’t get to the store. Thanks for the very detailed video!
Glad you liked the vid Phil, been using SharkBites for years with no problems. With a few quick tips they’re easy to install and a godsend on Sunday nights when water is leaking from the ceiling
Haven’t seen these yet but they look good. Did you get your stippling to match when you finished and did she make you repaint the whole ceiling?
Thanks for the great tutorial. I would love to try the shark bites. I’ve seen them before but wasn’t convinced they would work. I used a product called copperbond in the past. It was a two part epoxy. It worked great but isn’t available any more. Nothing worse than a repair that doesn’t hold!
Thanks Scott, you’re right…fixes that don’t hold suck. And are frustrating. I just go to SharkBites because they work, have never had a problem.
You should also mention that since you are SOOO close to a light fixture, make sure the circuit breaker is off.
Double thumbs up there, you’re totally right
After watching your video I was very well impressed especially when my son bought a house with some sort of old copper plumbing system that has deteriorated slowly. This video has enlightened me on how to better deal with the pipes. An emergency kit will certainly be handy. Your site is very good and I saved it as my source of Diyarbakir solutions for projects and tasks around the house. Thanks
Is the contest still going on? No mention of when the drawing would take place. I would love to win this kit. I have a 60 year old ranch with original copper pipes. I know that some day they are going to be a problem.
I think that it is important to learn a little bit about how to fix a leaky pipe. Pipe fitting can be difficult sometimes. This guide shows me how easy it is to replace my pipes.
Hi Jeff, I just watched your video about “How to fix a copper pipe…without soldering” and was wondering if you could enter me into the contest for a Home Repair kit? P.S. I have a major plumbing problem and haven’t been using the house plumbing. The bathtub on the upstairs floor leaked down to the family room floor, and then down to the basement, so the bathtub is not being used at all. There is also a leak coming from the kitchen, I think the taps when they are turned on (caulking may be needed around the taps and/or the taps and the foundation they rest upon may need to be replaced). Any suggestions you have would be appreciated. Thanks. Robin
Watched your pinhole leak video…thanks. I will be working on my home theatre and have a drop down ceiling with ceiling tiles…some are showing water spots so I presume I’ve got some leaks….your kit would be great to help me repair the leaks, so enter me into your contest….b/t/w, I noticed you using a handheld flashllght during the video making you look like a one-arm paper hanger; may I suggest you buy a headlamp to brighten you work. That will leave both hands available to work your project.
Good suggestion Ron, I have a headlamp but always forget to use it!!
Would you still recommend a shark bite if I only have about a 1″ copper pipe sticking out from a bathroom wall? Is that enough space? I’m avoiding having to break through the tiles.
Btw I’m not sure how old this video is but those giveaways would surely help me. I try to do my own repairs to save. I’m always finding something that needs repair.
Thanks.
Awesome videos. My house was built in 1974 with copper pipes. I currently have a tiny pin hole leak I stumbled on while replacing light fixtures bulbs in basement ceiling. This is my 2nd elbow pin hole leak that cause a big mess 4 years ago. I’m going to buy a repair kit tomorrow. Thanks for these helpful videos.
Definitely I will use sharkbites they are very good for a quick nice and neat repair job , my house is more than 100 years old I have been in my house for 9 years. but my husband and I are trying to use puddy or the tape and its not working. This leaky copper pipe is still leaking, this is our first leak and he does not know what to do. Ive seen this video today and you made it so easy. We can really use this kit like right now. It will come handy. And if I do not win at least I can say thank you so very much for this video.
Thank you
Great post with excellent photos. I appreciate great content that gets right to the point. I am looking into the newest wave of mobile content called AMP, Accelerated Mobile Pages Story. You may notice when you browse on your mobile device things called “Interesting Finds” that get top billing above many PPC sites.
You should put this together as an AMP story! This type of informational and useful media would be a hit. I am a web developer and I would consider doing this pro bono as you have/will help me so much in my personal DIY home repair. I am a renter and take care of my place as if I own it and do not wish to burden my landlord over trivial things that I have watched my father fix many times in my formative years.
Thank you.
-Steve
Again
– You need to turn it off inside a clockwise direction (DO NOT OVER TIGHTEN).
If yoou have any specific rules about soking around the
premises or hours at work, make certain it’s well documented.
So, wit these points in mind, you wikl want to use a few quotes produced by your neighborhood heating companies.
One thing you didn’t mention was turning off the power to the can light you had near your water pipe. Don’t want to end up seeing your name in lights!
Thank you!!!! I have a 125 yr old house with iron/copper plumbing. The town has switched to PVC in the street, and I believe they’ve changed the chemistry of the water (additives) to protect it. Now all of the fixtures in my house are oxidizing and corroding. I believe the PVC protection additives are causing accelerated corrosion of the metal in my old plumbing system. Anyhow, I have a copper pipe leak, and I am constantly changing my brass zone valves, water tank, faucets, etc. I also have gas piping, so welding is not a good idea, especially in an old wood framed house.
it seems there’s a lot of electric wires near your pipe…
would it be better to cut out the juice too?
as water and electricity don’t mix well…. 😉
Wow, what as great idea to have an emergency kit. The pipes in my house are 77 years old and I’ve spotted a leak to the pipe that feeds to the outside bib, currently it’s taped. Will have try this. Thank you.
Hello, just watched video of changing leaky pipe.. I like how easy it was to change out the leaky pipe with a pinhole in it. I have 2 in my basement that I need to attend. I also liked the easy instructional video. Would love a pex emergency repair kit!!! Thanks for your help.
Thanks for the great instructions, Jeff. If I want to add a Sharkbite garden faucet to an outdoor copper water supply line, would I still need to install a copper jumper cable? There doesn’t seem to be much room to work with given that most of the copper pipe is running through a brick wall. Thanks!
We are working on an Old Homestead… Copper pipe seems to be a different dimension and much thicker than the newer pipe. Shark bites don’t seem to work. Have a hole in a pipe right now and unable to get to it to solder it. Any suggestions
As a temporary measure mark the leak with a marker. Turn the water supply off. Dry the pipe at the leak and wrap it 3 times around with a 1 inch wide piece of high quality (Gorilla) duct tape centered on the line that marked the leak. Use a properly sized hose clamp centered on the tape wrap. Tighten to stop the leak. Will hold for a long time, certainly long enough to order parts for your job and send wifey to the spa while you do your thing.
I’ve been dealing with leaking copper pipes. I’d like to get one of you’re free kits that you were talking about. At this point I’m willing to try anything to fix the problem
Bought our house just one year ago and love trying to take good care of it (as the previous owners did as well). Just had an outside hose pipe freeze/burst last weekend while we were out of town. My brother-in-law has been singing Shark Bite praises to me for a few years now and I finally have good reason to try it out myself! I’m new to plumbing repairs (other than changing a faucet here and there) so love the idea of your kit! Thanks so much for making this all easy to understand.
So I’m a girl and no clue on copper pipe repairs. What size do I use for a 1/4 in copper pipe repair
Hi Jeff, Everything looks easier when someone else is fixing it . ( Right ?)
“”S O S ” ” Please help. I’m not as young as I used to be (duh) The shut off to my outside faucet is leaking but I can’t tell where the leak / leaks originate. That said, the faucet need replacing also. A Kit would help – a plumber would help even more – can’t afford the plumber. Help if you can . Loved your info… Thank you Jeff !
Randy ~
I just discovered my first copper tubing leak by accident when I was down in my unfinished basement and found a wet floor. With practically zilch experience with DIY plumbing repairs and just slightly more other DIY repair know-how (but always willing to learn) I searched the net and found your video and instructions the best option for me – I think I can handle it myself now thanks to you! Let’s hope I can find the SharkBites and pex in town. It sure would be nice to have an emergency kit for future leaks as I’ve got a ton of copper tubing in this house so I’m sure I’ll be finding more leaks in the future.
Omg I hope you can help. I’m at my wits end! The copper pipe near my water meter froze and busted. We cut on both sides of the hole, but we can’t seem to find the right size Sharkbite to connect the 2 pieces of copper pipes to a piece of Pex that we want to run in that cut space. There’s an elbow on both sides. No clue what to do. The copper pipe, for some reason is too thick and neither 3/4″ or 1″ Sharkbite will fit. The house is 130 yrs old & this is the original plumbing. So incredibly frustrated. Trying not to have to call in a plumber.
We used a 1/2 shark bite and glued it onto the copper pipe with epoxy glue ( for the bathtub faucet). We were able to get it on, but we cannot get it off. The faucet is leaking when the shower is turned on. Any suggestions?
2021 Texas freeze here. Wish I’d found this and SharkBites before plumber emergency rates. Although still grateful it could have been much worse. But this looks like something evem a novice like me could handle!
Question about the long-term durability of this approach. Or, put another way, what would a plumber say about the trade-off with their traditional approaches (soldering, crimping, whatever)?
One aspect of that question is I find myself considering preemptively installing SharkBite cut-off valves to sections of the house, especially the most exposed section that froze this time.
Thanks!