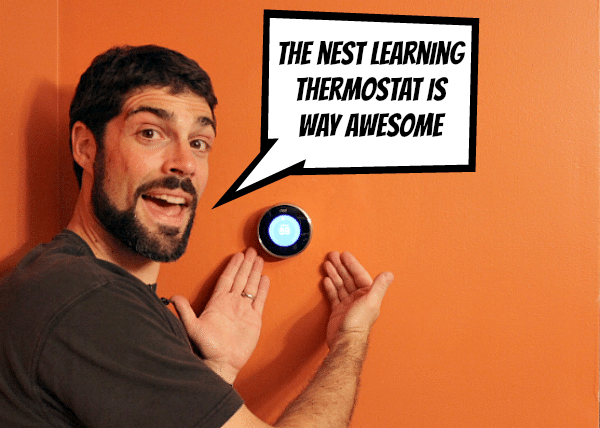
What is a Nest learning thermostat?
This is a question I’ve had for some time and thought you’d be interested in what I found out.
The Nest is a next-generation programmable thermostat that is also a wireless device. Programmable thermostats are not a new concept but the Nest is the first one to be super user-friendly.
And the Nest is different in that it learns what temperatures you like then automatically adjusts itself to suit your needs. On top of all that, you can connect it to your home WiFi network much like a computer.
Why is this cool? It means you don’t necessarily have to program the Nest and it can be controlled from a web browser on your computer or from an App on your iPhone, iPod, iPad, or Smartphone.
So, if you forget to adjust your home’s temperature while away you can do it remotely via the Nest.
Let’s dive in!
Getting Started with the Nest Thermostat
After reading this post you’ll discover that the Nest is easy to install and requires very few tools. Here’s the supply list for this super quick project
- Nest Thermostat ($249)
- Irwin locking pliers ($13)
- Combination stripper ($10)
The total cost for everything is $272.00 but you should be able to recoup a good portion of this by better monitoring your home’s heating and cooling. The installation will take 30-60 minutes but most of this is just reading the instructions.
I guarantee that you’ll be thrilled by the user-friendliness of the Nest and if you’re a tech junkie like me the ability to remotely adjust your home’s temperature with your smartphone is SUPER COOL.
What is The Nest Learning Thermostat
The Nest learning thermostat is a knob-style thermostat with an LCD screen on the front that can be turned and pushed like the click wheel on the first-ever iPod.
It kind of reminds me of my Mom and Dad’s old Honeywell thermostat but with a major revamp.
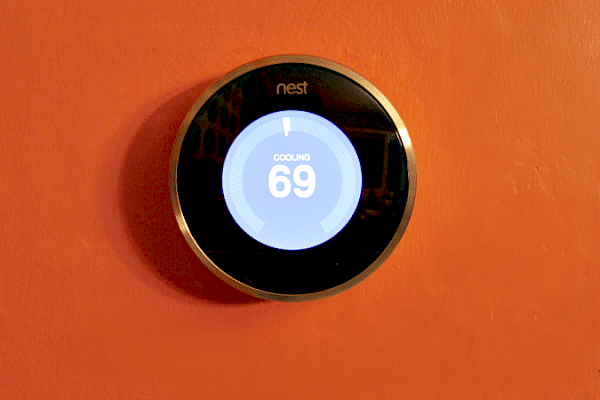
The Nest is way cooler than traditional programmable thermostats because it will learn your preferred temperature settings. When you adjust the Nest over a period of time it will learn your habits and automatically regulate the temperature in your house.
So, if you leave every morning for work and turn the thermostat down, the Nest will know to do this for you automatically. Or, if you only turn the temperature setting down on Friday and do this repeatedly for several weeks, the Nest will learn this habit as well and adjust itself accordingly.
The ring rotates and is clickable like I said above. And this is how you’ll maneuver through the setup process. If you remember the old iPods with the clickable wheel you’ll be good to go.
There’s a sensor on the front of the Nest that measures the temperature and humidity of your house. At first, I thought I cracked the LCD screen because I dropped it from five feet and it hit the metal step on my stool.
But what I thought was a crack in the LCD is only the sensor. So in case you do the same thing as me, don’t have a panic attack. AND PLEASE BE CAREFUL when you open the Nest’s box.
Ambient light sensors are also on the Nest’s LCD screen and this is a fabulous functionality because if it’s dark in the room the LCD will sense your presence and turn it on.
If you have a habit of checking your thermostat before going to bed and it’s dark then all you have to do is walk into the room and the Nest will light up. You need to be about 2 feet in front of it.
A rechargeable lithium-ion battery is housed inside the Nest (again, just like an iPod) and this allows it to recharge while connected to your power source (aka wires inside your wall).
If you turn it over, you’ll see a USB connector which you can use to program it, although you shouldn’t have to use it. And finally, there’s a pin connector that ports up with the wall plate/base.
You’ll get instructions with the Nest but I viewed the installation video on their website. The first part of the installation involves the wall plate/base. All the wires from your HVAC system will go.
Wires will go into the corresponding ports on the wall plate/base. There’s even a small level right in the wall plate/base to help you align it correctly.
You’ll get screws and a screwdriver to help anchor the wall plate to your drywall. My packaging did not come with wall anchors but the screws worked just fine.
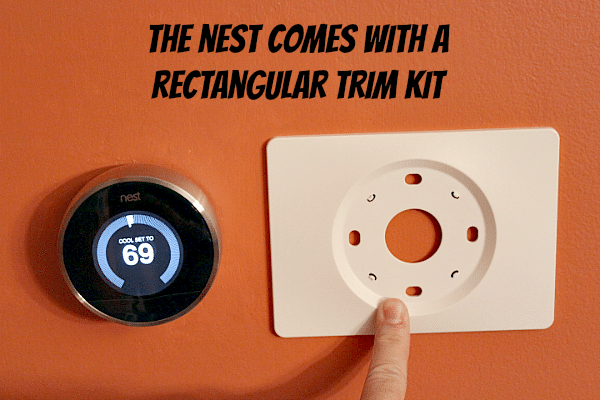
You could also use your own wall anchors if you like. Now here’s the BIG MISTAKE I made: not realizing the Nest comes with a rectangular mounting kit.
Like a dummy, I thought I needed to fill in the existing holes made by my old thermostat. Had a I been patient this entire mishap could have been avoided and my wife wouldn’t have been thoroughly miffed at me for ruining our orange dining room wall (which by the way we don’t have the color code for anymore).
How to Install the Nest Thermostat
Even if you’re a complete beginner you can install the Nest in 30-60 minutes. And that includes removing your old thermostat, installing the Nest base, connecting wires, and connecting the Nest LCD display. I’ve got several super tips that will help you with this process.
First, make sure you either turn your HVAC system off at your breaker or fuse box. Safety first!!
If your thermostat used the wires in the wall to power its display you’ll notice the display should be off. If your display is still on don’t worry. This indicates your thermostat is likely powered by batteries and it’s safe to continue on.
More often than not, thermostats are connected to walls via two screws. Loosen the screws that hold your thermostat to the wall.
TIP #1 – DON’T FILL ON SCREW HOLES
This honestly was my biggest mistake because we didn’t have the paint to touch up the holes I filled in. Needless to say, my wife wanted to slap me silly.
The Nest comes with a rectangular trim kit that will fit on your wall and cover up any unpainted space that was hidden by your old thermostat’s baseplate.
SO DON’T BE AN IDIOT LIKE ME.
TIP #2 – Paint
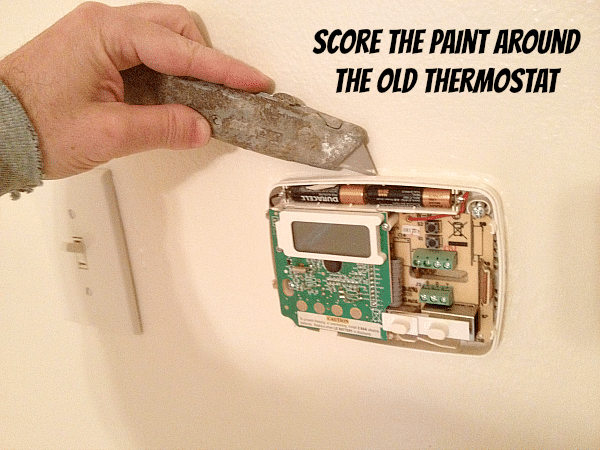
If the wall was painted and you suspect the thermostat was also painted (even just a little bit) use a utility knife to score the paint that surrounds the thermostat.
Otherwise, when you go to remove the thermostat you could also peel back a large portion of your wall’s paint.
BAD NEWS for anyone!!
TIP #3 – Wire Safety
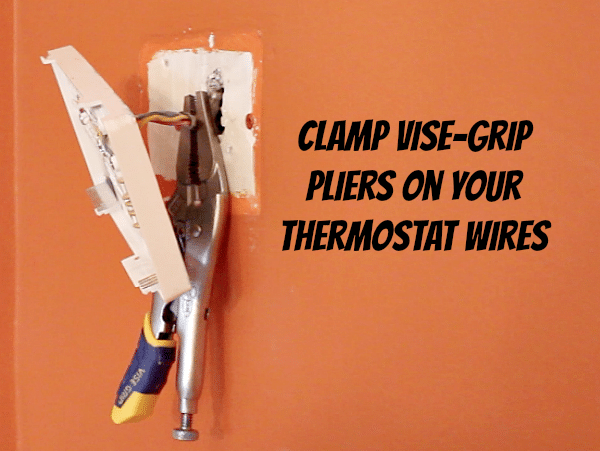
Once your thermostat is pulled away from the wall, clamp Vise-Grip locking pliers to the wires.
This will prevent the wires from dropping behind the wall and you have to call an electrician to fish them out and finish this project (which will likely cost you $85-$125).
TIP #4 – Take Pictures
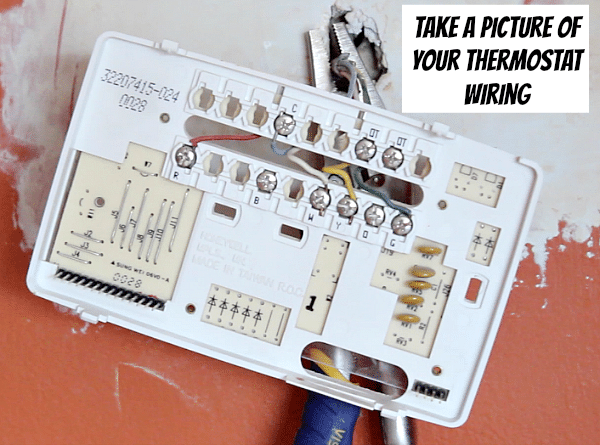
Take a good picture of the wiring configuration in your old thermostat. This will help you determine how to wire the Nest.
I highly recommend always taking a picture of any old wiring because if you can figure it out then this reference point will help your electrician.
TIP #5 – Label Wires
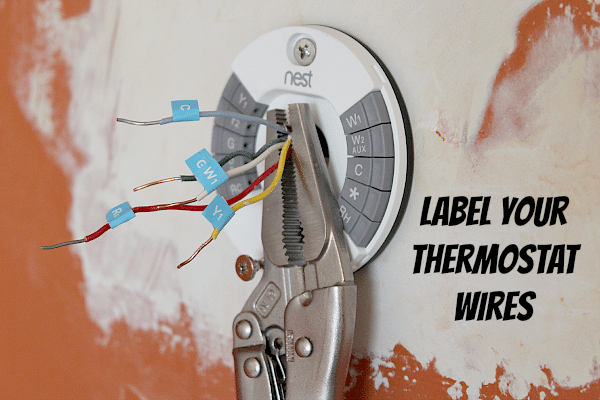
Label your wires with stickers that come with the Nest’s instruction booklet.
But apply the stickers to the portion of the wires that are behind the thermostat’s base.
If you don’t have enough wire to do this then use your picture to apply the stickers after TIP #6.
TIP #6 – Strip Thermostat Wires
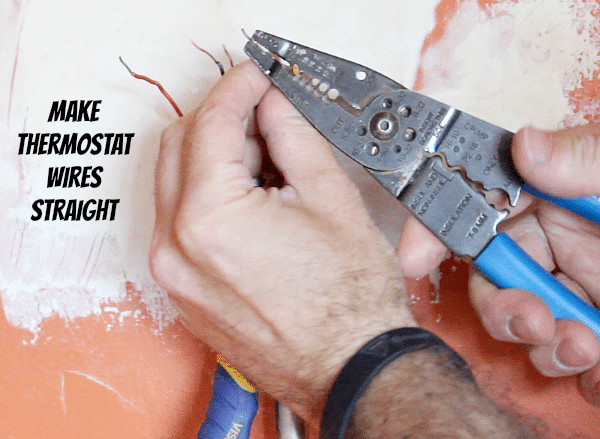
Cut the wires if you have 3 to 4 inches coming out of the wall. The Nest needs straight wires anyway and all old thermostats required the wires to be secured around screws.
This kinks the wires and cutting them will save you time anyway. Use combination strippers to cut the wires as close to the old thermostat base as possible.
Then use your combination stripper to remove about 1/2 inch of insulation from the wires.
Tip #7 – Thermostat Wire Connections
At this point, you’ll want to carefully pull all the wires through the Nest’s baseplate. Hold the wires with your hand, remove the vise-grip pliers from the back of the base plate and clamp the pliers to the portion of the wires in front of the baseplate.
You can now install a screw in the top hole of the Nest’s baseplate. Like I mentioned earlier, the Nest’s baseplate has a level in it (awesome engineers made this) and once you get that leveled then you can install the second screw.
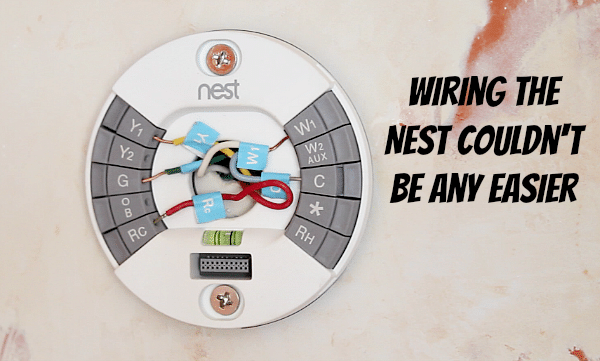
Each wire can then be placed in its corresponding slot by pushing down on the button and sliding the wire in place.
They honestly couldn’t have made it any easier. I’ve wired several thermostats and this is by far the easiest install.
Tip #8 – Installing Nest LCD
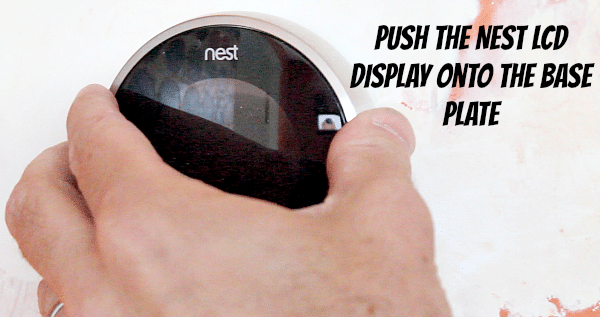
Take the Nest’s display, line up the pins on it with the baseplate, and push it into place. You’ll hear a click and the display should smoothly rotate.
You’re done with the physical installation.
It’s safe to turn on your HVAC system at the breaker or fuse box. At this point, the Nest will begin to walk you through its on-screen setup process which is so user-friendly that any homeowner can do it.
Just in case you like videos better than the written word, here’s one that will walk you through the Nest installation step-by-step.
How to Setup the Nest Software
The Nest will walk you through the setup process for its software by asking you a series of straightforward questions. This is totally similar to the iPhone, iPad, or iPod Touch setup process.
You’ll first have to connect the Nest to your wireless home network. I just had to enter my WiFi password and the Nest did the rest.
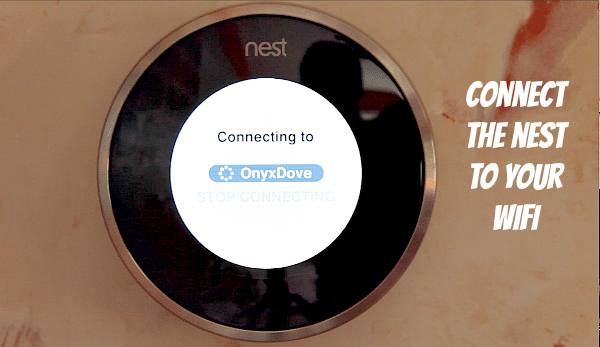
You’ll have to turn the wheel to choose the correct letters, numbers, or symbols then press the LCD display.
After this step, your Nest will likely update its software as mine did. You’ll have to wait a few minutes for this to occur but then you can move on to update the other settings. The Nest will confirm your HVAC wiring then ask you for your zip code.
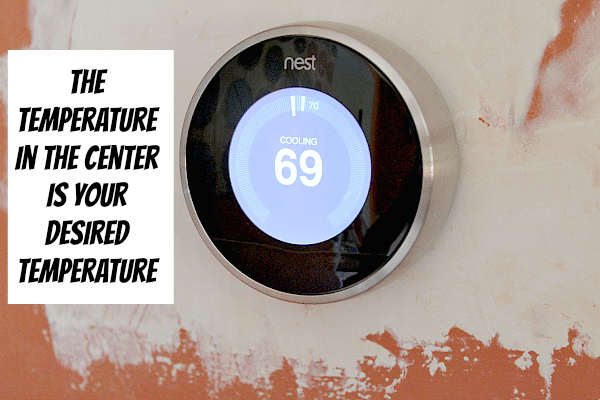
Once the Nest is completely set up you’ll see the temperature in the center of its LCD screen. This is the current temperature setting for your air conditioning or heating system (in our case a forced air furnace).
Turn the ring on the Nest to adjust the temperature up or down. The ambient temperature will be shown on the screen as you adjust the temperature. You can hear and feel the ring move as you turn it.
When you click the LCD screen the Nest will bring up different options. One is to change your HVAC system from heating to cooling.
Red indicates heating and blue indicates cooling mode respectively. The blue screen will get lighter as you set the temperature lower and the red heating screen will get darker the higher the temperature.
The Nest has an Away setting. This is a nifty setting for when you’d like to set a minimum and maximum temperature before leaving the house. You’ll want to use the Away setting before going to work or for when you leave on vacation.
The Schedule setting allows you to make changes to the scheduled temperature timeline. You can scroll through the timeline to manually change the temperature settings that the Nest has learned. You can change the timing of the temperature change along with the temperature itself. You can also add a new scheduled temperature change by scrolling through the day and adding it.
The Energy setting will show you your energy consumption for the previous week. You can see how long your air conditioner or furnace was running and what portion of this run time was due to your personal adjustments. This is cool because you can help to lower your energy bills by seeing how your personal decisions affect your HVAC’s runtime.
There are a ton of options in the Settings panel of the Nest.
- Change your Fan speed from automatic to always on
- Lock the Nest so changes cannot be made
- Change the learning behavior (good for when you’re on vacation, you don’t want it to learn a bad habit)
- LCD Brightness
- Screen On When You Approach (the screen will automatically turn on when you approach it)
- Click Sound (turn it on or off)
- Fahrenheit or Celsius
- Change Name of Nest (You could name it Sheldon or Captain Kirk)
- Network Settings
- Account Settings
- Zip Code
- Date & Time
- Wiring (you can see how you wired the Nest, which is handy for HVAC purposes)
- Technical Info (which has a ton of crazy info that will make your mind spin and remind you of physics class)
- Legal Info
- Reset Info
I could walk you through all the settings but this post would be super long and the software for the Nest changes over time. You can tinker around with it yourself and get your preferred setup.
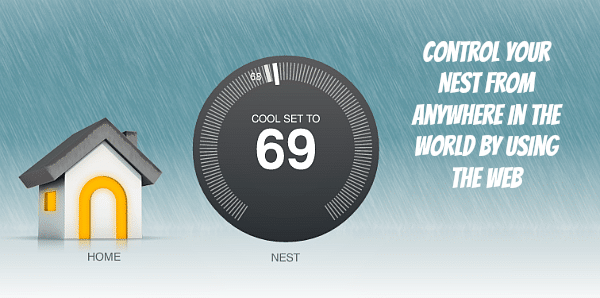
The Nest App (which is called Nest Mobile) works on the iPhone, iPod Touch, iPad, and Android devices. Because the Nest is hooked up to your WiFi you can connect with from anywhere in the world as long as you have a wireless or cellular connection.
The App shows you almost exactly what you’ll see on the Nest LCD screen. You can access the Settings as well as the Schedule via the App.
If you don’t have a smartphone then you can use a web browser to remotely adjust the Nest’s settings. Just go to www.nest.com. You’ll have to set up an account but after you do that you’ll be able to adjust the Nest just like you can with an App. The nifty part about the App is that it shows you the weather forecast for your area (it was raining the day I took this screenshot).
What’s Next
If the Nest is too expensive, try installing a standard thermostat. They’re cheap and typically programmable.
If you’re doing a bathroom remodel and need help, join one of our online courses – they’ll make your bathroom renovation much easier!
Let me know if you have any questions and I’ll do my best to help.
Thanks as always for reading, watching, and being part of our awesome community.
Cheers,
Jeff


