Nrdly
Get Nrdly Free Trial Built with Nrdly

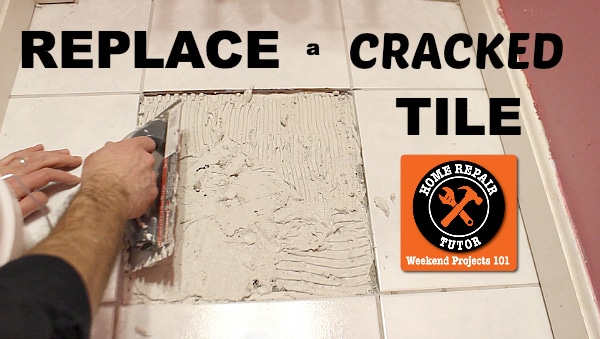
How to Replace a Cracked Tile

How much do you think it costs to have a handyman replace a tile?

I’m willing to bet it’s close to what you’ll pay for a nice dinner out.

So maybe $50 to $100.

There’s nothing wrong with paying a pro.

But what if you could do it yourself, save that money, have a perfect fix, and neighborhood bragging rights?

Who’s to say you won’t do a better job than the person you’ll call in the Yellow Pages?

I know you can replace your cracked tile because you’ve got guts and passion.

Don’t let your fear of making a mistake hold you back.

I’ll break down this project one step at a time so that it’s simple and easy to follow. Much like the directions to assembling a bicycle but BETTER ๐Ÿ™‚

In the end, you’ll be amazed at what you can do with a hammer, chisel, and some patience.

Replacing a tile only takes 1 day and I promise you can go to a nice relaxing wine-infused (or beer-infused in my case) dinner with the money you save!


Cracked Tile Supply List

These are the supplies that make replacing a tile easy

I did this project in a small bathroom with barely any room to maneuver – good thing I’m only partially claustrophobic.

The first step you should take when replacing a cracked tile is to remove the grout around it.

I’ll show you what tools you can use for grout removal and share my favorite one that can reduce this part of the project to 10 minutes!

But let me first discuss SAFETY.

Safety First, Make Your Mom Proud 

Just kidding about that last part, my Mom would never say that but she would be disappointed if I didn’t mention all the safety precautions for tile removal.

Before you get started make sure you have

  • Hearing Protection
  • Safety Glasses or Goggles (I almost typed Googles, haha)
  • A Respirator
  • Gloves
  • And Finally, Long Sleeves

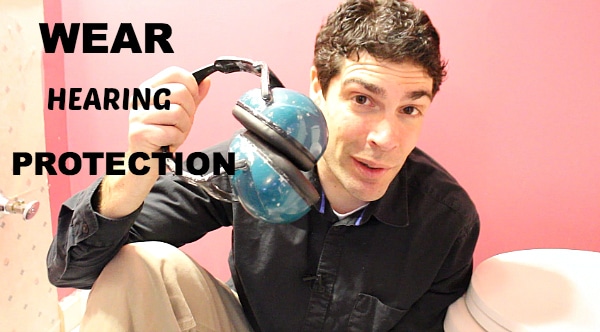
Pounding hard tile with a hammer and chisel is loud. You’ll want hearing protection for yourself. And unfortunately, your family members living with you might want some as well.

Wear Hearing Protection

Shards of tile are sharp. If a piece hits your eye you’ll be in the emergency room. Goggles or safety glasses are a must. Gloves and a long sleeve shirt will also protect your hands & arms from being cut.

The dust from this project is dangerous for your lungs. Actually, any fine particles are bad for your lungs and a respirator will improve your health during DIY projects.

Okay, I think that covers all the important safety tips.

Here’s my first HUGE tip…

How to Remove Grout in Less Than 10 Minutes 

Patience isn’t my strength when it comes to grout removal.

You can use 4 different kinds of tools to accomplish this task

  1. Handheld Grout Saw
  2. Carbide Tipped Cutting Knife (I use this to cut cement board, too)
  3. Triangular Grout Saw
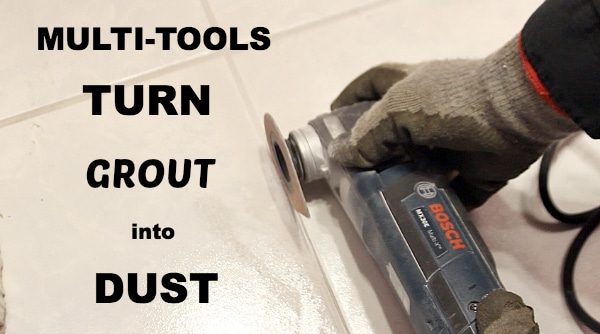
  4. Oscillating Multi-Tool with Grout Attachment

The first three tools will cost you about $10 each but it will take a ton of work.

I highly recommend using an oscillating multi-tool and buying a grout attachment for it.

It seriously took me less than ten minutes to turn the grout into powder.

Multi Tools turn grout into dust

Yes, a multi-tool is pricy but a fantastic investment for any DIYing homeowner.

And if you have arthritis you’ll love this tool way more than a handheld grout saw. It does all the work for you and is super safe to use.

The brand I use is Bosch because their multi-tool removed all the grout in my shower floor without a single hiccup.

You can check out that project right here.

With the grout gone, it’s time to get rid of the cracked tile.

How to Remove the Old Tile

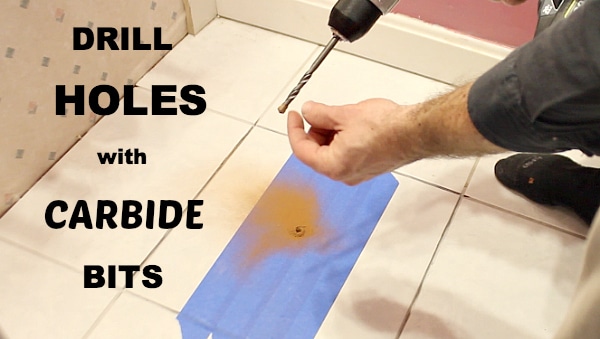
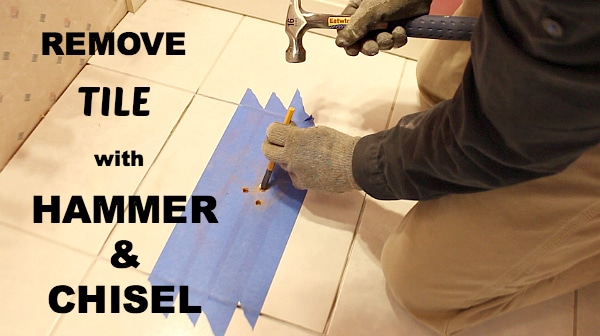
Start removing your tile by applying blue tape to it and then drilling a few holes into the center of the surface.

Use a 1/4 inch carbide-tipped tile drill bit. This will chew through the tile like a guinea pig eating lettuce.

Drill holes with carbide drill bits

Btw, we have two guinea pigs and they are 5 years old – I think they might outlive me due to their vegetarian diet and low-stress lifestyle.

Blue tape allows the drill bit to grip the tile without slipping.

Grab a 1/4 inch or 3/8 inch cold chisel and hammer.

Position the chisel at a 45-degree angle in the holes you drilled. Then smack it with your hammer.

Remove Tile with Hammer and Chisel

Do this repeatedly until you remove about 4 square inches of tile.

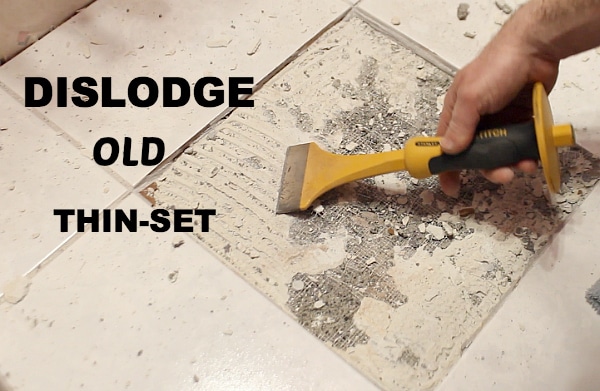
Then you can move onto the big boy, the 3-inch floor chisel. Use it to dislodge larger pieces of the tile.

Floor chisels are Awesome

Always chisel the tile from the inside to the perimeter. This way you lessen the chance of damaging the surrounding tiles.

You’ll also have to remove most of the thin-set mortar on the floor substrate. Otherwise, the new tile will sit higher than its neighbors.

Dislodge old thinset

Your chisel and hammer are good for this step, too.

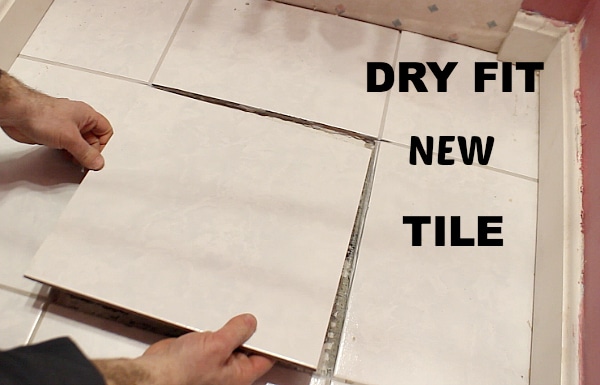
Dry fit the new tile and see if it sits a bit lower than the other tiles. Check that this is the case by using a 2-foot level.

Dry Fit New Tile

You want the new tile to sit lower than its counterparts because the new thin-set will add height.

With the old thin-set gone and the new tile ready to go, you can install the new tile.

How to Replace a Cracked Tile

I watched Abbott & Costello as a kid and they were always getting into strange predicaments.

Don’t let this happen to you when applying thin-set and grout.

I’ll share some good techniques so that you don’t have to explain why your new tile looks worse than a hungover pair of comedians.

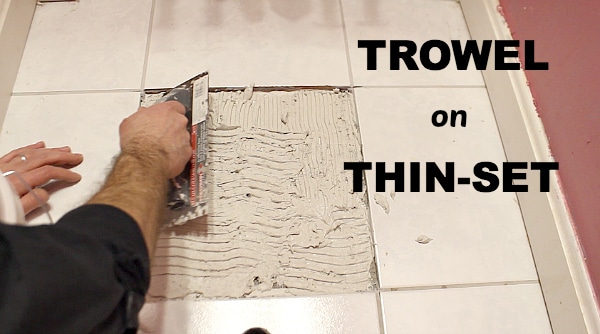
Since my tile was 1/4 inch thick I used a 1/4 inch by 1/4 inch trowel to spread thin-set.

The trowel ridges should keep their shape, which indicates you mixed the thin-set correctly.

Trowel on Thin-set

You should also back butter the new tile with thin-set to help it adhere better to the old substrate.

All this means is that you should add a thin layer of thin-set to the underside of the tile.

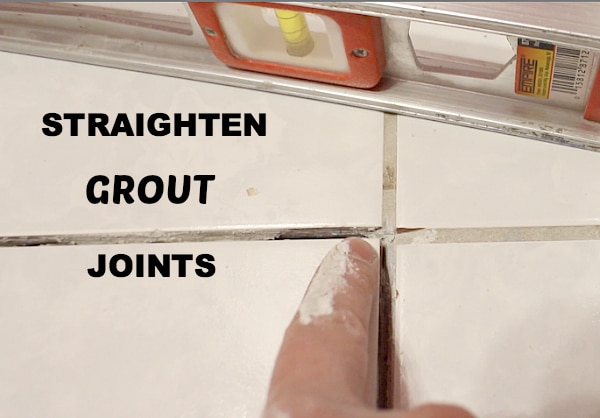
Set the tile in place and firmly press it on all sides. Then check that it’s level and the grout joints are straight.

Straighten Grout Joints

Let the thin-set dry for 2-3 hours before adding the grout.

Mix up the grout so that it has the consistency of peanut butter.

You can then spread it onto the center of the tile and smush it, yes I said smush, into the grout joints.

Float Grout into Joints

Then use your rubber grout float, held at a 45-degree angle, to scrape the grout off the surface of the tile.

Remove all of the grout from the tile and wait about 15-30 minutes or whatever the grout manufacturer recommends.

A film will develop on the surface of the tile and you’ll need to remove it with a moist grout sponge.

Wait another 60 minutes and buff the surface of your new tile with a microfiber cloth.

I love these cloths because they leave the tile looking shiny and new.

If you’d like to see me in action (pounding out a tile in a 2 foot by 4-foot bathroom, man it was tight) then check out my video for all the sweaty details.

What’s Next

If you’re doing a bathroom remodel and need help, join one of our online courses – they’ll make your bathroom renovation much easier!

Let me know if you have any questions and I’ll do my best to help.

Thanks as always for reading, watching, and being part of our awesome community.

Cheers,

Jeff


how to replace a cracked tile

  1. Evelyn says:

    Would like to see the application of the grout sealer.

    1. Hi Evelyn, sorry that I skipped that picture. I can take some and add them to the post.

      It’s a pretty simple application. Make sure to follow the directions on the bottle and you’ll be good to go ๐Ÿ™‚

  2. ramona says:

    love it jeff. u have the perfect shots for every step of the project.. very creative writing also. I love reading ur stuff. fondly ramona

    1. Thanks so much Ramona. I really appreciate your kind words.

      I’ll try to make you proud with the next post, too ๐Ÿ™‚

  3. Liliana Wells says:

    My husband and I have done tile work before. Whether applying tiles or removing them, it’s hard work. We used to let the tiles dry for at least 24 hours before applying the grout. It has served us well. Thanks for the tutorial anyhow.

    1. Thanks Liliana, I’m sure you have a ton of wonderful tips. Tiling isn’t easy work, that’s for sure. And it can be daunting.

      But hopefully with a little knowledge the average homeowner (me included) can do some of this kind of work and get great results. I love tiling and have always found it to be rewarding. So thank you for all your years of hard work.

  4. Good tips Jeff. I foresee tile demo in my future and hadn’t thought much about how to remove the busted ones. Of course, the mental-giants that tiled our entire home took the liberty of using a huge grout line, about 1/2″ wide so I have grout repair to do as well.

    Do you have any ideas for removing a tile without breaking it? Ours is no longer made and I’d like to move some for the kitchen remodel. – John

    1. Whew, 1/2 inch is rather big. But maybe it’s due to some reason having to due with your temperature out there.

      Removing tile without breaking it, that’s a tough one. You’d probably have to check out how well it’s adhered to the substrate. I can tell you that there was no saving the tile in this bathroom. Even if I wanted to, it wasn’t coming out without being in pieces.

      If your tiles aren’t sticking to the substrate all that well you might be able to get them off and salvage them. But you’d still have to deal with the mortar on the underside of the tile ๐Ÿ™

      Keep up the great work John, I love seeing what you’re up to in AZ

  5. AL. Ramos says:

    I’ve lived in my house for about 12 years now and I was never told that when the foundation moves or settles your tiles will crack. Well I do have tiles cracked from one end of the living room to the other. And they also appear all over the house about 10 or more tiles are cracked. Personally I would hire a pro simply because my wife would never allow me to replace them and second I don’t have any of the tools required to do the job. Thanks. for the video anyways….AL

    1. One tile isn’t too hard Al but a whole room is another story. So I totally understand your situation.

      Let me know how it goes and make sure that if the substrate is damaged it gets fixed before the contractors lay down the new tile. Otherwise you’ll see the cracks form again.

      1. Doug says:

        How do I prevent this same repair/replacement in future years?

        1. Dan says:

          I wonder if that guys wife let’s him think. I hope he got her permission to post that. Get a backbone.

  6. Susan says:

    Hi Jeff,

    Great post! Any tips on replacing a tile that’s over cement board? Got a tile in the shower that needs replacing but I’ve been putting it off since I haven’t exactly figured out how to remove it without ripping out the cement board behind it. Thank you!

    1. You can use the same method Susan. There was actually 1/2 inch cement board under the tile I replaced. Now, your situation is likely a bit different in that I doubt there’s wood behind your cement board. So you might want to be a little more careful with removing the tile and old thinset.

      How big is your tile?

  7. Victoria says:

    do you always use a grout sealer?

  8. Teresa says:

    Hi Jeff,
    I found your site and love it! Thank you! I always wondered how this was done as I have a cracked floor tile in my kitchen and was so depressed thinking I would have to replace the whole floor. Well you sure cleared that up for me and now I know that is not the case! Silly me, but again, I don’t know this stuff but will now as I will be a faithful follower! Your added humor really makes it even more fun!
    Thanks again,
    Teresa

  9. Jennifer B. says:

    Will this work if you have a wall (or floor) of older tile – say all plain white, 1 – 2″ square – and you just want to remove say a band or section of it to update the room with a newer tile style or color but keep the majority of the original white tile?

    1. You could definitely do that Jennifer. It wouldn’t be easy. I’ve given thought to doing this in some of my rental homes ๐Ÿ˜€

  10. Bob M says:

    I don’t currently own an Oscillating Multi Tool. I notice that yours is corded. Is it better to purchase a corded one than a cordless one? I have six cracked tiles in my bathroom and I plan to replace them. Also the grout in this bathroom was never sealed and I was planning to remove all and then re-grout. I am thinking that for all that work, a cordless Oscillating Multi Tool and its batteries will not have the power to do the job. Your thoughts?

  11. Jan Shadle says:

    Jeff, I tiled the back splash in my kitchen 15 or so years ago. the bottom row is coming away from the wall without any obvious reason such as settling or water infiltration. I applied the tile the same
    as you did, but I am not positive that I buttered the back of the tile. can you think of any reasons for this happening or anyway to prevent this from happening again? I sure hope I get an answer from you. Thanks.

  12. Dan says:

    Noticing that you didn’t clean out the corners/edges from the old grout. I use a chisel and a RUBBER mallet to make sure tile lines up properly before placing a tile. In addition, I would strongly recommend that you fill in those voids left by the removed CBU and get it level as possible using a 4″ knife. I would let this set up and then put your tile in place.

  13. Tim says:

    What if the tile isn’t level due to settling cracks in the substrate base? what’s the best way to level it out?

    1. That will depend on how out-of-level the tile is. If the substrate is cracking you’ll have to fix that with a liquid membrane or something else before adding the new tile. Substrate cracks will transmit to the tile. If the tile isn’t out-of-level by more than 1/2 inch and your repair the substrate crack you can use thin-set mortar to set the tile to the correct height.

  14. Katie says:

    Jeff can you use this tech on procelain .tile as well?

  15. David Shelton says:

    Overall, I like the video and the confidence it provides for an occasional DIY-er like me. The one question that stands out is the curing time for the thin-set. Your instructions indicated 2-3 hours before grouting; however, with the instructions on the thin-set I purchased as well as my recollection of a larger prior tile job at my home, the curing time for thin-set before grouting is supposed to be at least overnight or 24 hours. Is the reason you’re recommending a shorter curing time because only one tile is being replaced? In any case, wouldn’t you wait for 24 hours before stepping on the tile? I welcome your reply.

  16. Reese says:

    JOHN@http://www.azdiyguy.com/
    I’m not sure how long ago you posted your comment, or if you’ve already completed your remodel, but an idea I had for removing tiles without breaking them was to use some sort of thin wire (old school band saw from Boy Scout days, picture hanging wire, fishing leader, maybe even braided hugh-test fishing line like the one with an 8-legged creature name) and sliding it behind the tiles you’d like to salvage. This would probably mean cutting the thin-set or adhesive from the board and then sanding the backside of the tile afterwards. It’d be a lot more work and would probably mean you’d be replacing the backer board, but you are doing a eemodel AND you’d be saving your unique tiles for reuse.

    I haven’t tried this before, just a thought that I had when reading your comment. Hope this helps you, or anyone else who sees this. I’m interested to see if/how this works.

    Thanks!

  17. Stefan Robert says:

    This is an easy task to change your tiles. But you should be first priority for tiles. Before you get started make sure you have
    Hearing Protection
    Safety Glasses or Goggles (I almost typed Googles, haha)
    A Respirator
    Gloves
    And Finally, Long Sleeves

Leave a Reply

Your email address will not be published. Required fields are marked *