My Mom cringed when she saw our orange dining room.
She just isn’t use to strong colors but after a few years she decided it was a great choice.
Painting walls any color other than white can be a real challenge.
Especially if the colors are bold like orange, yellow, blue, or even RED!!!
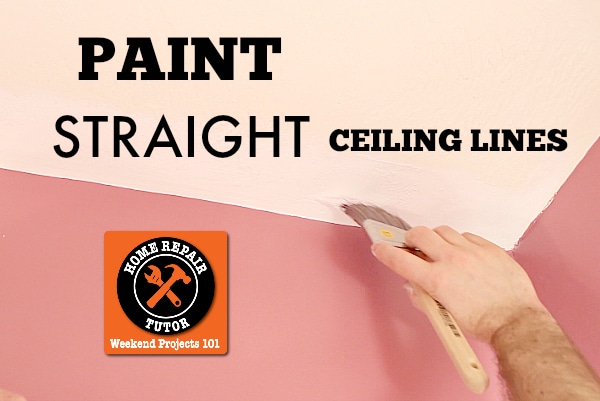
The tricky part, at least for me, is getting a straight line between the white ceiling and wall.
Good news, you don’t have to be Picasso to learn this.
And you can cheat a little by using the right supplies – which cost only $27 and can be used for years!!
Last weekend I had to paint a bathroom ceiling. So I decided to share all my tips and show you how to paint a straight ceiling line without using painter’s tape.
I’m fired up because I think you’ll get a better paint job after this tutorial. Plus I’ve got a special surprise at the end. Let’s get started 🙂
Paint Supplies
Here’s your supply list
- Purdy 2.5 inch ClearCUT Glide Brush
- Purdy Jumbo Mini Roller Frame
- Purdy White Dove 3/8 inch Nap Rollers (for Mini Roller)
- 2 Gallon Bucket
- Wire Grid for 2 Gallon Bucket
- Wiping Cloths (for mistakes and drips)
- Drop Cloth
- These Amazon Affiliate links help support HRT…muchos gracias
Here’s what you’ll learn
- How to paint a straight ceiling line between a white ceiling and bold colored wall
- How to preserve paint brushes so they last for years
I love sharing this stuff because I know it’s going to help you with your own project.
Let me show you how to accomplish that.
Paint a Straight Ceiling Line with These Awesome Supplies
If you want a good paint job you need to use Purdy paintbrushes and rollers.
Yes, paint type is important too.
But the best paint will look terrible if applied with an el-cheapo brush & roller.
I’ve been using Purdy supplies for years because they give the best-looking results.
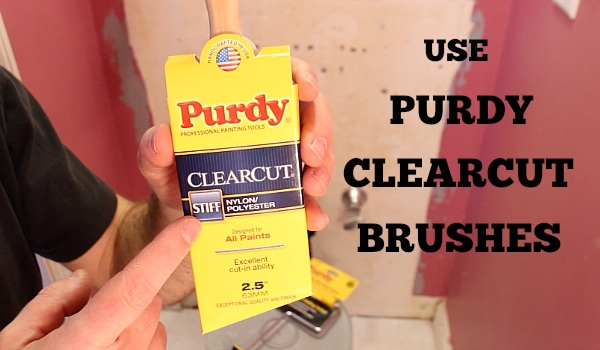
The specific brush you need to cut in a straight ceiling line is a Purdy 2.5 inch ClearCUT glide brush with an angled edge.
While you’re in the paint supplies section you’ll want to pick up a Purdy 4.5 inch Jumbo Mini Roller.
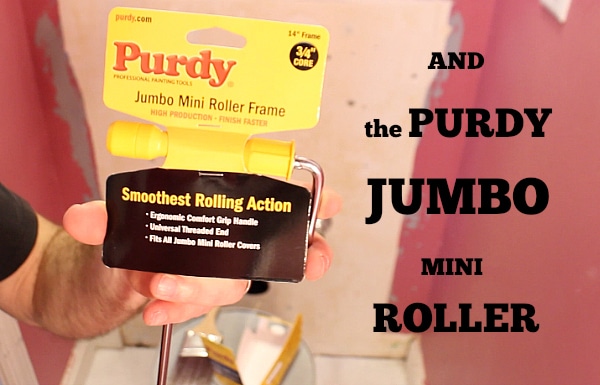
This little dude is fantastic because it rolls smoothly without any choppiness. Which is critical for straight lines.
And the White Dove paint rollers that you use with the Mini Roller are as lint-free as they come.
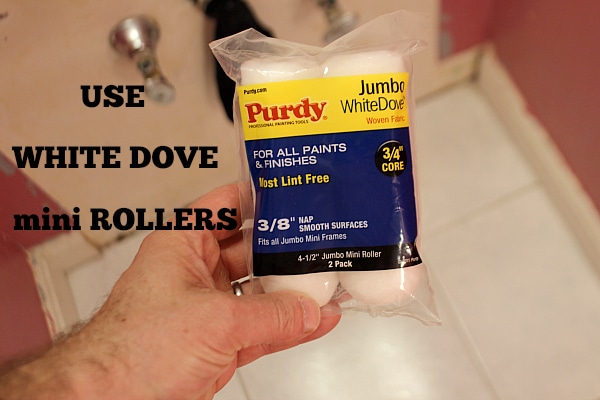
This is important if you have smooth walls that will show every imperfection.
If you’re using a roller please try a bucket with a wire grid versus a tray.
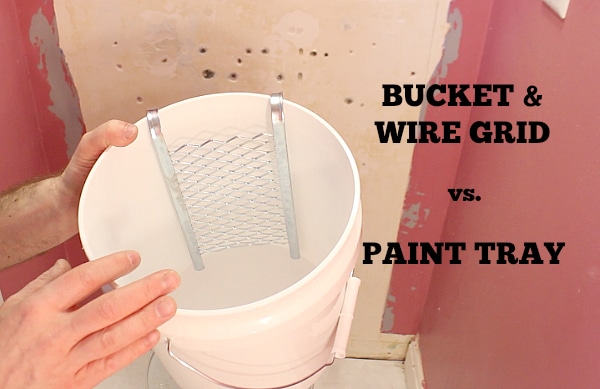
I’ve used trays before but love the bucket/grid because it’s much harder to step in a bucket of paint.
Plus, you can use the bucket for both the brush and the roller. Way cool.
Just as an FYI, I chose Valspar Ultra paint plus primer for the small bathroom ceiling I worked on.
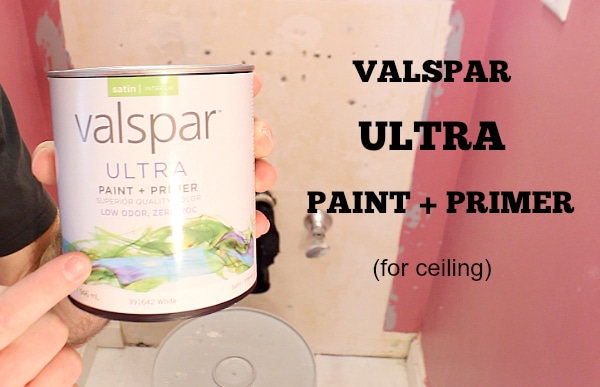
Primarily because it’s scrubbable, mildew resistant, and has a lifetime warranty – all great reasons to use it in a kid’s bathroom!!
Now, how do you use these items to get a straight ceiling? I’ll show you.
Painting straight ceiling lines by hand with no painter’s tape, oh my!!!
Dip your brush about 1 inch into the paint.
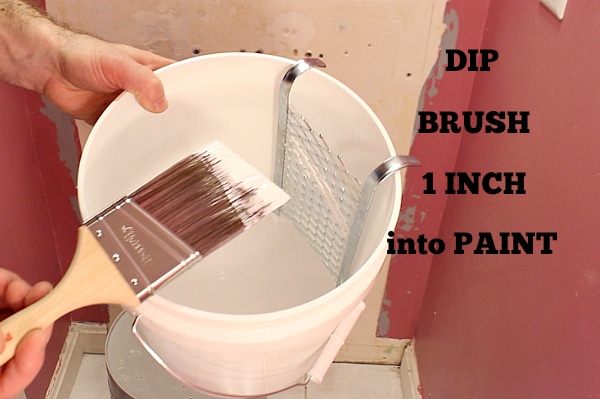
Tap the brush on the side of the bucket or wire grid to remove excess paint.
Place your brush on the ceiling so that it’s about 1/4 to 1/2 inch away from the ceiling/wall transition.
I like to have the brush on its edge when cutting in, i.e. all the ends of the bristles touch the surface.
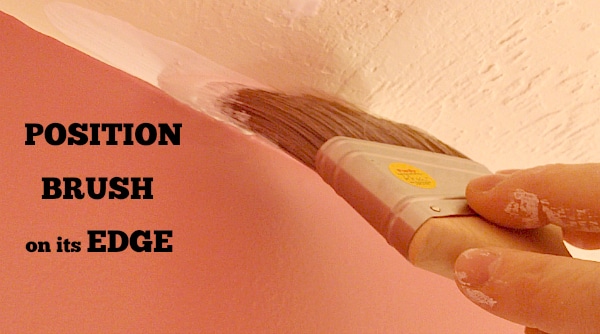
Paint in one direction about 12 inches then switch directions and lay the brush flat (not on its edge).
This back brushing will cover about 2.5 to 3 inches of the ceiling edge that meets up with the wall.
Do this until you cover 2 to 3 feet.
Now you can load up your mini roller with paint.
Place the mini roller on the ceiling where you stopped painting with your brush.
Roll on the paint with the mini roller so that you cover the brushed on paint.
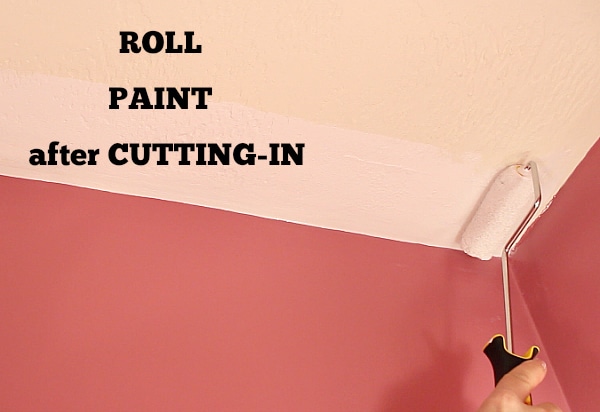
This will smooth out any marks made by the paintbrush.
The key to success is not letting the cut-in made by your paintbrush dry. Thus, it’s best to roll on paint right after using your paintbrush.
Here’s the complete step-by-step video tutorial that will show how to paint a straight ceiling line using only a brush & roller.
Here’s a great tip for preserving your Purdy paintbrush: clean it with water then wrap it with Glad Press’n Seal.
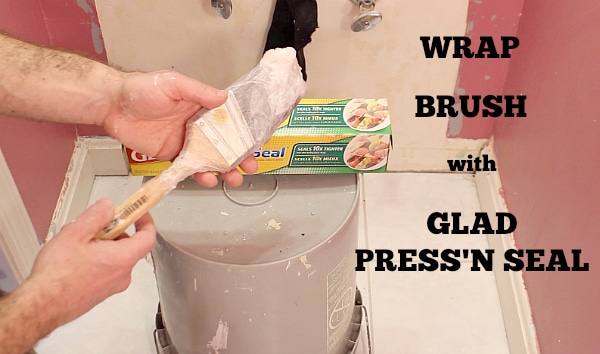
I’ve literally been able to use paintbrushes for 2 years because of this little technique.
What’s Next
Our tutorial that discusses how to paint a bathroom fast has great tips – don’t miss it!
If you’re doing a bathroom remodel and need help, join one of our online courses – they’ll make your bathroom renovation much easier!
Let me know if you have any questions and I’ll do my best to help.
Thanks as always for reading, watching, and being part of our awesome community.
Cheers,
Jeff

Thanks for the giveaway, Jeff.
Our two bedrooms are next on the list of rooms to paint. The hardest part will be moving all our stuff out of the way.
You’re welcome Greg. Yah, moving furniture is no fun.
What colors are you going to paint your bedrooms? Something fun?
can you just come over and do it for me, three weeks and I am still trying to touch up my mess ups ugg
I’ve got to paint the last room in our condo that hasn’t been painted- the bedroom. The challenges aren’t huge; but seeing as how we spend a good amount of time in there, getting the ceiling line as close to perfect as possible is going to be a must for me or it will drive me nuts!
This guide is exactly what I needed and I’m sure my wife will be exstatic that I finally want to tackle it. As always, thanks Jeff!
Glad to help Mike.
Do you have vaulted ceilings in your bedroom or are they 8 or 9 feet high? Man, vaulted ceilings are tough!!
As someone who hates ladders, I’m glad we don’t have a ceiling higher than 8 feet, lol.
I’ve got a kitchen as well as a bathroom to paint. My biggest challenge is going to be picking a new kitchen wall color after the remodel. Will check your other posts to see if/how you may have dealt with this. Love the site, btw!
You’re super sweet, thanks JT.
So you’re redoing your entire kitchen? Now that’s exciting stuff!!!
Do you have a backsplash for your kitchen? If so, you make want to explore colors that match that or go with it.
I am getting ready to remodel my guest half bath in the lower level. The previous owner slapped dark brown paint sloppily on all walls and the ceiling plus the texture, if you can call it that is awful. I want to do a smooth texture on the walls with just a few ridges here and there – I saw this done in a high end home and it looks very clean and professional. I am tiling the wall behind the vanity and toilet (same wall) but painting the others a medium blue gray and the ceilings white with a 1/4 cup of the wall paint mixed in. I also need to move the electrical box for the vanity light that is now positioned in the middle of the room and not over the sink/vanity. I am also installing a new vanity/faucet, mirror and toilet. So there is my next project… fun, fun, fun!
Erin, you’re going to have one cool bathroom!!!
You’ve got your hands full no doubt but I think you’ll love the end result.
What kind of tile shape and color are you using? I have a similar project this summer 🙂
I tried the straight line tips you gave. They work! Question on the brush storage: is that for short or long term storage? If I won’t be using the brush again for months, wouldn’t I want I to allow it to dry completely before wrapping it?
Great job Linda. Which room did you have to paint?
I’ve used Press’N Seal and stored brushes for months. The brush is always slightly damp when I wrap it up. If you have a Purdy brush they will keep for a very long time. They really are the best brush I’ve ever used.
Hi, Jeff! This technique would also work well with the top of walls which have no trim, right? We have an entire two story home needing paint updates, and we are planning to start with our daughter’s room. It’s a regular 8′ height with no crown molding. The ceiling is white and smooth, and the walls will be painted some very light shade of white.
Love the idea of the bucket and grid; so much easier to use and so much harder to tip over!
Yep, you could use this technique for walls as well, with or without crown molding.
Are you going to paint the entire bedroom the same color or choose an accent wall?
My wife and I go back and forth on whether to do accent walls 🙂
Thank you for your tips/hints/tricks. I find them very helpful. I’ve been mulling over repainting my main bathroom so this was a timely tip. I get your newsletter already and look forward to new ones.
Thanks Sue.
What color would you like your bathroom to be? I know you could knock out that project in a weekend no problem 🙂
I really hope this technique works for me, because I waste SO much time going over first the wall, then the ceiling, then the wall again, then the ceiling, you get the drift…
Haha, yes I totally get your drift because I’ve done it myself and boy it’s no fun. This technique will take some practice but once you get the hang of it you’ll be all set.
Are you currently thinking of painting a room?
Hi Jeff, just read your tutorial about painting straight lines near the ceiling. Yor advice is spot on! I’ve been very busy painting the whole inside of my house. Back in 1989, we purchased our house and I put up wallpaper on the lower edge of my dining room walls, and my foyer, and the den. I also had chair rail above the papered edge. Now to update my house I’ve ripped the chair rail off and scraped off the wall paper. The hard part is spackling all the holes and sanding them down to make the finish smooth looking. Then I’ve primed my walls and painted them, of course after painting the ceilings first. You tips have come in very handy and are time savers. Whew! It’s been a lot of work, but worth it.
You’ve been busy Marylyn. It’s crazy how styles change over time. The 80s saw wallpaper being the stylish thing. 90s, well, I can’t remember what was popular in the 90s.
And now the 2000s – and wallpaper in certain circumstances is kinda back to being cool. Frankly, I won’t touch it but do think it’s neat when done a certain way.
In your experience, do you find painting the ceiling first is better than the walls? (btw, I do this too :))
Hi Jeff, love all your projects and tips! I’m planning on painting our dining room. We live in a house built in 1880. We had some basement work done and it involved installing a steel beam to raise the sagging house by 3″. As a result, three walls in the dining room now have cracks in the plaster from ceiling to baseboard, so those will need to be repaired before any painting can begin. The ceiling is textured and painted white and I’m leaving it as is. The walls currently are a gray-ish olive color and we haven’t chosen the new paint color yet. There are five doorways, one window and 6″ baseboard throughout the room, all varnished wood, so there’s a lot of cutting in around all that trim before I can roll the walls. Hoping to apply your painting a straight ceiling line technique when I’m doing all that trimming. Keep up the great work!
Wow, your house must have a so much character Catherine. I love older homes. You can’t replace the workmanship and stylings from back then.
I can see a lot of cutting-in in your future.
Is the varnish original to your house? What kind of wood do you think they used for the trim and moldings?
I loved the tutorial. I always wondered how to pant without taping. Doesn’t your hand shake like mad? Does it take a while to get comfortable with the brush. It makes me nervous just thinking about it. I have heard so much about Purdy brushes;if I ever paint a room again I will get all the supplies you suggested. I just pray that I get up the nerve to pick up a brush again. Everything I have ever painted was a disaster; my husband ‘s too.
Now I suspect we were just using the wrong tools. Thanks.
My hand does shake a little, especially while holding a camera in one and the brush in the other (lol). But after a few cut-ins you’ll get use to it.
The right brushes make all the difference. I’ve used less than stellar ones in the past and Purdy is so much better. I suspect you’d have a superior experience with the right supplies.
Do you have a painting project in the works?
I am going to be painting my hall which has carpeting. Of course I’m worried about getting paint on the carpet and not sure what to do.
I like your suggestion of using a bucket instead of a paint pan! I would be easier to move around.
You could do a few different things Carol with regard to the carpet.
I’ve added painter’s tape (like Frog Tape or Blue Tape) to the baseboards and put a drop cloth over the carpet. This helps prevent paint from getting on the baseboards and the area that the drop cloth doesn’t cover all that well.
Have you tried something else that worked better? I’d be curious what others think, too 🙂
Great tips, never used a bucket and metal grid. I might try that next time I paint.
I think you’d like it Ed. The grid in the bucket also stops paint splatter while loading up the roller.
Are you more of a tray kind of guy?
Jeff, Thanks for the tips. I have several rooms to paint this spring/summer and this will help me. Pat
You’re super welcome Pat.
What room is first? 😉
I just finished painting our kitchen. This summer I hope to paint a dining room wall maybe a chocolate brown and then another accent wall at the top of our stairs that everyone sees when they enter. It will be a deep gray/graphite color. When we purchased the house several years ago, all the walls are white. I have finally had enough and am painting. I was a little discouraged to start since we have very tall, vaulted ceilings.
I like your bold colors Lesley. You’re going to love the end result.
Great idea of using an accent wall.
Do you also have an idea in mind for art or photos? This has always been my achilles heel, I’m no good with photos 🙁
To answer your question, I am hoping to put up some gallery shelves on the graphite wall so that I can change photos as I like (probably will be family photos). As far as the dining room, I have a thick wood shelf that I am going to refinish to match the dining room furniture and then put a stem holder under the shelf for wine glasses. Will see if there is room for some pictures at that point.
That sounds way awesome Lesley.
Please send me pics when you’re done. I can’t wait to see them 🙂
My husband just painted our kitchen and is in the process of the dining room. He is still deciding on the colors 🙂 I am passing this on to him and hope it helps 🙂
What color do you like best Molli for your dining room? Do you have any art or decor that needs to match the paint?
Good tutorial for getting straight lines. My sister showed me how to a few years back, but a refresher is always good. I want to repaint my bedroom this summer and we are finally finishing the basement guest room so that will also need to be painted. I haven’t decided on a color for my bedroom but am thinking about doing an ombre effect. The guest room will be either a sage or coral. I have some accessories that I want to use in the room so will be using that for my inspiration for color.
You’ve got a great project to work on Carol Sue.
I’m not familiar with the ombre effect, how’s that work?
I want to paint our bedroom grey. The challenge is that the drywall tape on the tray ceiling is cracking …
You’ll have to fix that Courtney. But that’s not a bad fix. I do recommend using setting type joint compound because it’s more resistant than premixed.
Did you already remedy this?
I don’t know if your topics always seem to match my next project or if your topics inspire my next project…..hmmmm. I am changing bedrooms in my house later this month and need to paint my new room (graphite grey on one wall and either a very light green or a very light grey for the other walls) and repaint my current room for my teenaged daughter (tiffany blue). Your tips for products are so helpful, I know what a difference a good brush/roller makes. I think your painting tips will transfer easily to wall…..yes?
Thanks Lisa, sometimes I feel the same way about articles I read 🙂
You can certainly use these tips for walls.
Graphite must be the new color for this year. You’re the second person who’s painting with it. Now I’m going to have to check it out next time I’m in Lowe’s.
Which brand of paint do you have good experiences with?
Simpler and faster way is to buy Frog tape. No bubbling, no bleeding, no steady hand needed. I peel off when the paint is dryish to prevent any bonding with super adherent paints. At times, I have bought a roll of striped wallpaper out of a discount bin that co-ordinates, and cut out the width of strip I want. It hides the wavy line on the wall. Have used it in a bathroom – no problem 7 years later.
Great tip Marion. I like Frog Tape, too.
Sometimes it can get a bit expensive if you have to do an entire floor of the house or your room is big. That’s my only beef. That and it takes some time to apply.
But it’s an another awesome project any homeowner should give a try.
Do you have a fast way to apply the Frog Tape?
Not only are you the repair guy, you’re a mind reader! I’ve halted a bathroom painting project because the results I’ve been getting, well… are really bad. Someone told me that you don’t have to tape, just paint with an angled brush. It should actually be that easy. As a recent widow, this is my first experience painting by myself and it’s just not working out. I painted the (very textured) ceiling first, and now I’m trying to paint the walls. It looks good when I’m up on the ladder, but when I get down and look at the wall/ceiling I can see how wavy and uneven it is. Thanks for the tutorial, very timely.
Thanks Nancy, with a little practice you’ll get better. The angled Purdy brush will help a lot.
Are you painting and remodeling the bathroom Nancy?
Thanks for the great tips. You make it look so easy!
Believe me Sharyn, I’m not perfect. Hence the rag in my back pocket, lol.
Are you looking to start a painting project?
Thanks for the great tips, Jeff! I’m painting just the ceiling of a saltbox bedroom (with one wall on the slant of the roof so the ceiling line that is eye level will most certainly show any mistakes at all. I’ll certainly use your tutorial and will buy the correct tools before I begin! Thanks again – Carolyn
Glad to help any time Carolyn.
Are you doing anything special with your painting project, accent wall, lines, etc?
I need to repaint the walls in my living room. The paint is dry and cracked and looks like the desert! Hopefully a fresh coat of paint is all I will need and those tiny cracks don’t show through. That could be a challenge, but the real challenge is my 1-1/2 year old toddler who loves helping daddy with projects!
Well at least you have a helper, right!!
Although small paint footprints could be in your near future, cute yet problematic 🙂
If your paint is chipping anywhere make sure to remove it with a putty knife otherwise you might see the same issue with your new paint. You might want to also prime over your walls first if the paint is chalky.
I’m painting the ceiling of a bathroom which we have just gutted and put up tile on the shower/tub walls. My challenge is that there is a seam of thinset where I taped and mudded the joint between the tile wall and ceiling. It’s going to to a rough edge. Hopefully, it will sand down well.
I’m sure you’ll be fine Renee.
What kind of tiles did you choose for your shower? I love shower tile and am looking to get ideas for our new remodel 🙂
Hi Jeff, I am going to paint the laundry room, and, ceiling. It has not been painted in 17 years! There is a rough patch of something on the ceiling that i don’t know what it is. I’m not quite sure how to tackle that. One of my concerns is taking down the closet maid wire shelving above the washer and dryer. I want it to look professional, and, i wish to clean everything before putting the shelves back up, so, i have to take it down. Oh, i wish i had cabinets instead. That would be easier to paint around, don’t cha think?
Cabinets would be a bit easier to paint around, that’s for sure. But you should be fine Carole. It takes some work, that’s for sure.
The patch on the ceiling, is it rough and your ceiling smooth? Or does your ceiling have a texture to it?
I have to paint the living room, dining room and office. First I must strip the wall paper from the dining room, then add trim to windows and door frames to add some height to the rooms. The living room and dining have triple crown molding and the office has arched windows and french doors so lots of trim detail to paint as well but LOVE my purdy brushes for that! With this big project I could certainly use all of these supplies!!!
Your room sounds phenomenal Erin. I can picture it in my head and it looks fantastic. Although you’re right, you’ll have a lot of details to trim around.
Are you going to roll on the paint or use a sprayer since the project is so big?
This came in handy since I was “nominated” to help paint a room at my son-in-law’s new house.
Nominated, that’s funny Tracy. I’m sure he’s appreciative of your help.
Hopefully you didn’t get a large room 🙂
I also like Purdy brushes. I am currently painting a bedroom pastel yellow. I am on my third coat since I am covering up a dark blue color previously. I like the idea of a grid and bucket, I will try that next time. I will also try the technique of cutting in brush and small roller. Thanks for your tips.
Pastel yellow sounds relaxing Darlene. I like that color a ton.
Is it your master bedroom?
I will be painting a bathroom. I had hand surgery last fall and am still a bit tender, so will use your mini roller for this job, along with the tips for cutting in the ceiling. This way I will not have a heavy roller to lift and manipulate. Have been wondering how I would get the job done, now I know. Always appreciate your tips and tutorials. This one really hit the spot for me.
Glad to hear you’re recovering Judy. It’s not easy to do anything with one hand let alone painting.
The Jumbo Mini roller was a new tool for me and I really like it. You’ll find that it isn’t heavy yet provides a superior finish.
Thanks for always dropping by to visit 🙂
Now I know what I have been doing wrong. I can always see where I cut in on a wall. These tips will help a great deal. I will be painting our laundry room next. Love Purdy brushes but have not seen Purdy rollers.
Thanks Lynn.
What color are you going with in the laundry room?
So that’s the way to do it! I have a living, kitchen, dining combo to paint. The ceilings are aqua so I want to paint them too. I have crown molding and do not want to mess them up
Aqua ceilings, that could be soothing. I’ve never seen them in that color but think that’s way cool Marilyn.
you mentioned storing the brush in plastic wrap after cleaning it. Does it need to be dry before you apply plastic wrap?
The bristles can be moist but make sure the brush itself is dried off so that it doesn’t rust.
My buddy jb prefers to let the brush hang and dry then he stores it. So you could do that as well. Purdy brushes seem to last no matter how they’re cleaned 🙂
I just stumbled on your blog from Hometalk and really enjoyed your tip for painting. I’ve always liked painting the quick way, without tape. Upon meeting my husband, he likes to tape EVERYTHING which doubles or triples the time it takes. So, I would love to win the free supplies to show my hubby painting without tape can be done! I’ll paint my kids bathroom (bright green), my laundry room (yellow), and anything else if I can prove I can do it just like you show! Thanks for your tip…I’ll be checking out more!
Thanks Jamie, I love Hometalk. So many fantastic ideas over there.
Tape isn’t a bad thing but I like you prefer to not use it if possible. Only because of the time factor. If I’ve got some extra minutes I’ll use it where necessary.
I like your choice of colors, great job!
I am 63 and will be using your tip to paint my ceiling and walls. I hope using the Purdy brush and techniques work. Thanks for your great suggestion.
Thank you Mona. You’ll find that Purdy’s supplies are superior to the others in the paint aisle. They are a bit more expensive but will last a lot longer than the cheap options. And you’ll get a better paint job 🙂
I need to repaint most of the inside of my house. I would like some tips on how to nicely fill holes. I try to, but when I prime over my work, it is still visable where I patched. 🙁
You should try 3M’s Paint Plus Primer. It’s got primer in it and you won’t see a shadowing effect if you paint over it. You can also sand it smooth if need be. I think you’ll love it.
I’m painting our newly remodeled bathroom this coming weekend and we have a kitchen remodel that is happening next. I’ll be a painting queen in the next six months. I wish I had your tips BEFORE I did our living room and dining rooms though! All I see are wobbly lines on my ceilings now. 🙁
You’re in good company Ellie. That’s happened to me a ton of times in the past. And the colors were orange and blue – very noticeable!!
But you can still cut-in over these mistakes using the same tips. Don’t worry, you can do a great job with some practice 😉
I will be painting two bathrooms, living room, dinning room, entrance way, family room and kitchen. When we bought our house the walls and the ceilings are all tan. We have already painted 3 bedrooms all with white ceilings. Wish I would have known your tricks to that strait line. You make it look so simple. Thank You for the Great lesson.
Virginia, thanks so much. I make a ton of mistakes while painting and always have a rag in close by. But it’s good to have a strategy that works. And this is one that has helped me become a better painter.
Hope your projects continue to go well.
Would love to try this on my next painting project! Thanks for the tip.
Glad you liked it Terri.
I’m painting my hallway. It’s LONG and NARROW. I’ll have tons of edging to do, so your tutorial comes in quite handy. I’m also faced with the dilemma of paint color because I don’t want it to look dark or more narrow, but I’m tired of the drab beige that I have. Very grateful for the small sample jars that I can purchase to try out. Thanks for the chance to win some awesome items!
You bring up a great point Deb with regard to the sample jars. It’s so nice to get these from the home stores. I’m sure you’ll pick out a great color for your hallway.
Keep me posted.
You are right about moving the furniture being the toughest thing about painting!! We have had the paint for our bedroom for a year and cannot bring ourselves to start because of the furniture!
You should look into those sliding discs for furniture Joy. My friend used them to move a huge cabinet by himself that weighed several hundred pounds. You can find them in any home store for a few bucks.
Thanks! I love to paint and try new colors, but my edges are horrible. Hopefully this will help.
With a little practice and the right brush I bet your cut-ins will look awesome Michelle.
Your tips and tricks are very helpful. I’m currently in the process of moving into a house that needs some tlc, and these tools sure would come in handy!
I hope this wasn’t already asked but there are way too many comments to sift through!
How exactly do you wrap the brush with the press n seal? Wait til it’s dry? Do it while it’s still damp after washing?
Can I do this in between coats with paint still on the brush?
Thanks!
Thanks Mark for asking.
I clean the brush thoroughly with just warm water and squeeze the bristles to remove most of the water. The bristles will be damp but try to dry off the rest of the brush. Then you can wrap the bristles with Press N Seal.
You can do this between coats but it’s still a good idea to rinse off the brush to remove the paint. I know it’s time consuming but this will help preserve the brush.
Hope this helps 🙂
Okay, great. Thanks for the clarification!
Thanks Mark for asking 🙂
Hi, great tips, I wish I’d have read this before starting the hallway and stairs in my house!
I’ve got a couple of questions, if that’s ok?
Firstly, we have a big mirror in the hallway and I’d previously touched up the old magnolia paint with a roller under the mirror to get rid of little grubby finger marks! Unfortunately you could always see the roller marks and after painting over with a new colour, these ‘old’ roller marks still show through in natural light. Do I just need another coat (I’m using a one coat paint, Jurassic stone colour!!!) or do I need to sand the wall??
My other question is regarding cutting in. What’s the answer to a wobbly uneven join between the wall and ceiling? Is there a tool that helps to create this crisp edge or do I need to be careful with the sandpaper or do I just need to follow the curves and blips with the brush???
Apologies for the lengthy questions, trying to google answer isn’t as easy as it sounds!
Thanks again
Al
I am carpenter and will be using your tip to paint customer’s ceiling and walls. Of course, I also use paint sprayer to work with because I think it make me saving energy and techniques work. Thanks for your great suggestion, it is good for whom has tight budget
Do other colors like blue, or green looks better than white in the ceiling?