True story:
I paid my handyman $600 to fix a 4 x 4 foot section of ceiling.
That was 9 years ago.
Don’t get me wrong, my handyman is awesome.
But sometimes money is tight, REAL tight.
And paying $600 or more isn’t doable.
Today you’ll see how to fix drywall ceilings and do it relatively fast.
Let’s dive in.
Drywall Supplies
You’ll need these supplies
- Drywall Saw
- Screws for Drywall (1 1/4 inch for 1/2 inch drywall)
- T-Square (optional)
- Drywall Bit for Drill or Driver
- Impact Driver
- Milwaukee Hole Cutter
- Respirator
- Fiberglass Mesh Tape or
- Paper Tape
- Putty Knife
- 6 Inch Drywall Knife
- 10 Inch Drywall Knife
- 12 Inch Drywall Knife
- Mud Pan
- Step Stool
- Tape Measure
- Utility Knife
- Purdy Paint Brush
- Purdy Rollers
- Paint Brush Roller
- Primer (Kilz is the Best)
- Paint for Ceiling (flat paint hides imperfections)
- Scrap of Drywall (size depends on your fix)
- Setting Type Joint Compound
- These Amazon Links help support Home Repair Tutor, thanks for using them
This is a long list, I totally get it.
BUT you’ll save more money than you’ll spend.
And this is a great excuse to get a new impact driver, haha.
Let’s start.
How to Fix Drywall…Sizing Up Your Mess (this sounds bad but isn’t)
Holes in the ceiling are scary.
But they’re not impossible to fix.
Measure the thickness of your existing drywall or plaster.
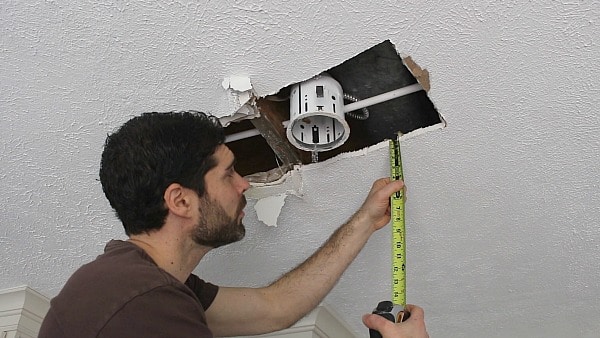
I had to deal with two different sizes of drywall.
On the left side of the joist there was 1/2″ and on the right side there was 5/8″ drywall.
This is a true pain in the BUTT but you’ll see how to deal with it.
If you have electricity in your ceiling turn off the circuit breaker.
I had to remove a recessed light fixture in our kitchen.
It was smack in the middle of the repair.
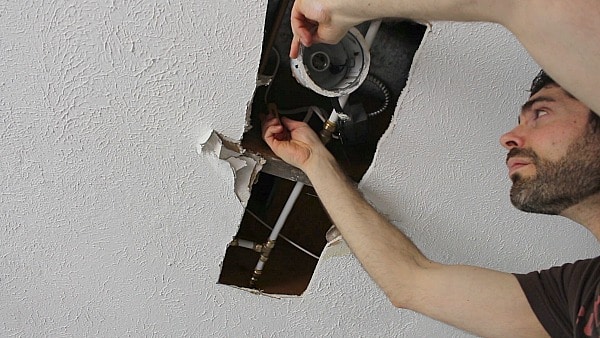
HUGE TIP:
Take a picture of your light’s wiring.
When it’s time to reinstall the light you’ll know exactly what to do (and will avoid a call to the electrician).
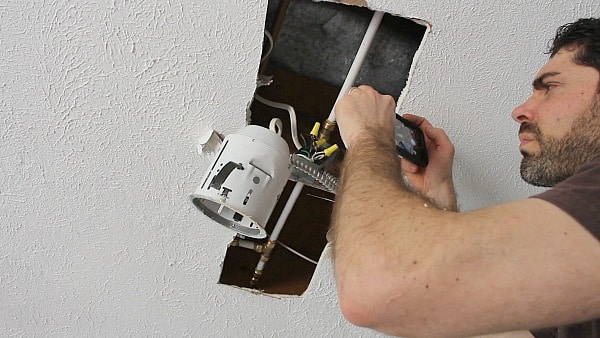
Cap the wires and push the electrical lines safely into the ceiling.
Try to avoid having them touch any copper or metal (just in case!!)
Measure the widest length and width of your hole.
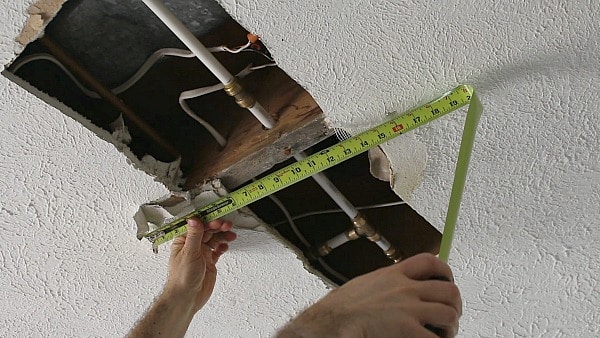
Cut out a new piece of drywall.
It should cover the hole in your ceiling.
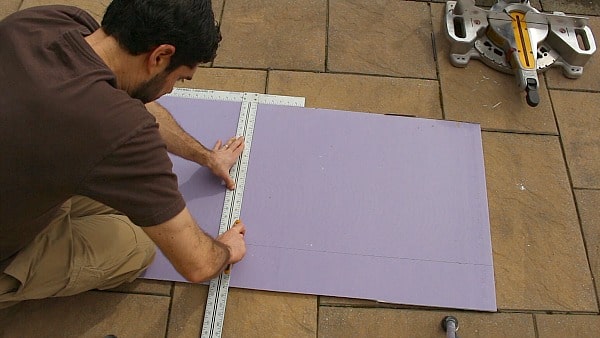
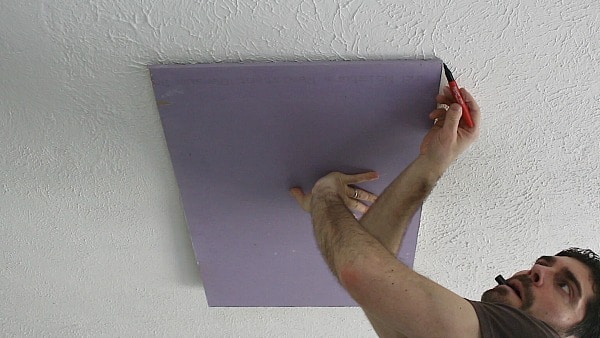
Dry fit the new drywall over your hole.
Trace around the new drywall with a marker.
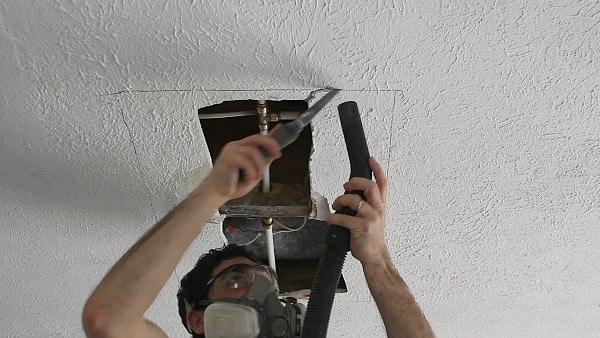
Cut along your traced guide with a drywall saw.
Use a shop vac to suck up some of the dust…although this is a futile effort at times, haha.
Remove the screws or nails that remain in the joist.
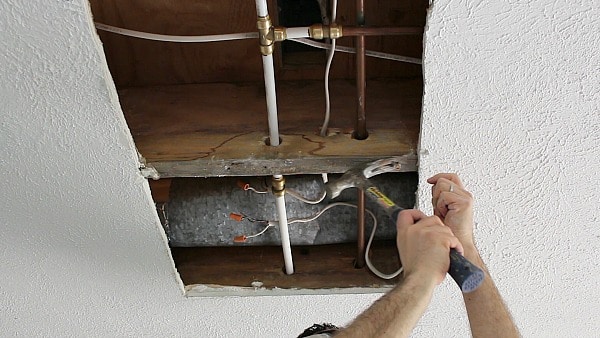
Add extra blocking in your ceiling to support your new drywall.
In this case I used 2 x 2 inch wood framing.
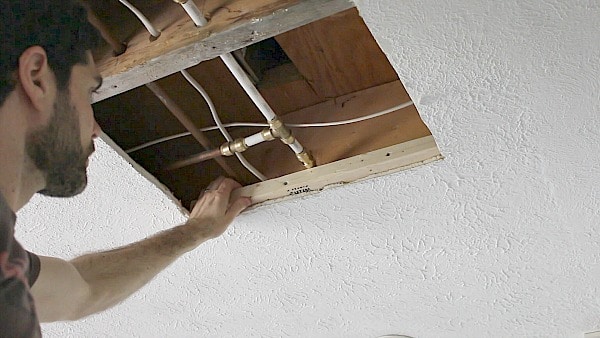
There’s more detail in the video on how I did this (actually, there are a lot of details in the video).
Mark the location of the framing and blocking on the perimeter of the hole.
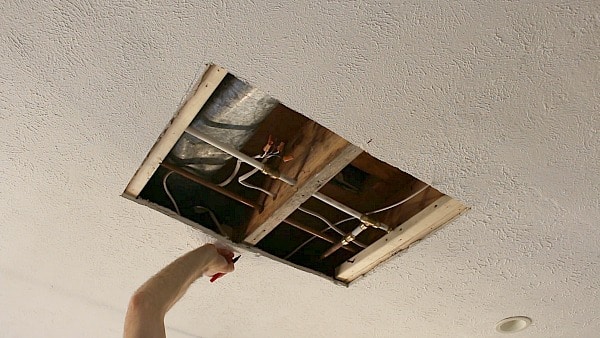
Now it’s time to hang the drywall.
How to Hang New Drywall (without killing yourself)
Most of the time I’m by myself when hanging drywall.
So the tips here will help you a ton if you’re in the same predicament.
Drywall screws should be slightly below the drywall.
You can accomplish this by using a dimple bit
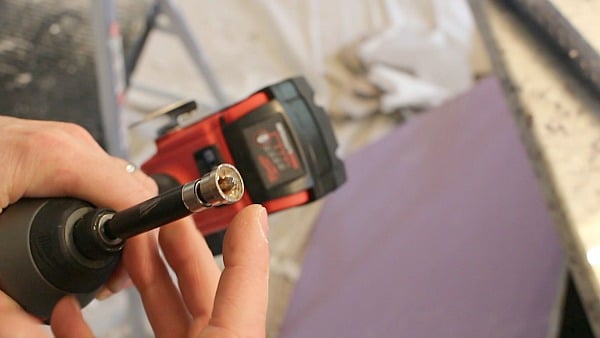
Place 4 drywall screws at the corners of your new drywall.
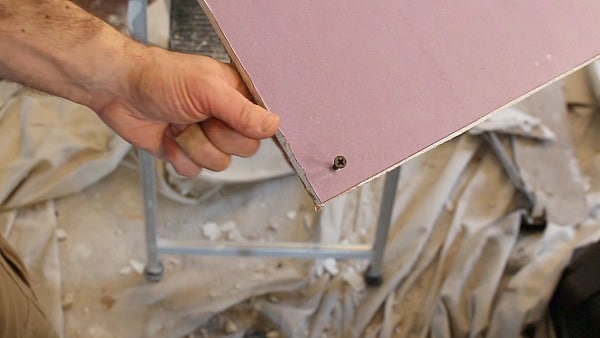
I forgot to mention this in the video!!!
When you dry fit the new piece of drywall, place a mark on one side and a corresponding mark on the adjacent ceiling.
This will help you line up the new drywall…small tip but super helpful.
Attach your new drywall to the framing.
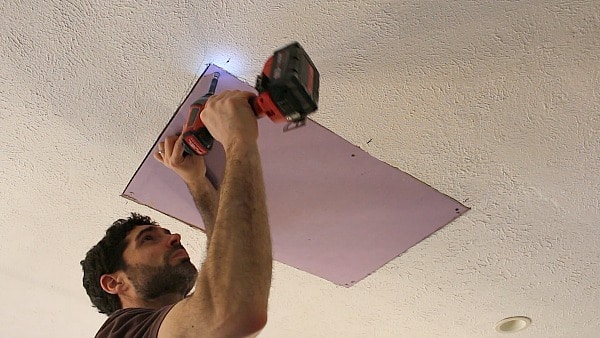
In the video you’ll see me fiddling with a laser.
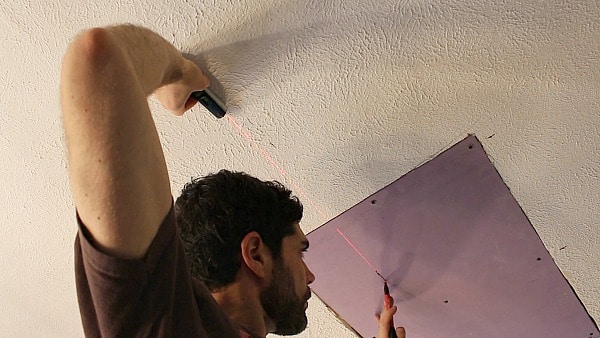
The laser helped me line up the location of the recessed lights.
Basically I shot the laser across the ceiling and through the other recessed lights.
Then used it find the exact location for my new hole.
While at Home Depot I spotted an adjustable hole cutter by Milwaukee.
This is one of those tools you instantly love.
It adjusts to cut 2 to 7 inch holes in drywall.
The best part: the attachable shield catches all the dust!!!
(my wife likes this tool, can you guess why?)
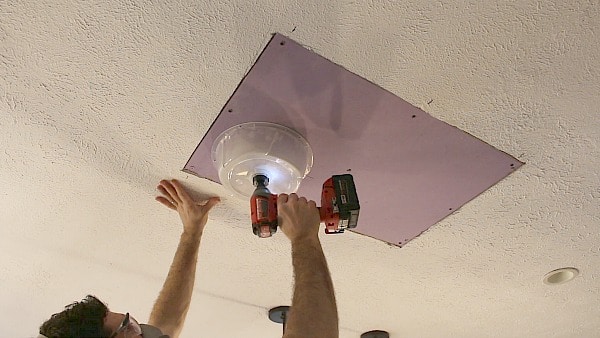
Once the drywall is hung it’s time to mud and add texture.
This is where it gets interesting…and a bit artsy as my daughters like to say.
Mudding Drywall and Adding Texture (it’s an art)
Some might think I’m nuts.
But for textured ceilings I prefer to use fiberglass mesh tape at the seams.
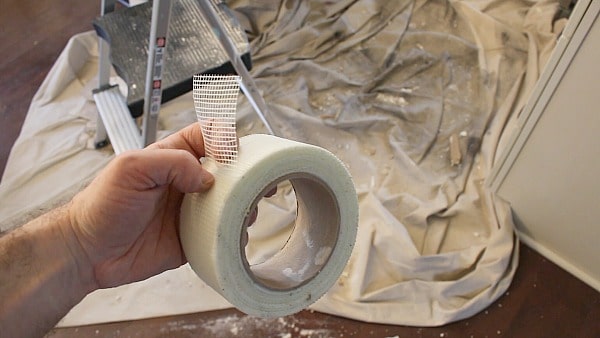
Why?
It’s stronger and more flexible than paper tape.
If the ceiling wasn’t textured I’d likely use paper tape.
Add mesh tape to all 4 sides of the drywall.
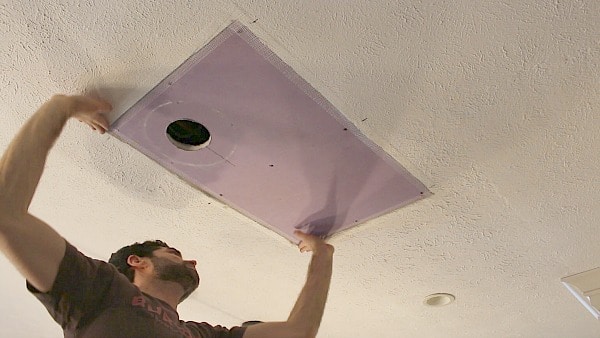
Apply a thin layer of 5 minute setting type joint compound to the mesh tape.
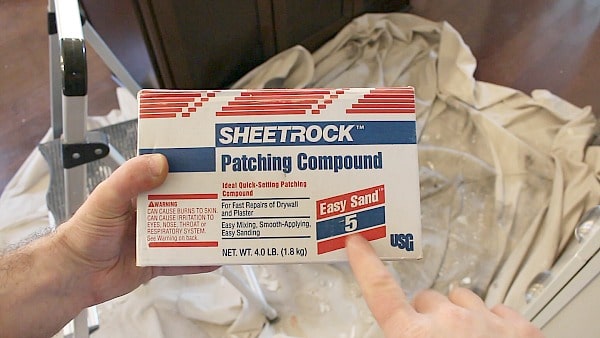
You only need enough joint compound to cover the tape.
Don’t worry, I show you the details in the video.
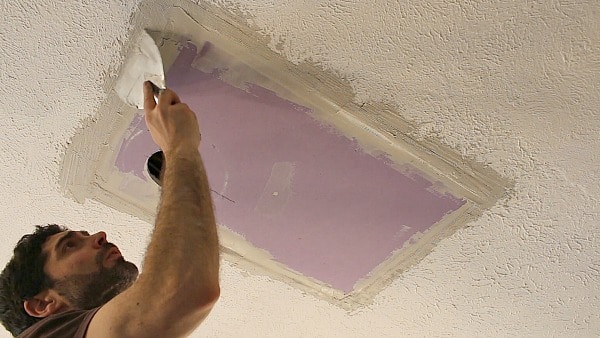
Once the 5 minute joint compound is dry, you can use Easy Sand 20 to get a second coat of joint compound.
Notice how the joint compound is only on one half of my 10 inch knife.
This was to fill in the difference in depth between the new and old drywall.
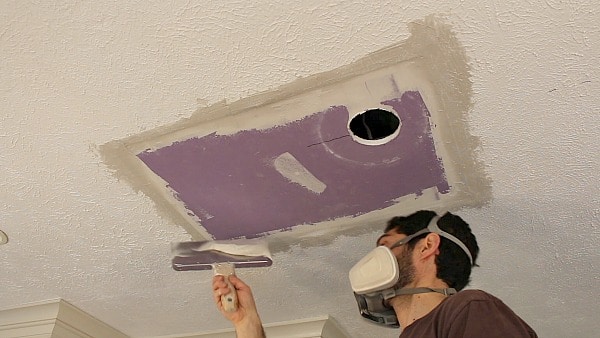
Easy Sand 20 sets up in 20-30 minutes depending on the temp and humidity.
Which is nice because you severely cut down on the time of the repair.
If you’re applying thin coats of joint compound you won’t need to sand much.
A moist drywall sponge cuts down on the dust.
Also, knock down any high spots or bumps with your drywall knife.
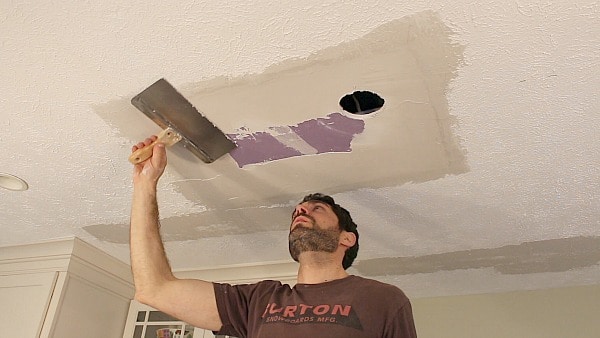
This is definitely a process.
And I’ve got a ton of great tips in today’s video…including how to texture.
What’s Next
If you have to fix leaky copper pipes we have a great tutorial on how to do that without soldering.
If you’re doing a bathroom remodel and need help, join one of our online courses – they’ll make your bathroom renovation much easier!
Let me know if you have any questions and I’ll do my best to help.
Cheers,
Jeff

One of my summer projects is to replace almost all the lower half of the dry wall in my basement, a 2000 sq ft area. Prior to me moving in, the basement flooded and the folks who fixed it did a pretty poor job. This tool would be great and save me tons of time. Watch your videos every week. Keep up the great work!! Thanx.
Thanks a million David and yes, having something like this would totally speed up your drywall work. Sorry hear the prior owners did you no favors. Stinks!!!
Thanks Jeff! GREAT video AGAIN!! We are fixing a ceiling because of a roof leak and we sure can use that Milwaukee impact driver!! I’ve also commented on your Youtube channel!
Thanks again for all you do!
Mary T
Those darn roof leaks, what a pain in the you know what!!! Hope the tips here help. Let me know if you have any questions. I’d be happy to help 😀
Ok – where were you when I was trying to fix a hole in my daughter’s drywall last week? I could have used a few (really a lot) of your tips! It actually out pretty good considering I was just guessing at what I was doing! Anyway, I would LOVE that impact driver! We are building a little storage shed in my backyard for lawn furniture and lawn mower, etc and that would be extremely helpful in building that! I would love it!!!!!
Lol, my timing was all off. Great job fixing your daughter’s drywall. Make sure to keep me posted on your storage shed. Would love to see pictures 😉
I always seem to put on too much mud and spend forever sanding it down. Just started using the sponge. Seems to work much better with less mess.
Sanding is painful, don’t worry the same thing happens to me at times. Lighting can make all the difference.
Jeff – Great video, and opportune as well. I have a number of ceiling repairs to do and this video gave me some great tips. Thank you. Also that Milwaukee impact driver looks awesome. Would love to get me one of these babies.
– Josh
Sweet, glad you liked the tips. Hope they help. It is a pretty amazing tool. Love the app and versatility of the RPM settings.
Hi Jeff , really love all ur helpful videos being a single parent I have to learn as much as possible as can’t afford to pay out for a lot of repairs or home improvements, so thx again & yes the impact driver would b a tremendous help to me omg how it would b great to win that thx again.
– Lisa
Keep up the great parenting Lisa, that’s more important than anything else in the world…and not easy (we have two tween daughters). Glad you’re getting good tips. Let me know if you ever have a question, I’d be happy to help.
The impact driver would be great and make my jobs so much easier. There are so many projects to use it on, too many to mention. I have their sander and love it, best one I ever had. Thanks for all of your help in all of your videos, esp bathroom remodel.
Denis
Having a great tools does make a huge difference Dennis. And we’re honored to help you with your bathroom remodel. Make sure to keep Steve and I posted on your progress. Always feel free to send us an email 🙂
I just finished putting drywall in a room in my son’s basement that had not been finished. I had never put up drywall and was short on time. I could definitely use this new tool for those jobs that either I take on or that my wife volunteers me to do.
Had to chuckle a little Andy when you mentioned your ‘volunteer’ work, haha. Well you’re obviously skilled. Otherwise your wife wouldn’t recommend you 🙂
I redid our upstairs bathroom last year. New cement board, new wall & floor tile, new cabinets and new mirrors. It was all done and looked great. The first time the shower was used we had a shower in the living room directly below. The tub faucet was not installed correct (yes, me) so I now need to repair the living room ceiling. This tutorial and a cool drill will help make this the perfect project.
Shucks, that’s a bummer Henry. Hope the plumbing wasn’t too hard to repair.
Water + Drywall = Badness
But it sounds like you have it under control 🙂
Great Video’s and tips – i am actually trying to tackle a whole Bathroom reno at the moment – Recently moved to Canada to start a new life and had to leave/giveaway what tools I had. the impact driver would be a great help !
thanks for all your tips!
Anything I can do to help with your bathroom remodel let me know Tim.
We have a bunch of videos here and on Bathroom Repair Tutor that’ll help you get started and finish.
Keep me posted buddy 🙂
Thanks for the video! It has given me a nice reminder to finally fix our ceiling from a bath tub leak many years ago. That new impact driver would also come in handy replacing some 2″x2″s on our patio cover.
Don’t worry Len, I also have a bunch of projects that have been put off. Life gets busy. Wish we had more time in the day 🙂
My roof leaked a few years ago when high winds came through and blew off my shingles and my insurance never gave me enough to repair my roof let alone repair the damage it did to my ceilings so I have been putting off the project because I’m not a sheet rock kind of guy. but by watching your video I believe its given me enough confidence that I’m willing to try to do the repair on my own now. So I would love to be the lucky winner of the New Milwaukee Drill to make my project that much easier. Thank You Jerry Field
I Love DIY and I’m a poor widow, which means I do all my own repair work. But I’m very handy and learn alot watching videos like this. I am redoing my bathroom (with lots of drywall repair) and my brothers home with at least 4 dryway repairs (he just had a heart attack and cannot lift stuff for a while, so big sis steps in). I’ve been using my battery driver, but doesn’t have the ooppmmh I really need. Keep the videos coming! Mucho thanks!
I have tried some other 3/8 drivers, and this one seems to be more powerful, lighter, and more maneuverable than the others. At 67, I try to work smarter rather than harder, so I would be ecstatic to receive a tool of this high quality.
I work with 4-H and we make animal feeders and hay keepers as well as animal pens and barn repair. this would be a great tool for the kids and I to use.
I’m a tool collector “wanna be”. I have scads of craft tools but I have always wanted to have my own “manly” tools. Someone punched a hole in the wall in my living room. Don’t think it’s ever going to get fixed unless I fix it. This tool would certainly help!!!!! I appreciate your videos very much. They will help me do some small repairs in my home.
Jeff, I just finished watching your awesome “How to Fix Drywall” video and you made it look so easy! I have some drywall repair I need to do on my textured ceilings and being retired and on a fixed income, I knew I couldn’t afford to hire someone to do it. I would LOVE to have that life changing tool you were using and would be so grateful to you if I were chosen to receive that Milwaukee Fuel M-18 Impact Driver! My husband recently had a shoulder replacement and he can no longer do these kinds of projects, so I have had to become a DIY housewife and watching your videos have inspired me and helped make that possible! Thank you so much!
Great tips, but a step stool would definitely not be tall enough to get my 5’2″ being up to the 9′ ceilings. I’ll definitely be using the tips on wall repairs and giving my husband the job for ceilings! Texture was really good info.
Oh wow! That would be so great this summer when I repair my badly in need of a makeover back deck.
Hi Jeff! We will be tackling a crack in our living room ceiling this summer, and I learned lots of tips from your video. That impact driver is great too. I need to add that to our tool collection!
Great video, I had the same issue with my bathroom ceiling. Luckily, my spot was only 8 x 11. I used the same technique but didn’t add a supporting wood framing. I will use Easy Sand 5 and 20 next time if I have a need to patch a hole on the wall or ceiling. Thank you so much of these tutorial videos; they are very informative and easy to follow.
Very nice Jeff.I like that adjustable hole cutter.because I am thinking of putting recessed lighting in my bathroom.so Now i know how to do the dry wall.can i use the same patching compound in my garage.thank you
Splendid video again as usual, thank you.
Many MORE ceiling repairs due to leaky roof. I will now try myself rather than paying out so very much money. Prices a little higher here in the West!
Not only for ceilings, but for all wall patches– so complete.
FYI-Video froze at about 10 minutes, might be my computer/service. I know I will view complete again and again. And as usual share with all.
Thank you Jeff.
I an 70 yr old retired physician and has enjoyed and learnt a lot from your videos.
Thanks very much
Harry sastry
Jeff- LOVE your tutorials and they’ve been a huge help to me already … that impact driver would be the icing on the cake! I could definitely use it as there are so many more projects I’ve got this Summer .. Thanks again for your videos!
Tim
I wanted to start off by saying thank you for all of your tips that you have shared. Watching your video’s has helped me out tremendously. I had a water leak and had to repair the bathroom ceiling. I was surprise that I could do it. It came out very nice, with my 14year old son’s help. You make things look less complicated. I would definetly enjoy having that Milwaukee impact driver for other projects for in and outside the house. Thanks for listening. ☺☺☺☺
I’m a 72 year old female do-it-yourselfer. Have been for years. My DeWalt cordless drill still works but the batteries no longer hold a charge for any length of time and it’s so old that replacement batteries are hard to find. I’m going to have to break down and buy a new one. If I win a new Milwaukee drill I could finish a lot of the projects on my list. I also have a corded drill but they are more trouble than they’re worth. I admire your drywall project. I’ve hung a lot of drywall over the years but I’m something of a perfectionist and it takes me forever to get the job done.
That impact driver would be a great addition to my arsenal: a real time saver. I don’t have any ceiling repairs at the moment, but with the huge hail we sometimes get here in north Texas, it might just be a matter of time. I do have a 2′ by 4′ wall section in a closet to repair. This is really a secondary project. The main project is re-tiling the tub surround in our hall bath. Twenty-five years ago it was tiled over two layers of drywall and now I’m repairing water damage and decided to redo the whole thing rather than just a patch. Knocked out the closet wall for better access to repair framing. I’ve been learning a lot with this project, and your great video has added to that new knowledge .
Thank you for this video. Your timing is perfect. I have a hole in my bedroom from when the bathroom pipe leak was fixed. I’ve been putting off fixing the darn thing because I really wasn’t sure how to fix it properly. Your video really helped illustrate exactly what I need to do. The Milwaukee Impact Driver will help me when I repair this hole. Thank you again for your help.
Great vid!! I love the tip on using a damp sponge to blend the old and new. Variable speed impact driver=Looks like an awesome tool. Need new doors so a variable impact driver would really help speed up the process.
The grammar school I retired from is across the street. The school will have a “Green Unit” where kids will grow their own produce. The school will allow a chickens, if the cost comes from the community. Therefore, this tool would help build the chicken coop and a mini barn to house all the tools.
OK…I’ve gotta be your “random drawing” (wink wink, nudge nudge) winner. I’ve got the exact situation you described. In my eighty year old house remodel there was a pinhole leak and now that that’s fixed I need to drywall the ceiling. Look, this is cosmically kharmic. It was simply meant to be. Please salve the pain of the others by ending this early and ship the drill to me. Thank you.
Great video man. Made me think about the dry walling jobs I’ve been avoiding.
I’ve got a shop that’s loaded for maintenance. Also, the house has areas of prior leakage stains. Oh man that Milwaukee
Unit looks sweet. It inspires me again! Thanks.
I really enjoy watching your weekly videos to see how you tackle these homeowner repairs. I will be able to use this one in my garage. The drywall has “experienced” two “hurts” from accidental bumps. I have been procrastinating their repair, now I think I can tackle the project. I could really use the Milwaukee Fuel M-18 Impact Driver to tackle the job. thank You for your tutorials.
As a newbie to the “do it your self world” I am getting ready to take on a project to remodel my bathroom to accommodate a disabled son. I would love to win the Milwaukee Impact Driver to start my tool collection that I am sure will help me in future home improvement projects.
What can I say Jeff…..You are just AWESOME! I have been viewing many of your videos to educated myself so I will be ready to take on my bathroom challenge. I Thank you for being so kind and always answering questions from all of your Jef-fANS!
Great video! I’m thinking about filling in my attic fan cover on the ceiling and the Milwaukee driver would be very helpful! Thanks for the video!
Thanks for all the great information that you make available online. I’m a first time home buyer, and started on the updates as soon as we had the keys in our hands. I plan to update everything I can myself to save our budget. I have drywall to repair, furniture and shelves to build, a kitchen to remodel (including tearing down walls). and flooring/bathrooms to update, just to name a few. I could certainly make use of a quality impact driver that’ll stand the test of heavy use. Thanks again, and keep up the good work!
Great video, Jeff! I would love the driver to help installing drywall in my bathroom and Wedi board in my tub surround! Thanks for your help with my home projects!!
Great instructions! I, too, want to save money by hiring a contractor. But still don’t know if the confidence is there because I have a bigger ceiling fix. Would love any free tools to help with the job! Thanks so much!
Hey Jeff
Great advice and tips for repairing drywall. One of the tools I don’t have is an impact driver. I usually buy me a tool every year at fathers day. I’m the handywomen in my house so I take advantage of the holiday and get me a tool! If I win this, I can get the bits to go with it and be ready for the next project! Thanks for the video’s!
Great job. That tool would be a great tool for many, many things around the house, including some fence additions I have planned.
Hi Jeff, thanks for the great tips. I have several areas of drywall damage from ice dams and thanks to ur tutorial, I am now ready to fix them. Karen
Hi jeff,
i love the video thanks for the great tips.
that great impact driver would be very
helpful for many repairs in my house
thanks,
Love all your video’s. Even though I’m 70 I’m still learning. Never had a tool like the Milwaukee Impact drill although I do have quite an assortment. You just can’t do a quality job without the proper tools. Keep the video’s coming
Thanks.
Hi jeff,
i love the video thanks for the great tips.
that great impact driver would be very
helpful for many repairs in my house
thanks,
I have to fix my living room sealing because of roof leak all by myself. Since my husband was diagnosed with Alzheimer’s 7 years ago I am learning how to fix things around the house. With some power tools and by constantly watching tutorials I am getting more confident every time I fix something. Thank you for the great tutorial! I could definitely use a beautiful tool like yours!
Sealing-ceiling (autocorrection)
I have multiple drywall repairs along with other home improvement and repair projects on my to do list. Your video and instructions will help me do it myself and save money. I’m still building my DIY tools and don’t have an impact driver. Wasn’t sure if I even needed one, but now I see why it would be a huge help!
I wish had this tutor about 4 years ago…the one thing that home ceiling drywall repair does is humble you…had a leak and thought it was from behind copper pipes in ceiling. Low and behold I was cutting away, only to find the leak at the faucet shutoff. Repair was Frankenstein-like, but wish I ha thought about blocking the edges for more secure mount. Live the tutorial and can’t wait for next ceiling repair to reapply.
Excellent video, however I would have liked to have seen the installation of the light.
Hey Jeff, thanks for the video. I am a new DIYer who recently bought a 2nd rental property that I will be living in for about a year giving it some TLC. I too have a few drywall spots that will need to be replaced with orange peel texture, so if you have any good tips on OP, I am all ears. I have tried the spray can from HD w/out much success. My only drill right now is a 9.6 V Dewalt I bought when I worked at HD in 2002 during my college years, so if you wanted to show some love with the Milwaukee impact driver, I would be very much appreciated. -thx!
When I was young and foolish, I hung the drywall in all of my basement ceiling all by myself using only a TEE made from 1 by 4’s. In some ways that was easier than making a patch because there is no old texture to match. I chickened out and used 3/8 drywall to limit the weight of 4 by 8 sheets and a ceiling is not subject to physical damage like a wall can be so the thinner drywall has never had a problem. But I used 1/2 inch on the walls. I’m guessing that a water leak will ruin any thickness of drywall. All by power tools I own have the 15 pound (just kidding) batteries so an old guy like me would really appreciate a battery and lighter battery.
I also cheated by hiring the ceiling sprayed but I did tape the ceilings first and I did all of the wall taping (and sanding, etc.) I had to sand more then I should have. After hanging about 60 or 70 sheets of drywall, I was wanting to get done with that project. I was working a lot of overtime at that time and hanging drywall was my way of relaxing after 10 or more hours working at a desk job! Can you believe that?
I enjoy your videos, Jeff and especially the extra detail you demonstrate in each phase of the job. I have seen videos made by others that just say something like, “cut a piece of drywall to fit,” and that is the only direction given for that task.
Thanks for the fun in studying your videos!!!!
I two old homes and I am constantly needing to do repairs. This would be so handy to have
I hinted around to get a impact driver for my birthday (4/11) and the hints, I guess, were not clear enough. So I am still in need of a impact driver. Can’t wait until next birthday. Improvements can’t wait until I am a year older. It would be nice to have for a belated birthday gift. Thanks for all you do.
Great drywall tips, Jeff! Perfect timing! I have 3 ceiling repairs like the one you demoed and now can get them started! My wife thanks you!
The new Milwaukee M18 Fuel Impact Driver would make the project go much easier!
Thanks, Jeff.
This summer I would like to build some patio furniture. However, I only have a corded drill. I built my wife a small vanity as a Christmas gift two years ago, but I haven’t built anything since because I only had a drill. Having to drill a pilot hole, changing the bit, and inserting a screw over and over and over again really gets old! This tool seems very useful.
I’d be thrilled to have an improved driver. Mine is getting a little flaky!
I have a long ‘Honey Do’ list for my husband (that he doesn’t know about yet… hehehe)! His old drill just took a dump… actually the batteries won’t charge any more… could be because they are about 20 years old! And those things weigh about 10 pounds each! He is really going to need this nice Milwaukee Impact driver set for our remodel of the master bathroom (shhhhh!… he doesn’t know this yet!). I would love to save this as a gift for Father’s Day! It’s going to take me that long to plan the remodel anyway! Keep the videos coming! They really make me look smart when I am helping him around the house!
Wow Jeff, another awesome DIY video and this one really broke it down to where about anyone could tackle that ceiling hole. You really made it look fairly simple and I love fairly simple. I have plenty of projects where that impact driver would come in handy. Redoing some work in my card room to start with and then my garage has some rough edges that your video and this driver will really help me with. Thanks for making life’s bumpy road for DIYers a little smoother.
Hi,
I have been having problems trying to get my contest comments to go through. I hope it works this time on my big PC instead of my phone.I am wanting to build a closet unit and a full wall shelving unit for my 3 year old granddaughter.I own the Kreg pocket hole jig, the crown molding jig,and the Kreg “square cut”. At this point in my life I have had 3 major back surgeries and my heath is slipping fast. I would LOVE to win one of the Kreg Rip-Cut saw guides so I could build something I could be proud of and is also well built to last her for years of enjoyment and give her something to remember “gampy” (grandpa) from. You have no idea how much this means to me and my granddaughter. Thank You Very Much,
John Kreimier
Disguising the patch looks pretty hard. I too wish there was way to blend in the texture. I just use paint brush to dab. Have you ever dabbed knock down to get orange peal look? Or is that too noticeable a patch?
Anyway contractor “said” he got under the windows (didn’t), and inspector made him poke back into the drywall I already textured. Now I have to patch all his holes below windows. I can do it just like you showed us.
I just found your site today. I am watching tons of your videos. Thanks for making them simple and easy to follow.
Awesome stuff about drywall repair. Please keep writing more things like this. I really like the fact you went so in depth on this and really explored the topic as much as you did. I read a lot of blogs but usually, it’s pretty shallow content. Thanks for upping the game here! drywallrepairlancaster.com