Working under a sink is a pain in the BUTT.
It’s cramped, dark, and sometimes stinky.
Last week I got a request from one of our community members.
Adam wanted to know the easiest way to replace faucet supply lines.
Today’s tutorial is going to answer his question and show you why you’ll love this tool…
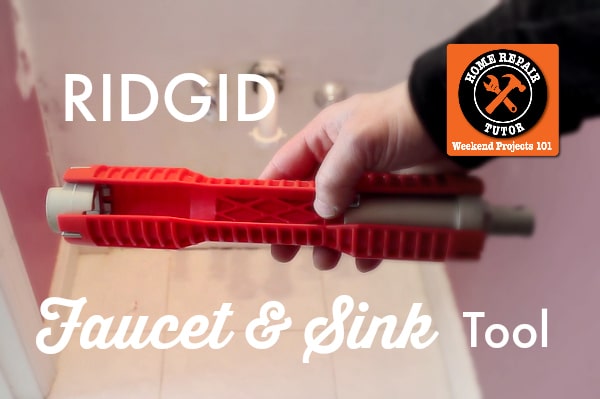
The Ridgid Faucet and Sink Installer
I like sharing anything that makes life easier.
If you need to do any plumbing work in your bathroom you need to check out this tool 😀
If you’ve ever tried to work with old faucets or supply lines you know they are stubborn.
Basin wrenches were my go-to tool for removing faucets and all their parts.
Heck, I even use one in this tutorial on how to replace a bathroom faucet.
But basin wrenches can sometimes be hard to maneuver in a tight sink space.
I think the engineers at Ridgid knew there was a better option.
Enter the Faucet and Sink Installer.
I’m going to give you 5 ways to use it right off the bat:
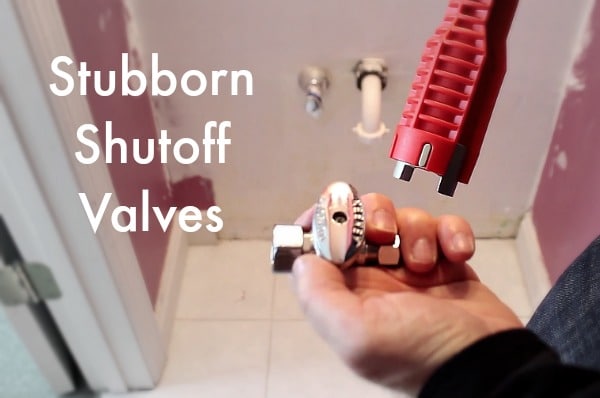
1. Turning off stubborn shutoff valves (more on this in the video)
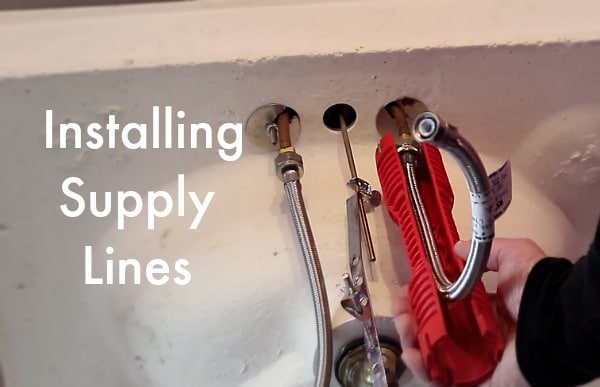
2. Removing and Installing supply lines from underneath a sink
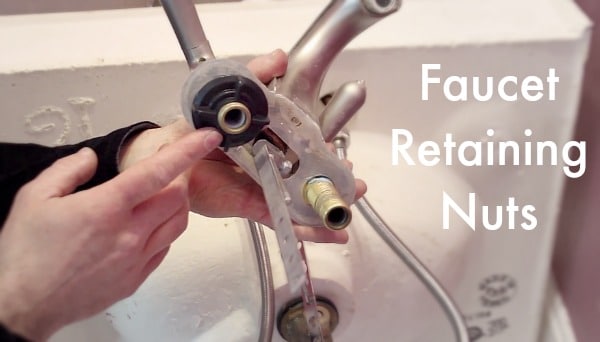
3. Removing plastic nuts that hold faucets to sinks
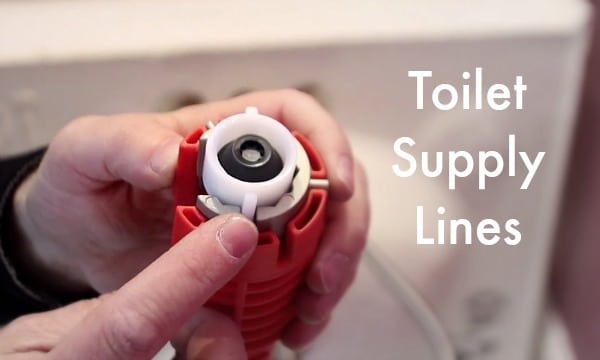
4. Removing old supply lines from toilets
5. Installing kitchen strainer baskets
Watch the video to get a full appreciation for this tool.
I really think the Ridgid Faucet and Sink Installer is a must if you’ve never installed supply lines or faucets.
You’ll seriously love it because it’ll cut down on the frustration factor my 100%.
The Ridgid Faucet and Sink Installer Tool
What’s Next
if you want to get the Ridgid Faucet and Sink Installer Tool here’s an amazon link.
For $21 it’s a great tool to have in your arsenal.
If you’re doing a bathroom remodel and need help, join one of our online courses – they’ll make your bathroom renovation much easier!
Let me know if you have any questions and I’ll do my best to help.
Thanks as always for reading, watching, and being part of our awesome community.
Cheers,
Jeff

I wish I had that tool 3 weeks ago !!
Like all plumbing jobs on old houses, be prepared for what can go wrong will.
I had leaking water at the handles of my bathroom sink faucet, figured it was just the spring and washer. so I turned off the water under the sink, took of the handle and removed the valve stem and looked at the spring and washer, they were fine, turned out to be the valve itself, got that replaced. went to turn on water and the valve at the shut off was leaking, well guess what, I decided to replace the entire line from valve up.
That tool you got there would have been put to good use.
I don’t have a favorite tool, but here is a little tip / idea I found come in handy instead of dragging a heavy huge tool box around…You know those old shower caddys the plastic ones with handle, they work great as a portable tool box / caddy. just load in your tools for the job and take it with you around the house, you can fit all kinds of hand tools in them. wrenches, screwdrivers, knives, chisels,pencil even screws/nails, measuring tape nylon tape whatever.etc…when your done just put your tools back in your main box and your ready for the next adventure.
Oh and Jeff, Thanks for the Home Repair T-SHIRT !!!
I like to wear it when I do the fix it jobs around the house….(wife was like where did you get that shirt) I said I won it thanks to her and her HONEY DO LIST!.
🙂
That’s so funny Lee, you made me chuckle. Glad your wife likes the T-Shirt. Maybe I should send her one!!!
Shower caddy into tool caddy, now that’s a great idea. I’ll have to remember that next time I have a little job around the house.
Yah it’s amazing how a small project explodes into something way bigger. This happens to me all the time. Sounds like you got everything under control 😀
OMG!!! You are a life saver thanks for this video, I’ve spent countless painful hours trying to remove supply lines off old faucet which I’ll be replacing, I purchased this tool but didn’t know how to quite use it yet, but now after this video, I’ll become a certified plumber! My wife wife is gonna Love me more, LOL! now that I can replace those old fixtures!
It totally changes the dynamic of any faucet repair or replacement Luis. Glad you liked the video and hopefully it clarified how to best use the tool. Good thing you found it before getting started 😀
I saw the video where you used this tool. I ordered one to use to install a fixture in my bathroom sink, it works! Thanks for the tip
Awesome Demetrio, that video is one of my proudest because although it’s long I tried to make it super jammed packed with tips and tricks. My pleasure to help any time.
AWESOME! I need to tighten a sink in a home I am selling. This will save me a call to a plumber! You are the BEST!
Tightening those plastic retaining nuts is a real chore if the sink cabinet is tight. You’d laugh Linda if you saw how I crawl inside of our vanities. It’s hilarious. Glad to the video helped. And hope you sell your house fast 😀
Stellar tool! Would never have found this/known about such a thing.
Thank you so much once again Jeff.
Video is great, but hoping I won’t be needing for a long while–yet so important to know of this. Great video again as well.
Thanks Char, if you do need any help with a faucet or supply lines you know where to venture 😀
Oh snap – I know I didn’t just see that you have t-shirts! Will wonder for awhile what a girl has to do to get one of those …
Jeff, this forum really has been great for my little home improvement paradise. How else would I have discovered my favorite bathroom tool – the toilet snake. Made specifically to fit into the toilet drain without marring the porcelain – beautiful design for something made to deal with poop.
Watch out for a new question I’m posting at HRT about pallet walls!
🙂
Lol, maybe I should make more T-Shirts for everyone. Glad you like the community Lisa. It’s the best part of DIYing, having someone else to bounce ideas off of. Toilet snake, hmmm. I’ll have to maybe do a video on that bad boy.
Can’t wait to see your post about pallet walls over on the Facebook group 😀
I have done 3 different faucets in the past year. Wish I had this, but we are doing a bathroom and kitchen remodel soon. Plan on buying this tool!
Hey Jeff. Nice tool. I decided to rebuild my faucet to my laundry deep sink. The sink was installed in 1985 with metal all the way. First the HOT & COLD were leaking, so I pulled the cores out – what a mess. OK, I will replace the faucet, H&C lines, clean p-trap, etc. Well!!! Everything was “stuck”. I considered some serious muscle, vice grips & pipe wrenches, but decided to take the sink off the wall – good idea. Everything was stuck. With the sink in the yard, with vice grips & various wrenches everything came off. I got a sink & vanity and replaced the deep sink with all new stuff. This was after sawing off the compression nuts that mate with the H&C new valves. Lesson here: If all the stuff is stuck like it was welded on, I suggest removing the sink/vanity if possible. You may break “stuff” and end up with it on the floor anyway.
Jeff. Another note on threaded plumbing parts. Have a jar of Vasoline handy and put a light coating on all the threads. I find most parts slide on with ease. If you need to loosen or take something off, smooth as a whistle.
That’s a pretty neat tool! I hadn’t planned on doing much plumbing type work, but I’m going to be painting and putting new flooring in the kitchen, so that has had me thinking about putting in a new faucet with a sprayer nozzle (I miss not having one!). One of these seems like it would be another good addition to my tool box.
My favorite plumbing tool has been my drain removal tool. For a long time I had used pliers and a screwdriver to pull them out, and I almost always broke my drain, so now that I have the tool, my life is much easier.
thanks Jeff
Jeff,
Thanks for the shout out. I love this tool…but forgot to take pictures–I think I was overwhelmed with how well this really worked. The 2 new bathroom faucets went in like a breeze–definitely wish I’d had it for the first faucet. This one tool is all you described and more. It is so easy to use…removing the old faucet as well as installing the new one. I’m getting a new kitchen faucet and I believe this will work just as well for that one also. I’ll try to remember to take some pics this time. I might even put a new faucet on the laundry tub…then I’m out of faucets LOL. Unless I tackle my parent’s house, hmm….
Here in Florida we use vertical blinds to cover sliding glass doors. Over time the plastic clips that hold the fabric become brittle and snap off. In the past repairing the blind has been almost impossible, meaning off the the store to buy a new track. I have found a way to re secure the blind that will work 95% of the time. The break in the clip holding the blind is usually not completely sheared off, and if there is as little as 1/4in left you can repair it. I use a large upholstery needle held in a small vice grip 90 degrees to the jaw. Using a propane lighter I heat the tip and push it through the remaining stub of the clip. I create two holes about 1/4 in apart and do the same for the plastic insert that holds the top of the fabric to the clip. Now using a very small diameter copper wire, I attach the blind to the stub and twist the wire to lock it in place. This repair can last for years and beats buying and installing a new track.
I would love to see pictures, step by step or a better explanation…I want to learn how to save the track but get lost in your explanation…Jeff, maybe your can do a video if you understand how he repaired his…Thanks, I love ideas like this!!