Learning how to cut porcelain tile is easy, right?
Not so much.
You need to know what tools to use and when.
Unfortunately, that’s also not enough because you need to know how to use those tools.
I’ll share what tools I like best for cutting porcelain and how to make them perform like a Ferrari.
Basics for Cutting Porcelain Tile
Cutting tile depends on the cut you need and the type of tile.
For example, making a miter joint requires different tools than your standard straight cut.
If I need to make a straight cut, I’ll use my manual snap cutter.
Heck, I’ve used my manual cutter exclusively along with a grinder and polishing pad for many projects.
I’ve been using Montolit’s Masterpiuma for years. It’s not cheap, but it cuts a variety of tiles.
If I need to notch tiles around a curb or wall, normally I use my grinder, wet saw, or IQ saw.
There are pros and cons for each tool.
I’ll explain.
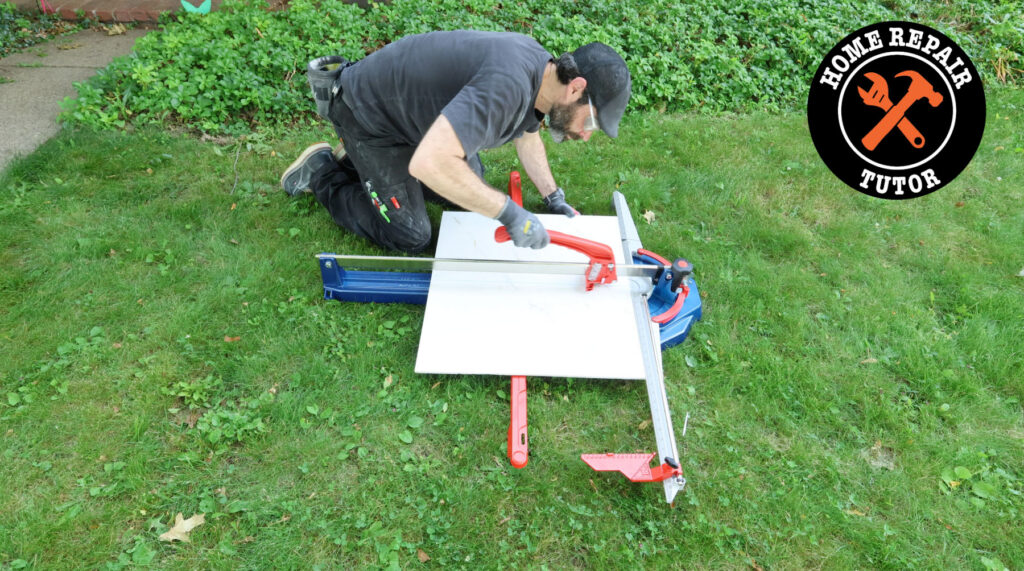
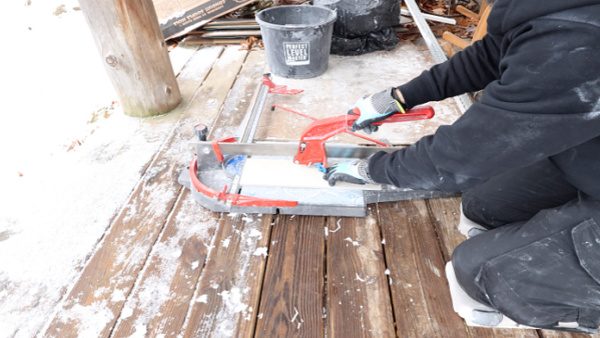
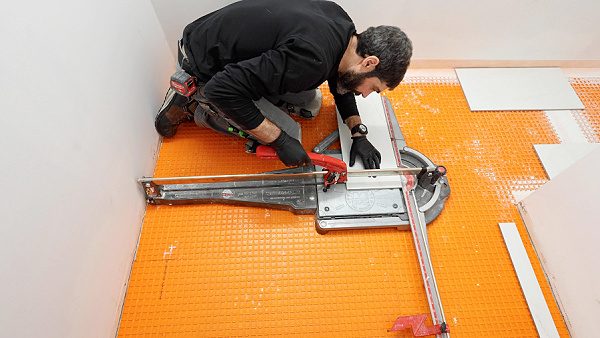
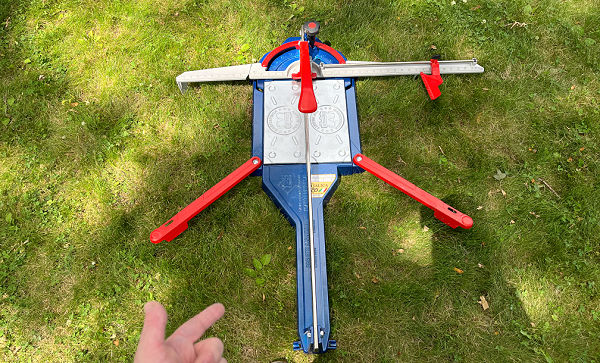
Manual Snap Cutter (Straight Cuts)
It’ll take a lot to convince that a great manual snap cutter isn’t the best tool for porcelain.
First, they’re fast to set up and don’t create a mess like wet saws.
Second, they fit in small spaces like inside showers and on countertops.
Third, they’re quiet compared to wet saws – which is great if someone is working from home.
Finally, they’re easy to use. Here’s a rundown of how I use my Montolit Masterpiuma
- Measure and mark: Draw the cut lines on the tile with a pencil
- Position the tile: Place the tile on the cutter and align the mark under the scoring wheel
- Score the tile: Place the cutting wheel on the tile edge, apply firm downward pressure, and push the handle forward across the tile in one smooth motion
- Snap it: Push the handle downward with a quick motion while applying even pressure to snap the tile
I’ve been using Montolit’s Masterpiuma for years and highly recommend it. This snap cutter comes in several sizes.
The newest Italica Masterpiuma boasts a bigger scoring wheel, laser, and single-molded base that makes it easier to snap large tiles.
I used the Italica recently to cut 24-inch by 48-inch tiles and was very impressed.
But sometimes certain tiles don’t snap evenly or have jagged edges.
I don’t throw the tile away. Instead, I’ll polish the snapped edge and make it square.
If you’re a good tile setter (and you should be striving toward that), you should have polishing pads.
I like using hand polishing pads or 200-grit electroplated ones that attach to the grinder.
Wet Saws have been a staple in the tile industry for years. So let’s see some tips for that.
Wet Saws for Cutting Porcelain Tile
I don’t use wet saws often, but when I do…
It’s the DeWALT D24000.
This saw is a beast and can handle tiles up to 24 inches.
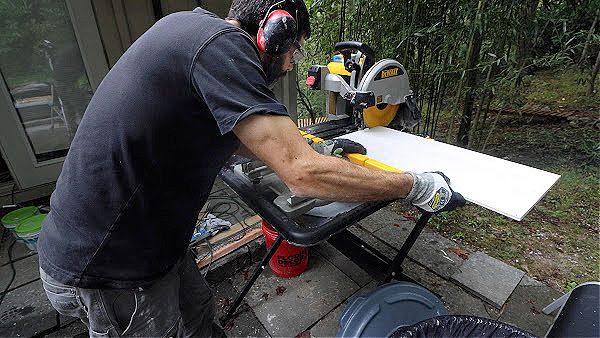
The downside to these saws is that they’re messy and loud.
If you want to lose your hearing, use one of these every day.
Here’s the step-by-step for how to use a Wet Saw with porcelain:
- Setup: Fill the saw reservoir or a 5-gallon bucket with water, and ensure the pump is in water
- Aim water: Check to see that the water is hitting the saw blade to cool it and reduce dust
- Measure and mark: Dry the cut lines on the tile with a pencil or, preferably, a wax-tipped marker
- Guide the tile: Line up the cut mark with the blade before starting the wet saw, pull back the tile, and power on the saw
- Make the cut: Push the tile forward slowly and let the blade do the work; pushing too fast will cause porcelain tile to crack or chip
Here’s a bonus tip:
Remove old debris from the wet saw blade using a dressing stone.
This is especially important if you’re renting or borrowing a wet saw and using an older blade.
Grinders are like mini wet saws, or at least they can be!
I’ll explain.
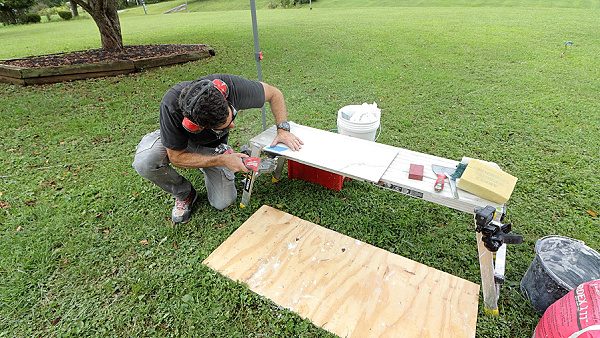
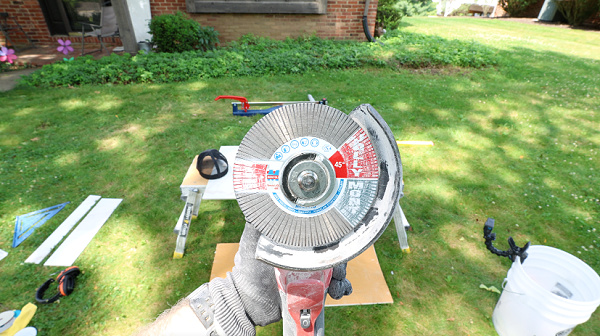
Angle Grinders for Cutting Porcelain
Angle grinders are like the Swiss Army Knife of tile cutting.
You can cut tiles, make notches, make U-shapes, polish, and more.
However, grinders can be extremely dangerous.
First, the blade has to be installed properly. Normally, there’s an arrow or indicator on the blade that coincides with the rotation of the grinder.
Second, know the RPM rating of the grinder and the blade.
The blade RPM must be higher than the grinder’s RPM.
For example, if the blade is rated for 5,000 RPMs and the grinder is rated for 7,000 RPMs, that’s a problem.
The blade could overheat and break. Those shards have the potential to really hurt you or someone else.
Here are the basics for using an angle grinder to cut porcelain tile:
- Setup: Install the blade properly and have its rotational arrow align with the grinder’s
- Secure the tile: Clamp the tile to a bench or sturdy table with plywood or scrap foam board underneath
- Measure and mark: Draw the cut lines on the tile with a pencil or, preferably, a wax-tipped marker
- Score first pass: Score the top of the tile with the blade to reduce chipping and cracking
- Complete the cut: Cut the tile a second or third time to complete the cut
- Polish the edge: Use handheld polishing pads or an electroplated polishing pad with a grinder to polish the cut edge
I recommend having a variety of blades for different uses.
For instance, I recently used Crowne Tool’s Paragon Blade to cut 24 by 48-inch porcelain. And I gotta say, it has exceeded my expectations.
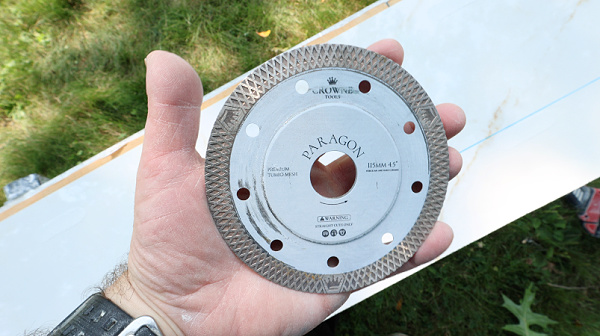
They say this blade dissipates heat, and it does just that. The result is a chip-free, smooth cut that requires minimal polishing.
Straight cuts are one thing, but if you need to make bevels, that’s a completely different story.
For example, I use a 5-inch Montolit Jollymont blade to bevel tiles for miter joints.
And either use diamond polishing pads or the Montolit Fleximont to polish porcelain tile.
Knowing your tool options makes tile projects easier.
One great example of this is the iQ Saw, which I’ve really enjoyed using.
Dry Cut Tile Saw
Sometimes I have to cut large tiles and don’t want to run up and down steps all day.
This is where the iQ dry cut tile saws have been invaluable.
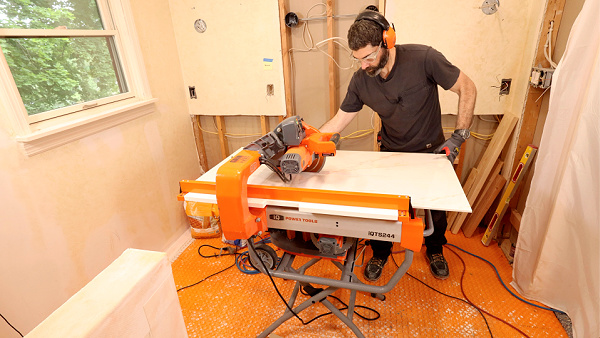
These saws don’t require water and are hooked up to HEPA vacuums.
This prevents silica dust from spreading and accelerates the cutting process.
The large saw above is the iQTS244. It can handle 12 x 24-inch porcelain tiles.
But I’m ripping down a 24 x 48-inch tile with the extension table.
Admittedly, this saw is expensive, but you could rent one to get any job done.
Here are the basics for using the 10-inch iQ dry cut saw:
- Setup: Install the proper blade based on the tile being cut
- Secure the tile: Place the tile on the rolling table and use the laser or square to align it
- Measure and mark: Draw the cut lines on the tile with a pencil or, preferably, a wax-tipped marker
- Adjust saw blade depth: Move the saw blade to the proper depth to just barely cut through the tile
- Slowly push the rolling table: Move the rolling table and tile through the saw blade
- Watch the loading indicator light: Cut the tile and try to keep the loading indicator light in the green zone
- Polish the edge: Use handheld polishing pads or an electroplated polishing pad with a grinder to polish the cut edge
iQ has a variety of blades for the 10-inch saw, but I mostly use the Combination Blade for porcelain tiles.
I also turn the filter spin knob at the end of the day to clean the HEPA filter.
Learning how to cut porcelain tile is a great skill.
I have a ton of great courses on how to tile showers, bathroom floors, and more inside Home Repair Tutor – it’s one of the best online resources for anyone renovating a bathroom or home. Tap the button below to learn more
Jeff