Knowing how to patch drywall is one of the smartest skill sets you can learn.
In this tutorial, you’ll see how to patch a large hole and learn what materials make this project a breeze.
In the end, you’ll be confident to do this project even if you’ve never done a drywall repair.
Let’s dive in!
Drywall Patching Guide
I’ve organized this tutorial into the following sections:
- Drywall tools and Materials
- How to make a drywall patch
- How to apply joint compound
- How to prime and paint
You can tap the above links, which’ll take you to the specific part.
Also, KILZ has been a sponsor of Home Repair Tutor. I’ve used their primers for over 20 years and still do to this day.
Drywall Tools and Materials
For this project, I used Level 5 drywall knives.
These are my go-to drywall tools because they don’t rust and are very flexible, which makes spreading joint compound easy.
Normally, I use the following tools and materials:
- 2-inch knife (for mixing joint compound)
- 6-inch knife (for first coat of joint compound)
- 10-inch knife (for first/second coat of joint compound)
- 12-inch knife (for final coat of joint compound)
- Metal mud pan
- Joint compound mixing paddle
- Setting-type joint compound
- Drill
- Drywall patch
- 1-5/8 inch course threaded drywall screws
- Sanding sponges
- Dust mask
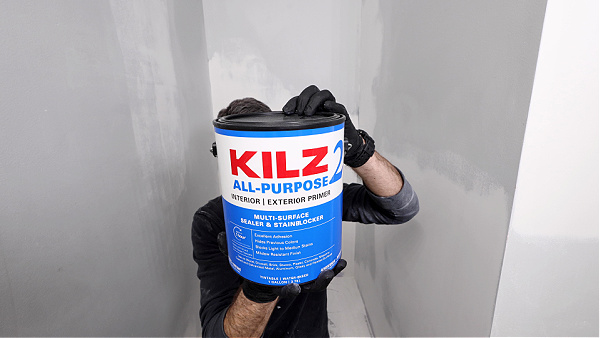
- KILZ 2 primer
- Purdy white dove rollers
- Paint roller
- Paint pan
The drywall patch makes or breaks this kind of project. And I’ll explain that more down below.
But the other important component is the joint compound.
I use setting-type joint compound because it cures fast and is strong.

Typically, I can get multiple coats of joint compound on the wall in one day.
This speeds up the drywall patch and also makes it stronger than if pre-mixed compound were used.
How to Make a Drywall Patch
On this project, I had to remove an old porcelain toilet paper holder.
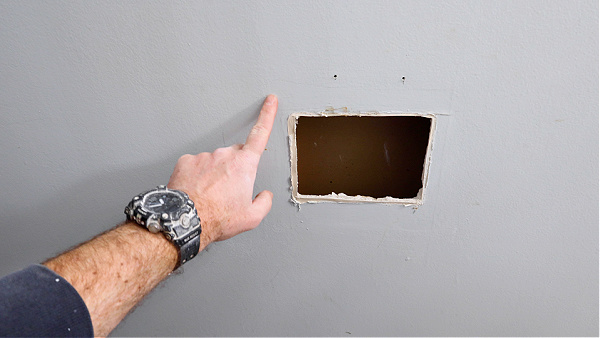
Fortunately, it was a perfect rectangle.
If you’re not as lucky, I have a huge tip:
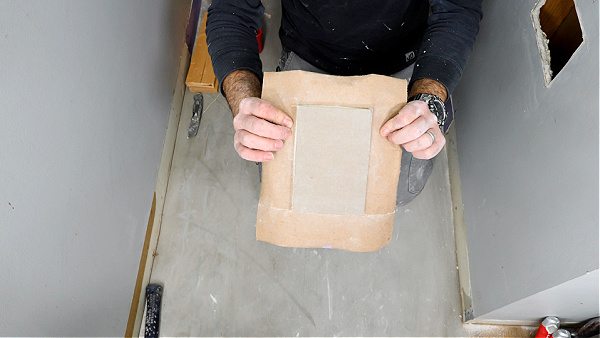
Cut the drywall to make a square or rectangle.
Transfer that dimension to a scrap piece of drywall.
Then remove a 2-inch perimeter around that shape, leaving the paper.
My video below does a good job of showing how I accomplish this.
That 2-inch paper perimeter will be used instead of paper tape.
Also, I recommend adding wood inside the wall.
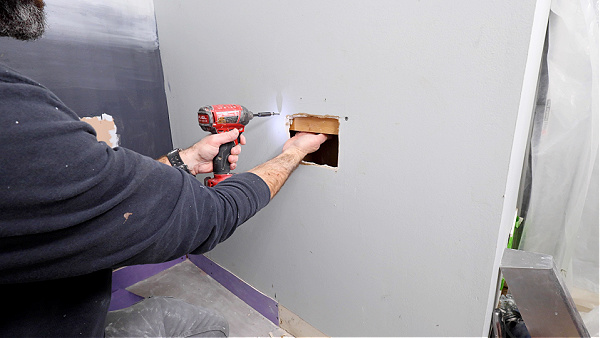
I use 1-5/8 inch course threaded drywall screws to secure the wood to the back side of the patch area.
Then I fasten the patch to the wood blocking using the same drywall screws.

At this point, the patch is ready for joint compound.
But there are some details you need to know to make it look seamless.
How to Apply Joint Compound
One thing I didn’t mention in my video down below is how to mix the joint compound.
I add water to the mud pan, about halfway from the bottom.
Then I pour the setting-type joint compound on top until it’s about three-quarters full.
I mix that for 1 to 2 minutes with a Level 5 mud mixing paddle.
My goal is to make the joint compound as creamy as possible.
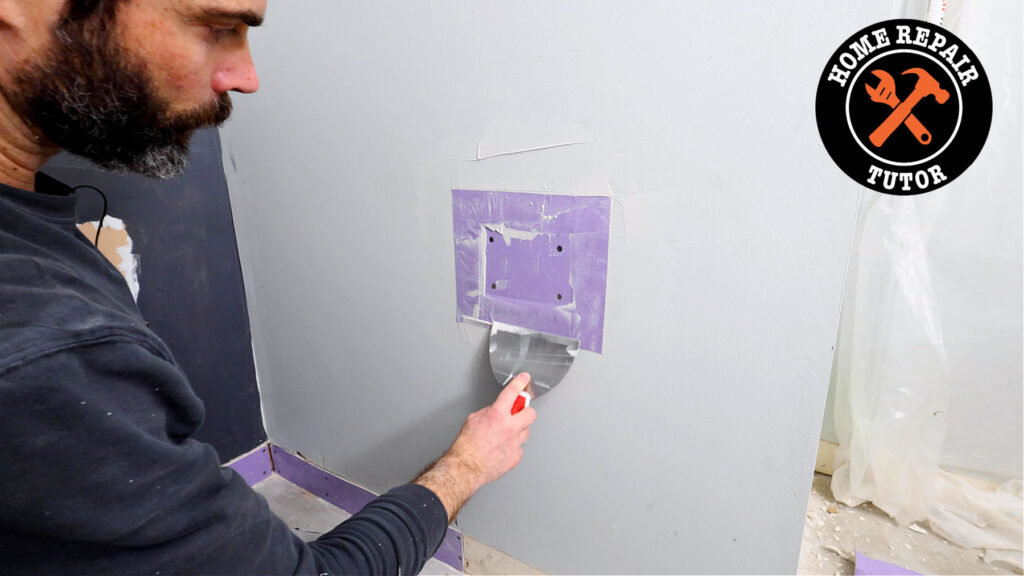
Then I apply it behind the 2-inch paper perimeter with a 6-inch joint compound knife.
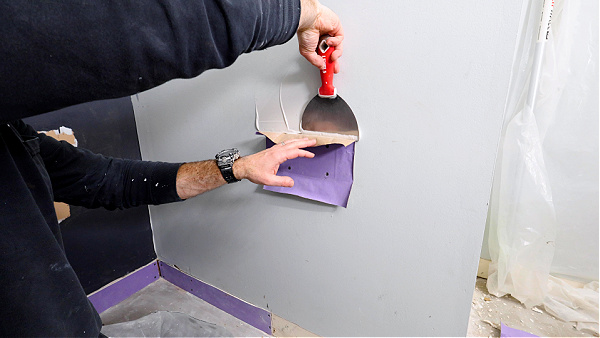
I compress the paper into the joint compound and make it as smooth as possible against the wall.
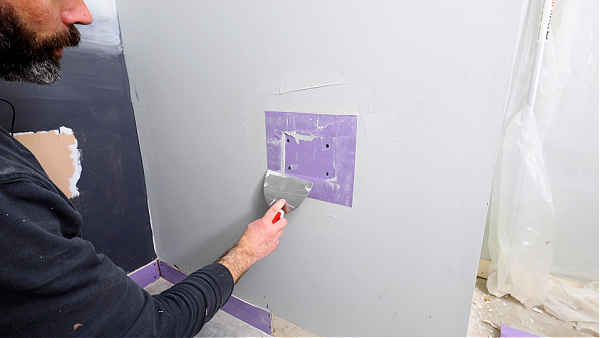
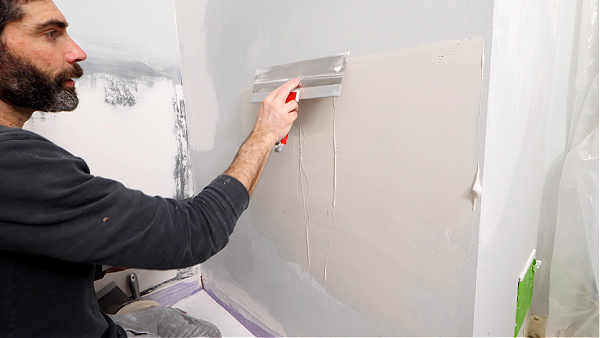
At this point, it’s possible to use a 10-inch knife and apply more joint compound.
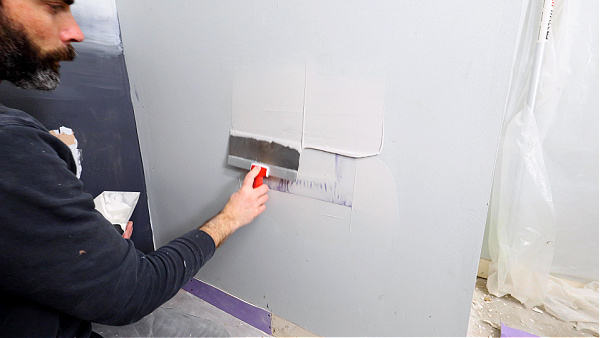
I feather the joint compound around the patch and extend 6 inches beyond the perimeter.
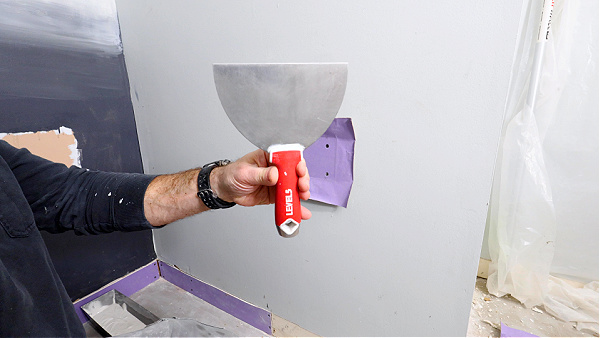
The setting-type 45 takes about 1-1/2 hours to dry. At that point, I use sanding sponges to sand it smooth.
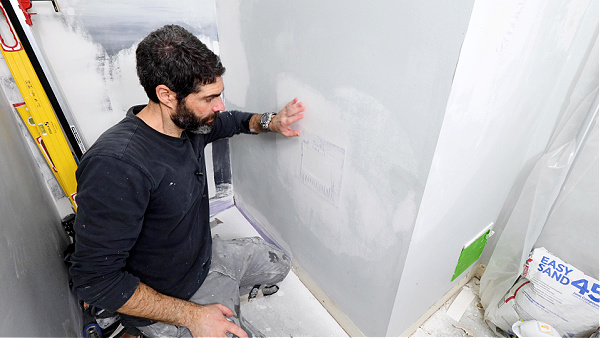
My final pass is with a 12-inch joint compound knife.
Sometimes I’ll do a third or fourth coat of joint compound to get the patch super smooth.
Each time I’ll wait for the compound to dry and sand smooth.
By the way, sometimes I use setting-type 20 which cures faster than the 45.
The next step is important and some folks make the mistake of skipping it.
How to Prime and Paint
Priming fresh drywall patches is absolutely necessary.
Otherwise, the top coat won’t bond properly.
I use KILZ 2 primer.
Also, my favorite paint rollers are Purdy White Dove.
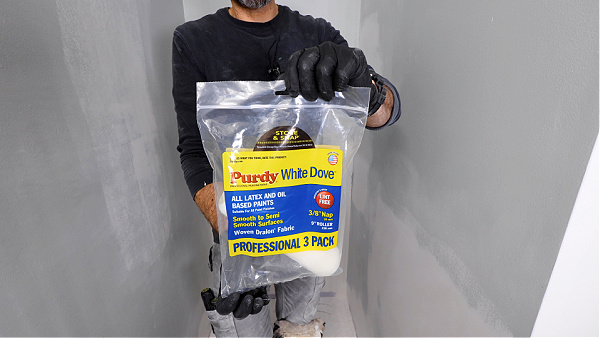
The reason I use these rollers is that they don’t leave fuzz on the wall.
When I apply the primer vertically, I’ll move over one-half roller width and apply the next coat.
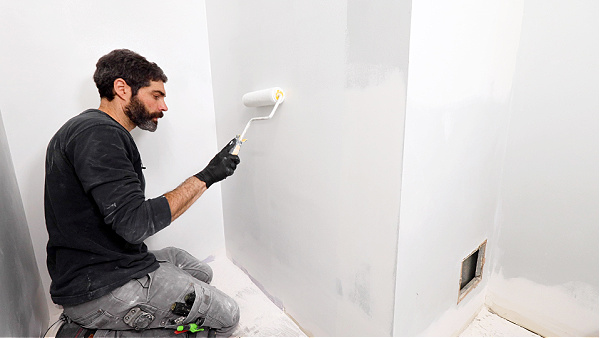
I keep doing that until the entire area is primed.
KILZ typically cures in 2 to 3 hours, and I apply the top coat at that point.
Watch my full video to see all these drywall patch tips in action.
Drywall work is just one facet of home or bathroom renovation.
If you want to unlock all my bathroom remodeling videos and personal coaching, join Home Repair Tutor today – tap the button below to learn more
Jeff