
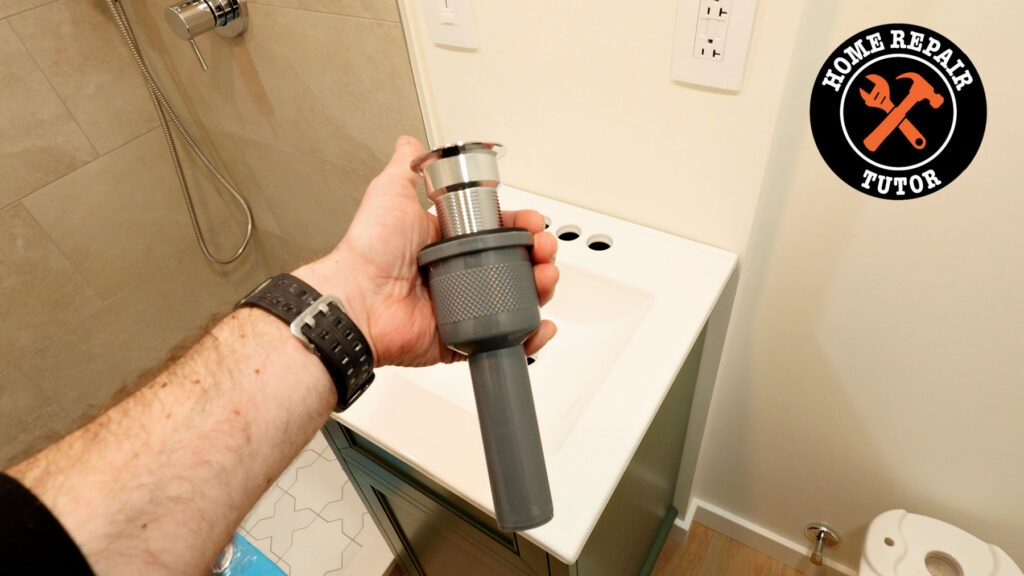
Today, you’ll see how to install a bathroom sink drain, but with a twist.
Normally, this project involves lots of moving parts that create potential water leaks.
But a new sink drain has simplified the process.
I share how to install it and make leak-free connections.
Plus, I’ll give you some tips on how to offset the house DWV to make the P-Trap connection easier.
Let’s dive in.
How to Start and Supply List
Either you’re installing a new sink drain or replacing an old one.
Old drains typically have plumber’s putty under the drain flange and against the sink.
They also have a large nut on the underside that squeezes a rubber gasket against the sink.
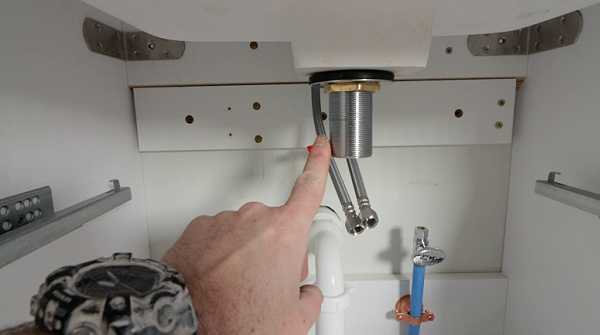
Both of these connections can leak and create problems inside the sink cabinet.
The first step with any new bathroom sink drain is to disassemble the old P-Trap.
Here’s the step-by-step for how to remove an old sink drain:
- Clear the sink cabinet – take everything out of the cabinet to have more room
- Turn off the water to the angle stops – this is optional if you’re just replacing the drain
- Remove old P-Trap – place a container or bucket under the trap and remove the slip nuts
- Remove old drain flange – unscrew the nut and slide the rubber gasket off, push the drain flange up and off the sink
- Clean the sink – use Goo Gone wipes to remove plumber’s putty residue from the sink drain area
I recommend placing a small bucket or container under the trap.
That way, when you loosen the slip nuts, water will go into the container.
Also, wear nitrile gloves. This part of the drain project is gross because P-Traps have gunk in them.
Here’s the link to my printable supply list, which also has clickable links to Lowe’s and Amazon
If you’re not disassembling an old sink drain, you’re incredibly lucky and should thank the plumbing gods.
Now for the fun part: a new way to make sink drain installation easy.
Best Bathroom Sink Drain
Old sink drains are notorious for lots of moving parts that often leak.
This is where the Dearborn Universal Pop Down Sink Drain kicks butt.
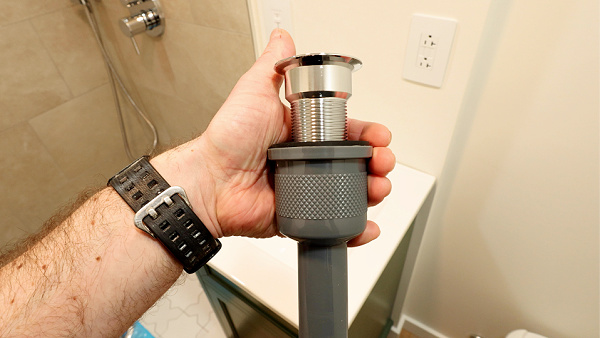
It literally has four parts, and anyone can install it. Plus, no special tools are required.
Here are the step-by-step instructions for the Pop Down Sink Drain:
- Apply silicone to the underside of the flange – I also like using Lexel and apply a 1/4-inch bead under the drain flange
- Install the drain flange – carefully slide the drain flange into the sink drain recess, use silicone or Lexel on the sink if necessary
- For thick sinks, use only one rubber washer (provided with Pop Down Sink Drain)
- For thin sinks, use two rubber washers and the spacer with the taper oriented down
- Add the gray drain body – from under the sink, carefully screw the gray drain body onto the drain flange threads while holding the drain flange in place
- Ensure the rubber washer(s) are properly seated in the recess of the gray drain body while tightening it to the underside of the sink
- Installation tip – apply a small bead of Lexel or silicone to the top of the rubber washer if the bottom of the sink is coarse or cast iron
- Hand-tighten the gray drain body – tighten the gray drain body until the silicone or Lexel is compressed between the drain flange and sink basin
- Remove excess silicone or Lexel with Goo Gone wipes
- Insert the cartridge – slide the Pop Down cartridge down into the flange
I love this sink drain because it’s strong, easy to install without leaks, and the PVC can be cut if necessary.
Also, it’s for sinks with or without an overflow, which truly makes it a universal solution.
I want to address one controversial topic: the use of Lexel.
The Dearborn instructions call for the use of silicone under the sink flange.
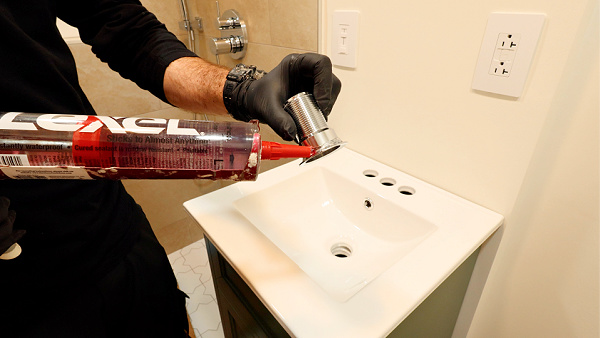
And that’s why I use Lexel sealant instead of Plumber’s Putty. Always follow the manufacturer’s instructions, and you’ll be in good shape.
Now that the sink drain is installed, it’s time to add an offset to the house DWV and P-Trap.
Unfortunately, this is where a lot of folks see water leaks.
How to Offset House Sink Drains
Sometimes the house plumbing has to be offset.
This means it’s not centered on the sink and instead to the left or right.
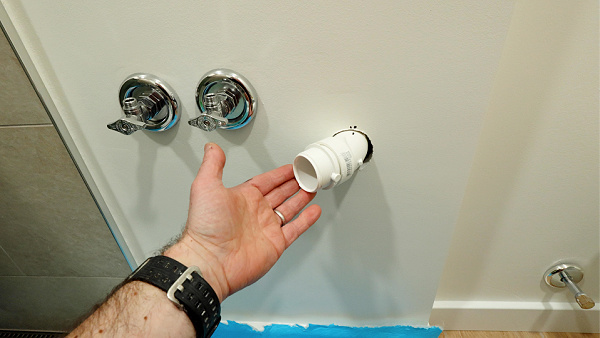
Offsetting the house drain involves using a street 45 (in this instance) with a male trap adapter.
All these supplies are in my Supply List (in the previous section) and there are links to them.
In order to offset the plumbing, you’ll need basic plumbing skills.
But fortunately, the installation is fairly straightforward. Here are the step-by-step instructions:
- Dry-fit the the street 45 – clean the house fitting (normally a sanitrary tee) and dry-fit the street 45 so that it’s tilted slightly upward
- Solvent weld the trap adapter – I use male trap adapters that can accept 1-1/4 or 1-1/2 inch thin-walled PVC tubing
- Apply 4 to 5 revolutions of Oatey PVC primer to the trap adapter and street ell hub
- Immediately apply 4 to 5 revolutions of Oatey PVC cement to the trap adapter and street ell hub
- Insert the the trap adapter into the street ell, twist 1/4 turn, and hold for 30 seconds
- Solvent weld the street ell – the street ell has to be solvent-welded to the house sanitary tee or DWV
- Apply 4 to 5 revolutions of Oatey PVC primer to the street ell and house DWV hub
- Immediately apply 4 to 5 revolutions of Oatey PVC cement to the street ell and DWV hub
- Insert the the street ell into the house DWV hub, twist 1/4 turn and hold for 30 seconds
- I like the street ell to be slightly pitched upward to promote water drainage
Here’s an important tip: don’t run water in the freshly solvent-welded drain for at least 24 hours.
Otherwise, you run the risk of ruining the weld and having a water leak.
Now that the street ell is solvent-welded, it’s easier to dry-fit the bathroom sink P-Trap.
P-Trap Installation to Sink Drain
Bathroom sink drains can use 1-1/4 inch or 1-1/2 inch P-Trap kits.
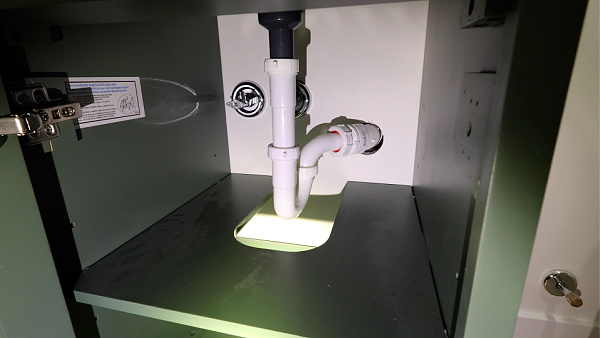
I actually prefer 1-1/4 inch for two reasons.
First, it provides extra space in small vanity cabinets.
Second, if there’s a clog, I’d rather it be in the trap or extension tube than inside the wall.
It seems counterintuitive, but I’d rather clear a clog under the sink than snaking the pipe inside the wall.
Here are the step-by-step tips for installing a sink drain P-Trap:
- Dry-fit the extension tube – push the extension tube onto the drain body and tighten the slip nut
- Install the trap arm – place a slip nut onto the trap arm with the threads facing the P-Trap connection
- Place the trap adapter slip nut onto the trap arm with the beveled side of the rubber gasket facing the house DWV
- Slide the trap arm into the house sanitary tee or trap adapter, and tighten the slip nut by hand
- Note: The trap arm should not bottom out in the house DWV because this can cause clogs or water to drain slowly
- Dry-fit the P-Trap – slide the P-Trap into the trap arm fitting and hold the trap against the extension tube
- Trim the extension tube to fit down into the recess of the P-Trap. I like having at least 1 inch of the tube in the trap
- If the 6-inch extension tube is too short, use a 12-inch extension tube
- Use the Ridgid tubing cutter to trim the extension tube to the desired size
- Install the P-Trap – push the P-Trap up into the trap arm and extension tube at the same time
- Tighten the trap arm/P-Trap slip nut by hand
- Tighten the extension tube/P-Trap slip nut
- Tighten the extension tube/sink drain slip nut
- Tighten the trap arm/trap adapter slip nut
- Test the connections – turn on the sink faucet and allow water to drain for 5 minutes
- Inspect the sink drain connection against the bottom of the sink basin
- Inspect all the slip nuts to see if there are any water leaks
- Tighten the sink drain or slip nuts to eliminate any water drips
Here’s a Pro Tip: try to buy P-Trap kits that have rubber gaskets.
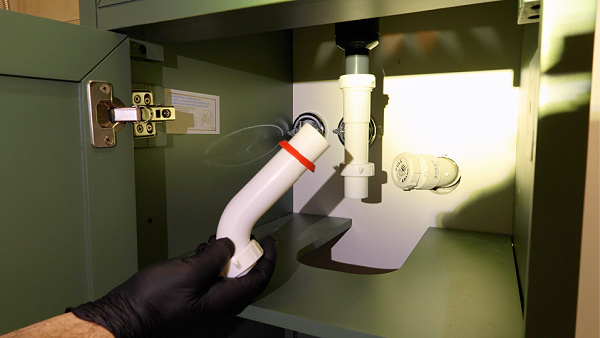
These gaskets come with Oatey P-Trap kits and are way better than plastic ones.
Here’s my step-by-step video tutorial with some extra tips to help you with your project
Bathroom sink installation is just one part of bathroom renovations.
I have a ton of great courses on how to plumb showers & sinks, waterproof/tile showers, install bathroom floors, and more inside Home Repair Tutor – it’s one of the best online resources for anyone renovating a bathroom or home. Tap the button below to learn more
Jeff