Doing a bathroom exhaust fan install can be tedious.
But I’ll do my best to make it easy and give you step-by-step instructions with supply lists.
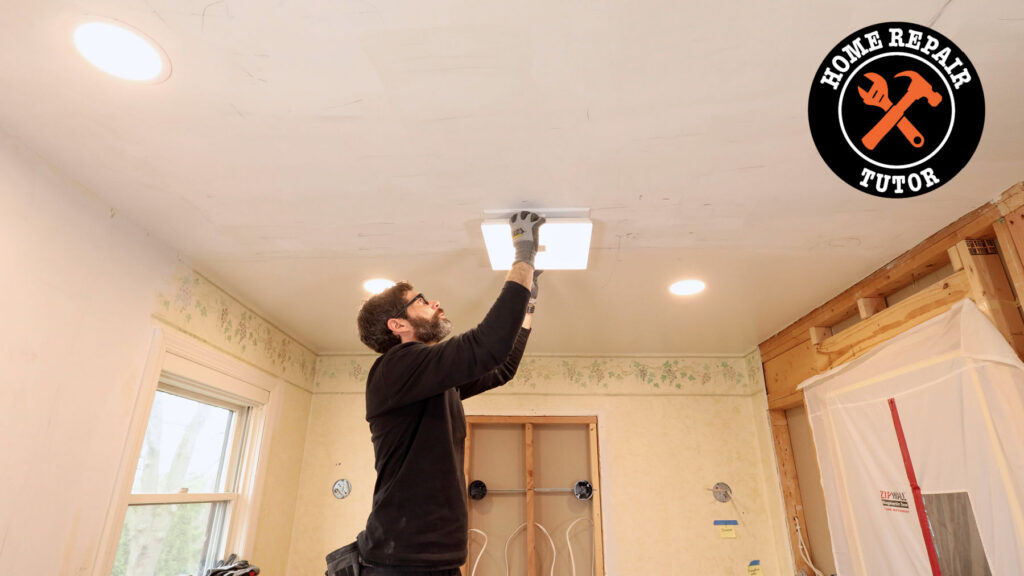
Plus, the fan I’m installing is one of the best. It’s the Panasonic Whisper Green Select.
The great thing about this fan is that it has power, an adjustable light, and a modern style.
It’s a great upgrade for any bathroom.
Preparation and Planning
Step 1 is choosing the right location for your bathroom exhaust fan.
This is especially critical if you’re adding a new fan or relocating an existing one.

It’s important to place the fan close to the highest moisture area.
Normally, this is the shower or bathtub in a bathroom.
Ideally, the fan should be slightly outside the shower area and centered on at least one wall.
Also, consider the bathroom lighting if your fan has an LED light.
The Panasonic Whisper Green Select I’m installing has an adjustable LED light that can match the recessed lights.
But I want the fan light to distribute light evenly in the bathroom, so I chose the location based on that goal.
Step 2 is the layout, which depends on the ceiling joists.
Find the ceiling joist orientation. This can be done in one of two ways.
The first way is by going into the attic and seeing what direction the joists run.
The second is easier (in some homes), and that’s to use a stud finder on the drywall.
Typically, but not always, ceiling joists are 16 inches on center from each other.
Also, ensure there’s room to run the ductwork up to the roof. I like to run the ductwork straight up if possible. More on that later.
Step 3 is turning off the power to the electrical line that will supply power.
Do this at the breaker. It’s helpful to have a partner or circuit breaker finder kit.
Just be sure the power is turned off; it’s not fun being electrocuted.
Proper planning makes everything a lot easier.
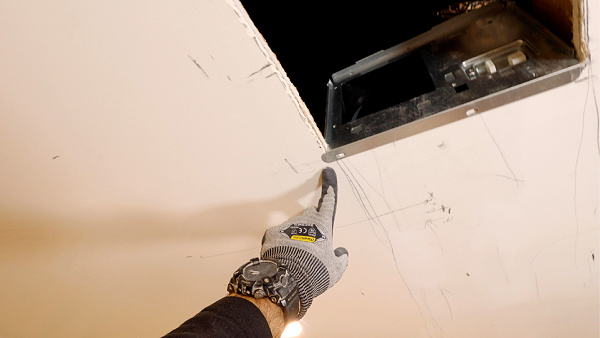
Cutting the Exhaust Fan Hole
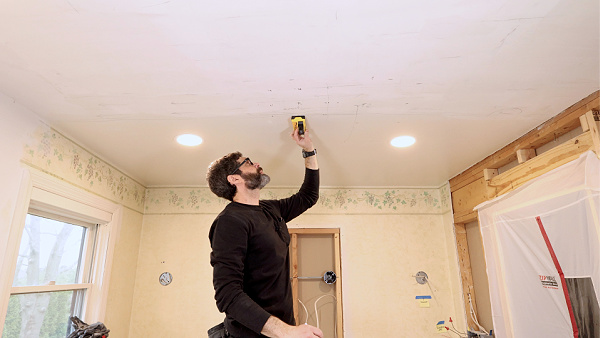
I like to drill a small reference hole in the ceiling. This helps me see where the fan will go once it’s up in the attic.
It should barely penetrate the drywall or plaster, just in case there’s an electrical wire or plumbing above.
I try to center this outline on the bathroom’s length or width, and make it equidistant in relation to the walls.
Then I trace the fan body dimensions on the ceiling and cut it out using a drywall saw or oscillating multi-tool.
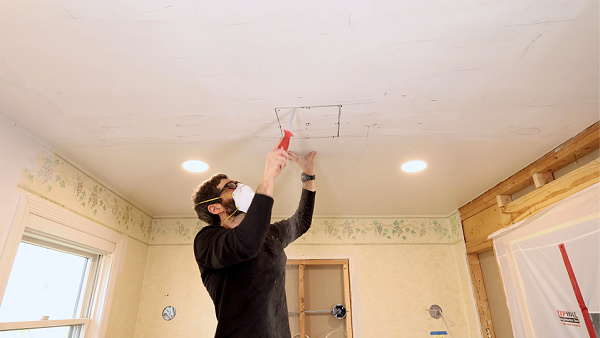
Here’s a Pro Tip,
If the hole is slightly too small, use a drywall rasp to make it bigger.
The fan body’s flange should overhang the drywall. That’s important for the next step with a Panasonic fan.
Installing the Fan Bracket
Panasonic fans come with a Flex-Z Fast bracket.
This can fold and extend 16 to 24 inches inside the attic joist bay.
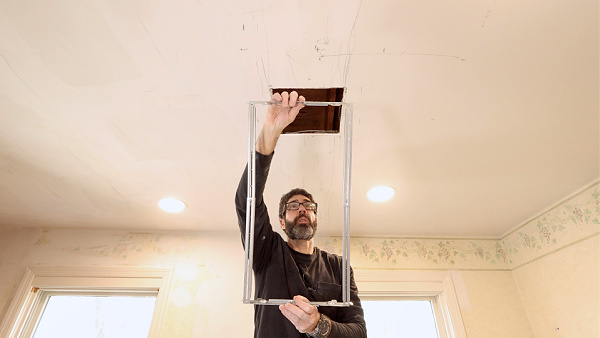
There’s an orientation to this bracket, so pay attention to the UP stamp when installing it.
I fasten the bracket to the joists with the provided screws (all four) and ensure it’s flush against the ceiling.
The goal is to center the bracket on the opening so that the fan’s adapter and body can be installed properly.
Adding Ductwork
Most Panasonic fans have two major parts: the adapter and the fan body.
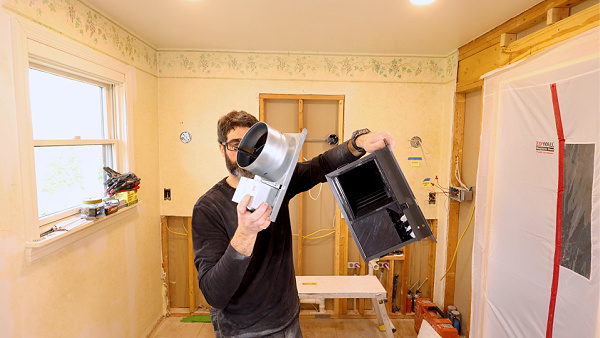
I like to run the ductwork and electrical wire to the adapter before installing it.
Here are the supplies you need for the ductwork:
- Insulated ductwork (4-inch or 6-inch)
- Warm drive clamps (2)
- Screwdriver
- Foil tape
Place one warm drive clamp over the ductwork and tighten it against the adapter outlet.
Then use foil tape to seal the ductwork and prevent air leaks.
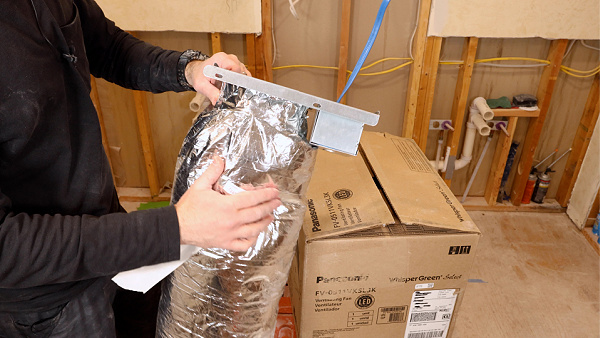
I do the same thing for the bathroom exhaust vent, which should be ventilated through the roof, soffit, or side of the home.
The next step is the electrical, and you might be surprised at how easy it can be.
Wiring the Fan
All the bathroom exhaust fan wiring is done inside Panasonic’s Whisper Green Select adapter.
There’s an electrical box that has three sets of wires.
One set powers the fan, another powers the light, and a third set is for special accessories that can control things like humidity.
Here are the supplies you need for the wiring:
I wanted to keep this fan functionality as easy as possible for my clients.
I used a 14/3 wire and pigtailed all the neutrals together, along with the ground wires. Then I used the 14/3 black and red wire to power the fan and light, respectively.
I capped the red module wires and the blue night light wire.
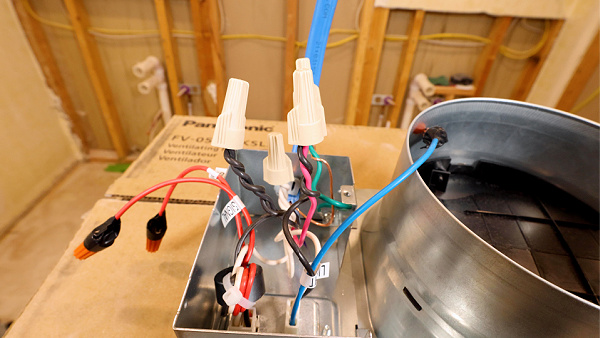
Then I used two light switches inside the electrical box.
One powers the fan and the other powers the light, both independent of each other.
I like using rocker light switches because they look more modern and are easier to use.
Ensure the light switch is rated properly for the circuit breaker being used.
Once the adapter is wired, the rest is very straightforward.
Fan Adapter and Body Installation
The Panasonic Whisper Green Select adapter has an L-shaped channel
The channel slides under the drywall ceiling when the adapter is pushed into the attic.
Then I use the self-drilling screws provided with the fan to fasten the adapter to the Flex-Z Fast bracket.
After the adapter is installed, I slide the fan body into it until I hear a click.
I secure the fan body to the Flex-Z Fast bracket using the second set of self-drilling screws.
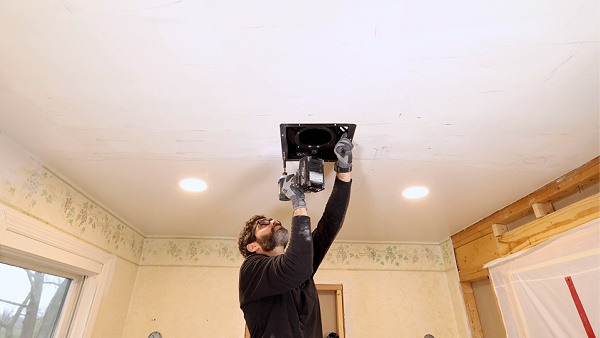
Here’s an important step,
Secure the machine screw through the fan body and adapter to complete the ground continuity.
This screw had to be removed to separate the fan body from the adapter. So don’t lose it!
Plug the connector into the receptacle and adjust the CFM with the Pick-A-Flow switch.
What makes the Panasonic Whisper Green Select awesome compared to other fans is the LED grill.
LED Grill Installation
The grill for this Panasonic fan has a large 5-color changing LED light module.
The light color can be adjusted with a dial, and I match the color to the recessed lights in bathrooms.
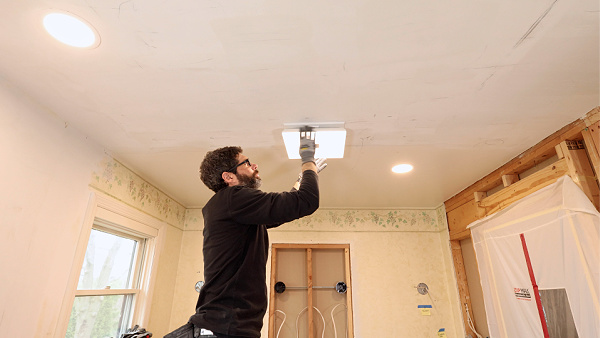
Then I slide the springs up into the fan body and place the grill flush against the ceiling.
I gotta say, this light is fantastic and really makes the bathroom look more high-end.
If you’re remodeling a bathroom or looking for a great upgrade, consider the Panasonic WhisperGreen Select – I think you’d love it.
If you want to unlock all my bathroom remodeling videos, courses, and personal coaching, join Home Repair Tutor today – it’s one of the best online resources for anyone renovating a bathroom. Tap the button below to learn more
Jeff